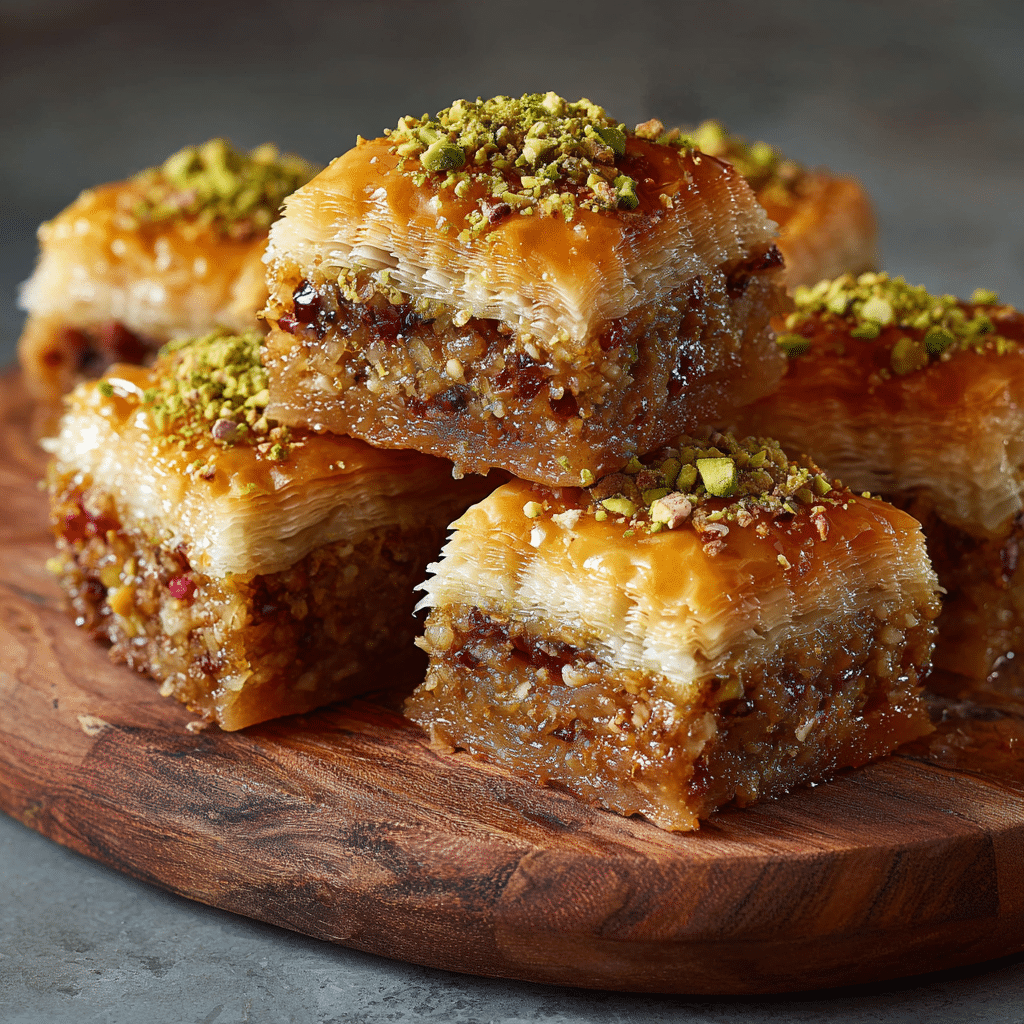
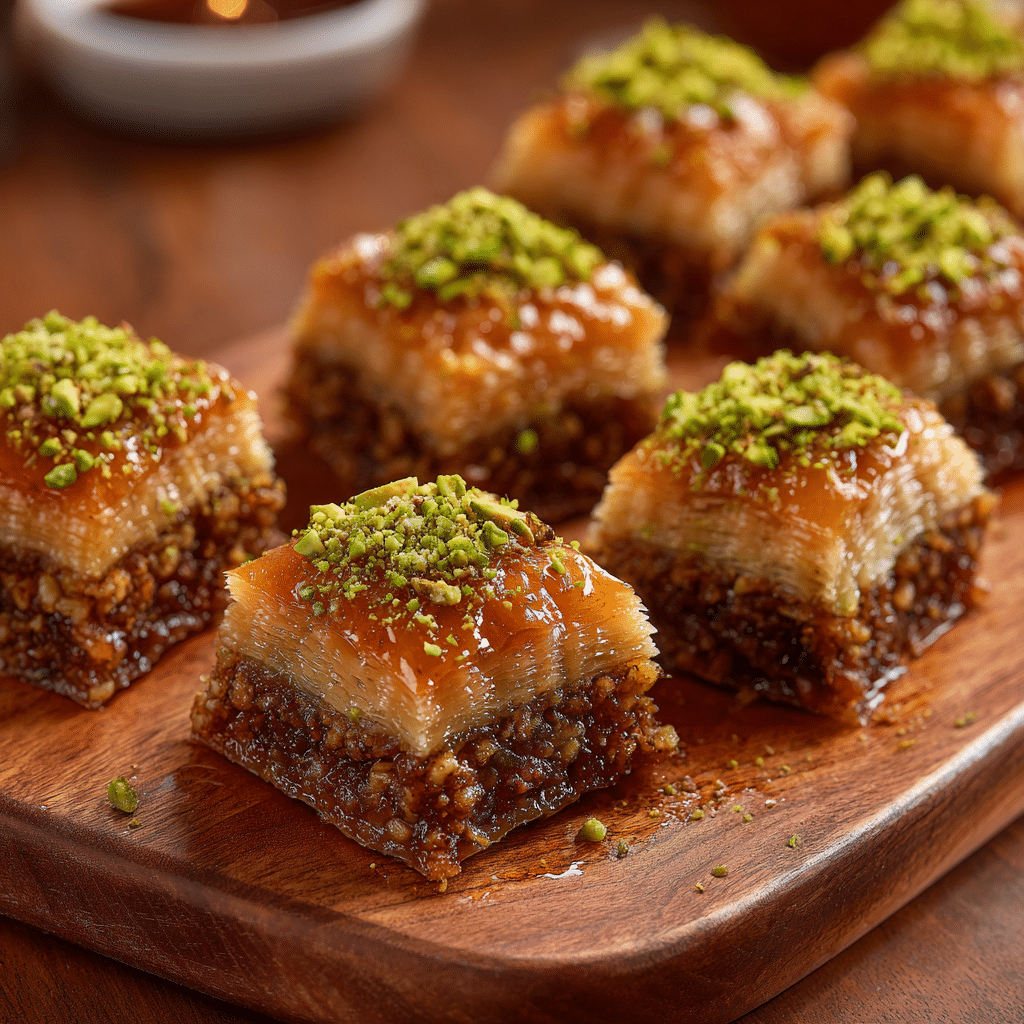
Turkish Baklava Squares Recipe
If you’ve ever bitten into a piece of Turkish Baklava Squares, you know it’s a perfect harmony of textures and flavors that feels like a little celebration in your mouth. These squares boast delicate layers of buttery phyllo pastry, generously filled with either crunchy pistachios or walnuts, all baked to a golden crisp. The magic happens when this golden delight is drenched in a fragrant syrup that adds just the right touch of sweetness, making Turkish Baklava Squares an irresistible Turkish dessert classic that’s both comforting and stunning. Once you try this recipe, it’s sure to become one of your go-to treats for impressing friends or simply indulging yourself.
Ingredients You’ll Need
Creating Turkish Baklava Squares is simpler than it sounds, and the magic lies in how every ingredient plays its part. From the flaky, buttery phyllo to the rich nuts and fragrant syrup, each component contributes to the texture and deep flavor of this beloved dessert.
- Phyllo dough: The paper-thin sheets provide the light, crispy layers essential for that iconic crunch.
- Butter: Melted and brushed between the layers, it ensures a golden, flaky finish with rich flavor.
- Pistachios or walnuts: Finely chopped for a rewarding crunch and earthy taste in every bite.
- Sugar: Used both in the nut filling and syrup to add balanced sweetness.
- Water: The base of the syrup that soaks into the baklava, keeping it moist yet crisp.
- Lemon juice: Adds a subtle brightness to the syrup, preventing it from becoming overly sweet and helping preserve the dessert.
How to Make Turkish Baklava Squares
Step 1: Preparing Your Ingredients
Start by thawing your phyllo dough if frozen, and finely chop your chosen nuts—pistachios tend to be traditional and vibrant, while walnuts give a deeper, earthier flavor. Melt your butter gently; this will be brushed onto each layer to create that signature flaky texture.
Step 2: Layering the Phyllo and Nuts
Lay out the phyllo sheets one at a time, brushing each generously with melted butter to achieve a golden, crisp finish when baked. After every few layers, sprinkle a thin even layer of your chopped nuts mixed with a little sugar. This layering creates those wonderful alternating textures and flavors when baked.
Step 3: Cutting into Squares
Before baking, it’s important to slice the assembled baklava carefully into neat squares. This step ensures that once baked and syruped, the Turkish Baklava Squares are easy to serve and maintain their shape beautifully.
Step 4: Baking to Perfection
Place your cut baklava into a preheated oven and bake until the layers are golden brown and crisp. The smell at this point is intoxicating, and the flaky texture is just the right balance of tender and crunchy.
Step 5: Preparing and Pouring the Syrup
While the baklava bakes, prepare the syrup by boiling sugar, water, and a splash of lemon juice until it thickens slightly. Once out of the oven, pour this cooled syrup evenly over the hot Turkish Baklava Squares to soak in. The temperature contrast helps the syrup absorb fully, creating that luscious finish.
How to Serve Turkish Baklava Squares
Garnishes
Sprinkle a little extra ground pistachio or walnut on top of each square to enhance the nutty flavor and add a pop of color. A tiny drizzle of clotted cream or a dusting of cinnamon can also elevate the presentation and richness.
Side Dishes
Turkish Baklava Squares are often enjoyed as the grand finale of a meal but pair beautifully with a cup of strong Turkish coffee or spiced black tea. The bitterness of the beverage balances the syrupy sweetness perfectly.
Creative Ways to Present
For a festive touch, arrange the Turkish Baklava Squares on a decorative platter lined with fresh mint leaves or edible flowers. Serving them stacked or alongside fresh fruit like figs or berries can also create a stunning dessert spread.
Make Ahead and Storage
Storing Leftovers
Your Turkish Baklava Squares can stay fresh at room temperature for up to three days, covered loosely with foil to maintain crispness while keeping out dust. Avoid refrigeration, as it can make the pastry soggy.
Freezing
If you want to keep these delightful treats longer, freeze the unbaked layered baklava or fully baked squares separated by parchment paper in an airtight container. Thaw at room temperature before baking or serving for best results.
Reheating
To reinvigorate the crisp texture, warm the baklava gently in a low oven for 5 to 10 minutes. Avoid microwaving as it tends to soften the layers, losing that signature baklava crunch.
FAQs
Can I use other nuts besides pistachios and walnuts?
Absolutely! Almonds, hazelnuts, or a mix of nuts can be delightful alternatives, each bringing its own unique flavor profile to the Turkish Baklava Squares.
Is it necessary to use unsalted butter?
Yes, unsalted butter is preferred so you can control the saltiness of your dessert more precisely. Salted butter may alter the sweetness balance in the baklava.
How long should the syrup cool before pouring over baklava?
The syrup should be completely cooled to room temperature while the baklava is hot out of the oven. This temperature contrast helps the syrup absorb properly without making the pastry soggy.
Can I make Turkish Baklava Squares gluten-free?
Traditional phyllo dough contains gluten, but there are gluten-free phyllo alternatives available. You can substitute to make a gluten-free version, although the texture will be slightly different from the classic.
What’s the best way to serve baklava to guests?
Cut into neat squares or diamonds and arrange on a decorative plate with a sprinkle of crushed nuts on top. Serve with a small fork or toothpick, accompanied by a hot, aromatic Turkish tea or coffee for the full authentic experience.
Final Thoughts
If you’re looking to bring a beloved slice of Turkish culture right into your kitchen, these Turkish Baklava Squares are a must-try. Their combination of crispy layers, nutty filling, and fragrant syrup is utterly irresistible. Once you start making them, you’ll find joy in the process and delight in sharing these rich, buttery squares with friends and family. Give the recipe a go—you might just discover your new favorite dessert!