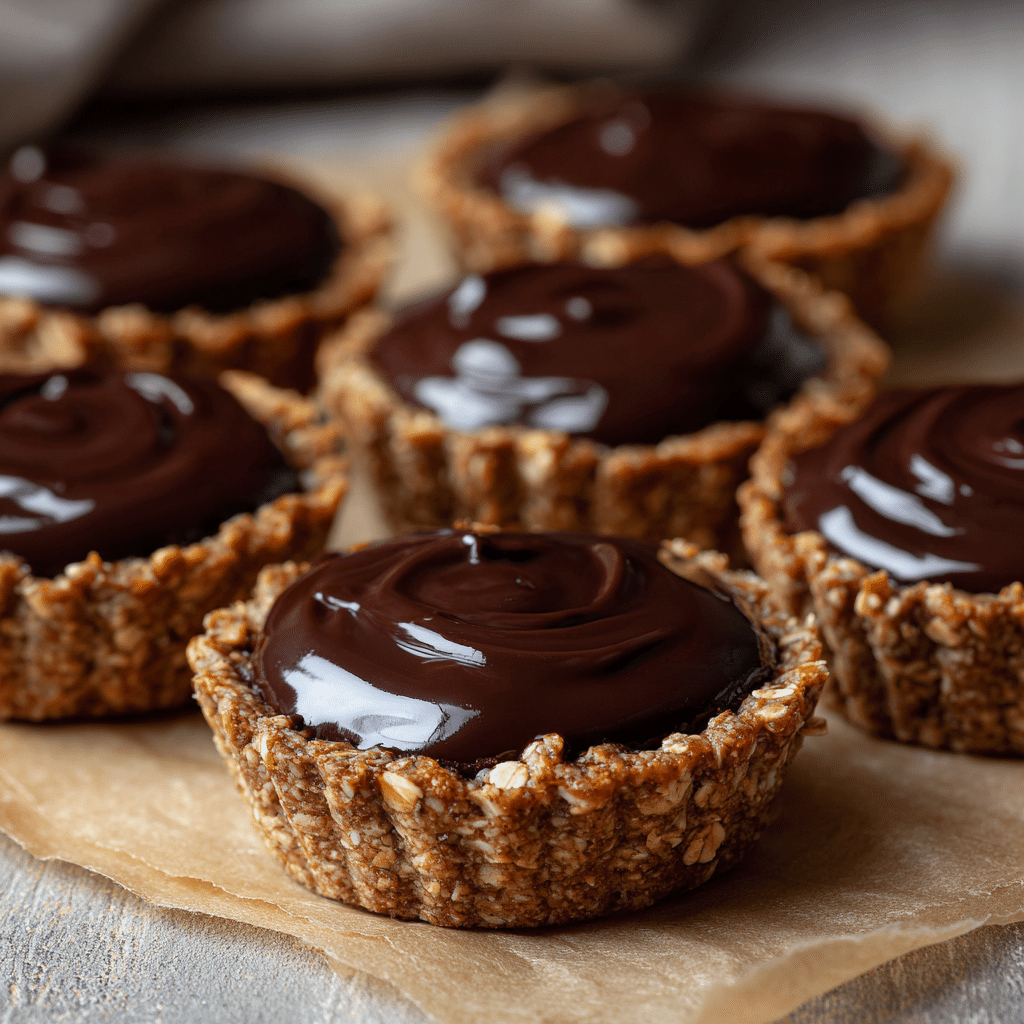
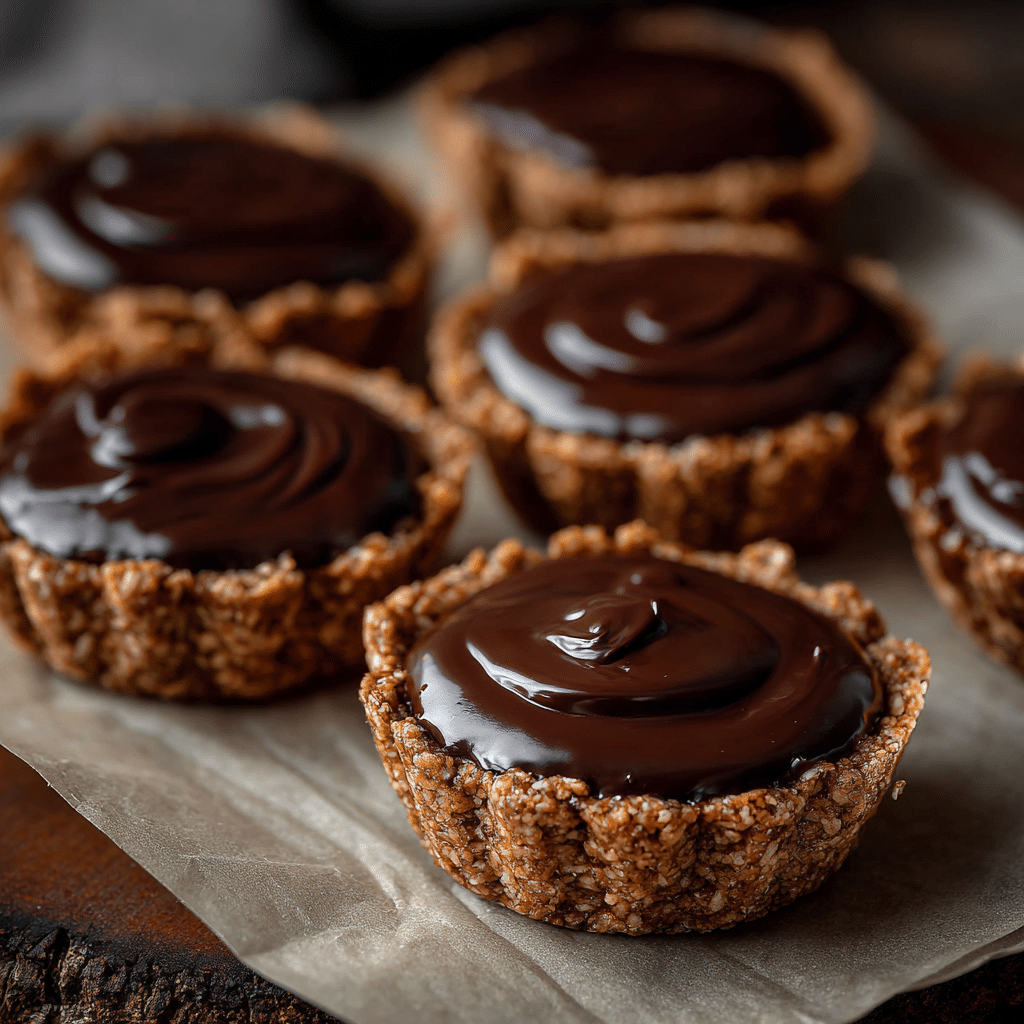
No-Bake Chocolate Oat Cups Recipe
If you’re on the hunt for a quick, healthy dessert that feels like a treat but won’t keep you in the kitchen forever, these No-Bake Chocolate Oat Cups are exactly what you need. Imagine creamy, chocolatey bites combined with the wholesome chew of oats, held together with naturally sweet peanut butter and honey—all without turning on the stove or oven. They’re effortless to whip up, fun to press into cute little molds, and make a delightful snack or dessert you’ll find yourself craving again and again. Trust me, these little cups pack so much flavor and texture in every bite, they’re about to become your new go-to indulgence.
Ingredients You’ll Need
The beauty of these No-Bake Chocolate Oat Cups lies in their simplicity and how each ingredient plays a starring role in the perfect combination of flavor and texture. Each ingredient is easy to find, but don’t underestimate how essential they are to the final magic.
- Oats: Use rolled oats for a hearty texture that balances smoothness and chewiness effortlessly.
- Peanut butter: Opt for natural or creamy peanut butter to hold everything together while adding richness.
- Cocoa powder: This gives the cups their deep chocolate flavor without overwhelming sweetness.
- Honey: A natural sweetener that brings just the right amount of sweetness and helps bind the ingredients smoothly.
How to Make No-Bake Chocolate Oat Cups
Step 1: Mix the Ingredients
Start by combining the oats, peanut butter, cocoa powder, and honey in a mixing bowl. Stir everything until it’s evenly incorporated and the mixture comes together into a sticky, chocolatey dough. This step is so forgiving—adjust the honey if you want it sweeter or a bit more peanut butter if you like it richer.
Step 2: Press into Molds or Cups
Next comes the fun part: pressing the chocolate oat mixture into small cups or molds. This not only shapes the No-Bake Chocolate Oat Cups into perfectly sized bites but also gives a satisfying hands-on moment that makes this recipe delightful. You can use silicone molds, mini muffin tins, or even just a lined baking dish to press the mixture firmly.
Step 3: Chill Until Firm
Pop your filled molds in the refrigerator for about 30 minutes or until the cups have set and are firm to the touch. Chilling helps them hold their shape and develop a lovely, fudgy texture that’s totally irresistible.
Step 4: Serve and Enjoy
Once chilled, simply pop the No-Bake Chocolate Oat Cups out of their molds and get ready to indulge. These are perfect for a quick snack, an easy dessert, or a sweet pick-me-up anytime your chocolate cravings strike.
How to Serve No-Bake Chocolate Oat Cups
Garnishes
Enhance your No-Bake Chocolate Oat Cups by topping them with a light dusting of cocoa powder, a sprinkle of sea salt for that sweet-salty contrast, or even some chopped nuts for an added crunch. A few fresh berries or a drizzle of melted dark chocolate can also elevate the presentation and flavor beautifully.
Side Dishes
These cups pair wonderfully with a warm cup of coffee or a tall glass of cold milk to round out a satisfying snack experience. They’re also great alongside fresh fruit slices, yogurt, or even a scoop of vanilla ice cream to create a simple yet elegant dessert plate for any occasion.
Creative Ways to Present
Think beyond the classic mold shape and get creative by shaping these treats into bite-size balls rolled in shredded coconut or cocoa powder. You could also layer the mixture with whipped cream or fruit compote in small jars for a charming parfait presentation that’s sure to impress guests or delight kids.
Make Ahead and Storage
Storing Leftovers
Keep any leftover No-Bake Chocolate Oat Cups in an airtight container stored in the refrigerator. They’ll stay fresh and delicious for up to a week, making them a perfect ready-to-go snack whenever you need a little chocolate fix.
Freezing
For longer storage, freeze the oat cups by placing them in a freezer-safe container separated with parchment paper. They freeze beautifully and can last up to 2 months. Just thaw them in the fridge before enjoying, and they’ll taste just as fresh.
Reheating
Since these are no-bake treats best enjoyed cold or at room temperature, reheating isn’t necessary. However, if you prefer a softer texture, let them sit at room temperature for 10 minutes before eating to take the chill off.
FAQs
Can I use almond butter instead of peanut butter?
Absolutely! Almond butter works just as well and will give your No-Bake Chocolate Oat Cups a slightly different but equally delicious nutty flavor.
Are these cups gluten-free?
They can be, as long as you use certified gluten-free oats. Many oats are processed in facilities with gluten, so check the packaging if gluten sensitivity is a concern.
Can I substitute maple syrup for honey?
Yes, maple syrup is a great alternative to honey and will keep these treats naturally sweet and nicely bound together.
How sweet are these cups?
The sweetness is mild and balanced since we rely on honey and natural peanut butter rather than refined sugar. You can always tweak the amount of honey to suit your preference.
What if I don’t have molds or mini muffin tins?
No problem at all! Simply press the mixture into a lined baking dish, chill, and then cut into squares or bars for easy serving.
Final Thoughts
If you want a dessert that’s quick, wholesome, and downright delicious, give these No-Bake Chocolate Oat Cups a try. They’re the perfect way to satisfy your sweet tooth without the fuss, and they’re so easy to personalize with your favorite flavors and toppings. Once you make them, I bet you’ll keep coming back to this little chocolatey treasure whenever you need a simple yet scrumptious treat.