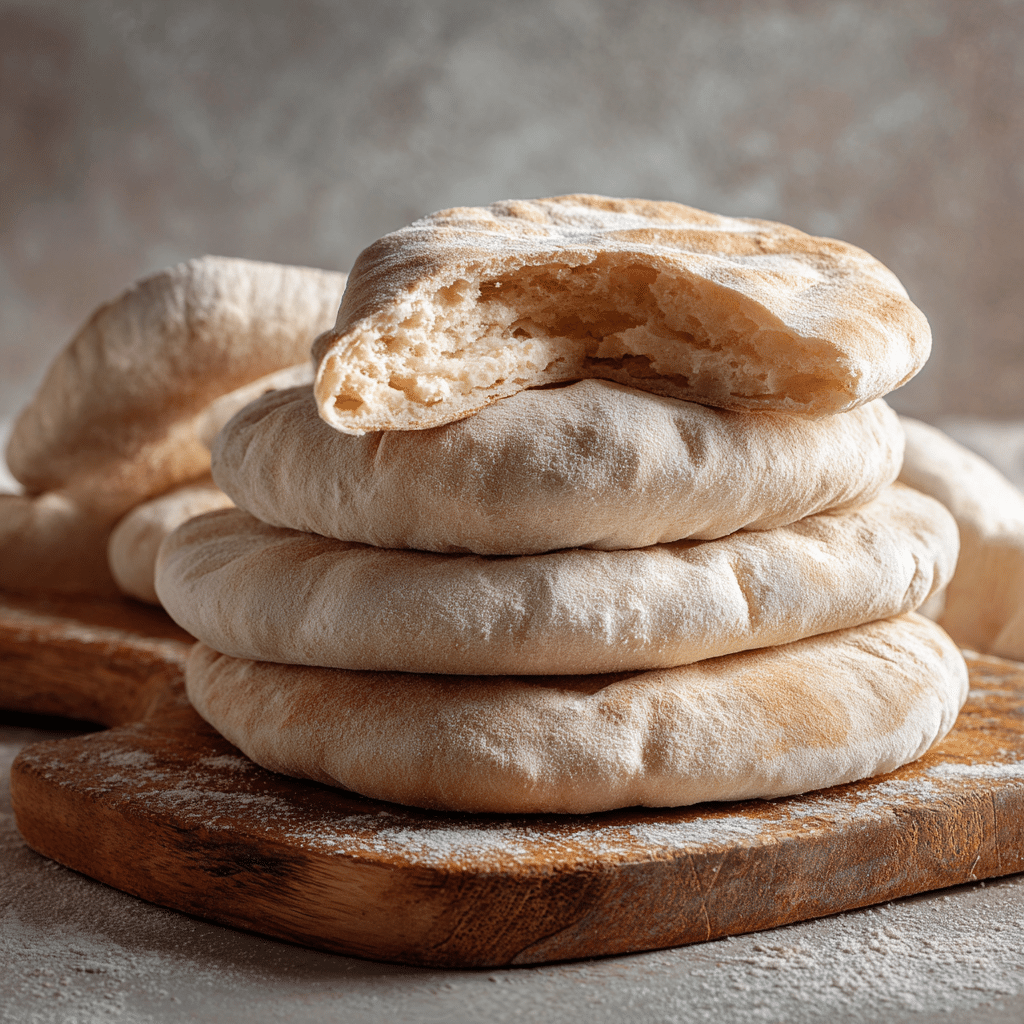
Homemade Pita Bread (Pita Pocket) Recipe
If you have ever wished for a warm, soft, and fluffy bread to scoop up your favorite dips or cradle delicious fillings, then you are going to adore this Homemade Pita Bread (Pita Pocket) recipe. These pillowy, perfectly puffed pockets are not only a joy to make but also a game changer for any Mediterranean-inspired meal. With just a handful of simple ingredients, you will create magical pitas that impress family and friends alike. Get ready to embark on a baking adventure that fills your kitchen with irresistible aromas and your table with tasty treats that everyone will rave about.
Ingredients You’ll Need
All you need to make these wonderful pitas are a few basic ingredients, each playing an important role in bringing that classic taste, texture, and perfect puff you expect from Homemade Pita Bread (Pita Pocket). Nothing fancy here—just simplicity at its best!
- Flour (1 Kg): The foundation of your dough, bread flour works best for the perfect chewy texture.
- Active dry yeast (1 tablespoon): This helps your dough rise and gives the bread that lovely airy structure.
- Granulated sugar (2 teaspoons): Feeds the yeast for a nice, steady rise and adds a subtle hint of sweetness.
- Kosher salt (1 tablespoon): Enhances flavor and strengthens the dough’s gluten network.
- Water (3 cups): The magic liquid that brings everything together into a soft, workable dough.
How to Make Homemade Pita Bread (Pita Pocket)
Step 1: Mix the Dry Ingredients
Start by sifting the flour, active dry yeast, and sugar into a large mixing bowl. This ensures even distribution and helps the yeast activate properly. Mixing the dry ingredients first sets the stage for a smooth dough.
Step 2: Add Salt and Water, Then Mix
Sprinkle the kosher salt into the dry mixture, then gradually add the water. Use a stand mixer on medium speed or mix by hand for about 10 minutes until the dough becomes soft and elastic. This step is crucial to develop the gluten that gives the pita its signature chewiness.
Step 3: First Rise
Cover your bowl with a clean towel and let the dough rise in a warm spot for about one hour, or until it has doubled in size. Patience here rewards you with dough that’s wonderfully airy and ready for shaping.
Step 4: Shape the Dough
Once risen, punch down the dough gently to release air bubbles. Turn it out onto a floured surface, stretch it into a log, and cut it into 10-12 equal pieces. Roll each piece into a smooth ball and cover with a towel for 30 minutes to relax the gluten before rolling out.
Step 5: Roll Into Circles
Preheat your oven to its highest temperature (usually around 475°F/245°C). Lightly flour your surface and rolling pin, then roll each dough ball into a circle about ¼-inch thick. Try to keep them even to ensure consistent puffing during baking.
Step 6: Bake to Puffy Perfection
Place the rolled dough onto a preheated baking sheet and bake for 3-5 minutes. You’ll notice the pita pockets puffing up like little balloons — that’s the steam creating the perfect pocket inside! The bottoms should have beautiful brown spots when ready.
How to Serve Homemade Pita Bread (Pita Pocket)

Garnishes
Warm Homemade Pita Bread (Pita Pocket) pairs beautifully with a variety of simple garnishes like a drizzle of olive oil for richness, a sprinkle of za’atar for herbal zing, or a touch of sesame seeds before baking for crunch and flavor.
Side Dishes
This bread makes an excellent companion to hummus, baba ganoush, taziki sauce, or any fresh salad. It’s the perfect vehicle for scooping and adds a comforting touch to any spread.
Creative Ways to Present
Slice open your homemade pita pockets and fill them with grilled meats, roasted veggies, or falafel for a delicious sandwich. Or toast the pockets lightly and cut them into triangles to create irresistible pita chips for dipping. The possibilities are endless and endlessly tasty!
Make Ahead and Storage
Storing Leftovers
If you have any leftover Homemade Pita Bread (Pita Pocket), store it in an airtight container or a resealable plastic bag at room temperature for up to 2 days. This keeps the bread soft but still delicious.
Freezing
For longer storage, wrap the pitas individually in plastic wrap and place them in a freezer-safe bag. Frozen pitas last up to 3 months and can be quickly thawed when needed, saving you prep time later.
Reheating
To refresh your pita pockets, warm them in a preheated oven at 350°F (175°C) for about 5 minutes, or heat in a dry skillet over medium heat for a minute or two on each side. Avoid microwaving when possible to keep them nice and fluffy!
FAQs
Can I use all-purpose flour instead of bread flour?
Absolutely! While bread flour gives a chewier texture due to its higher gluten content, all-purpose flour works just fine and yields soft, tasty pita pockets.
Why did my pitas not puff up?
Pitas puff because steam forms inside during baking. Make sure your oven is very hot and the dough is rolled evenly. Also, let the dough rest sufficiently before rolling, and avoid overcrowding the baking sheet.
How long can I keep Homemade Pita Bread (Pita Pocket) fresh?
Fresh pita bread is best eaten within two days when stored in an airtight container, but freezing allows you to keep them fresh for months.
Can I add herbs or spices into the dough?
Definitely! Adding herbs like rosemary or spices like cumin to the dough is a fantastic way to customize your pitas with extra flavor.
Is it possible to make pita bread without a stand mixer?
Yes, you can mix and knead the dough by hand. It might take a bit more elbow grease but yields just as delicious results.
Final Thoughts
Making your own Homemade Pita Bread (Pita Pocket) is one of those simple joys that elevates any meal and fills your kitchen with love and warmth. Once you try this recipe, you’ll never want to go back to store-bought. So grab your ingredients, get rolling, and discover just how rewarding homemade pita can be!