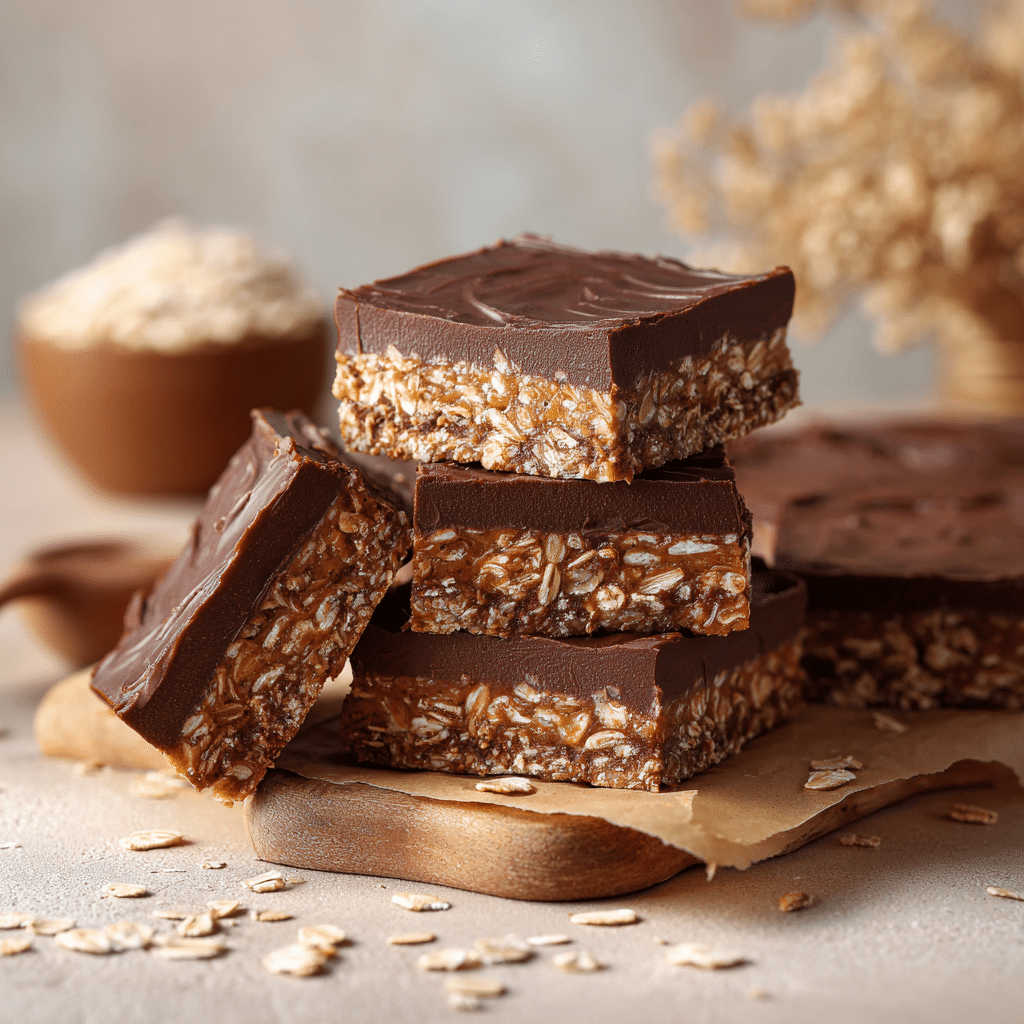
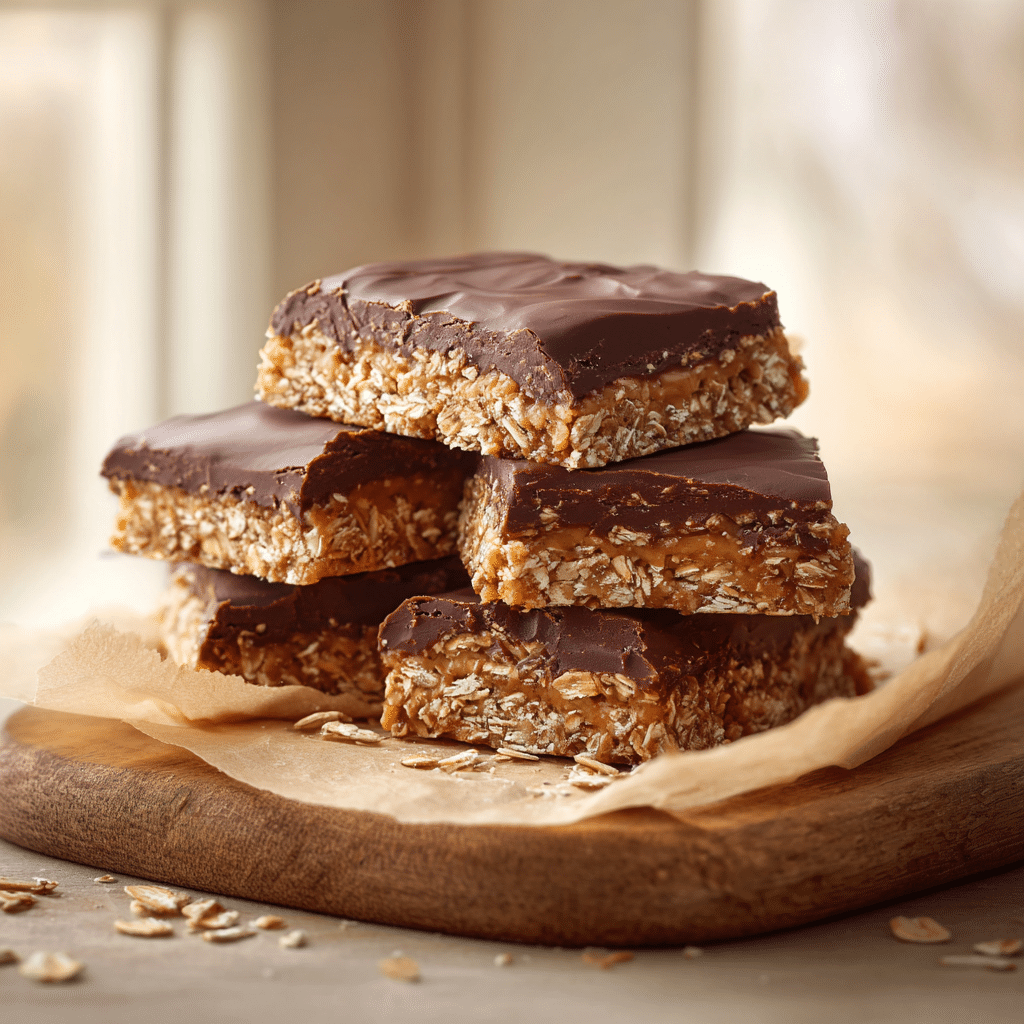
No-Bake Chocolate Oat Bars Recipe
If you’ve been on the hunt for a sweet treat that’s easy to whip up, satisfying, and utterly delicious, look no further than these No-Bake Chocolate Oat Bars. They bring together the comforting chewiness of oats, the rich creaminess of peanut butter, and the indulgent touch of melted chocolate in a way that’s as simple as it is heavenly. Whether you’re craving a quick snack or need a crowd-pleaser for gatherings, these bars are a perfect choice that doesn’t require firing up the oven.
Ingredients You’ll Need
Making No-Bake Chocolate Oat Bars is all about using basic, wholesome ingredients that contribute to a marvelous mix of flavors and textures. Each component plays a key role, so you’ll want to gather them carefully for the best results!
- Old-fashioned oats: These provide hearty chew and a wholesome base that holds everything together beautifully.
- Peanut butter: Creamy and nutty, it not only binds but infuses a rich flavor that perfectly complements the chocolate.
- Honey or maple syrup: A natural sweetener that adds just the right touch of sweetness to keep things balanced.
- Melted chocolate: The star ingredient that adds silky richness and turns these bars into pure indulgence.
- Vanilla extract: A tiny splash elevates the overall flavor with warm, inviting notes.
- Sea salt: A pinch enhances the sweetness and deepens all the flavors.
How to Make No-Bake Chocolate Oat Bars
Step 1: Prepare Your Ingredients
Start by gathering all your ingredients and measuring them out. Melt the chocolate gently, either in a microwave-safe bowl or over a double boiler, making sure it’s smooth and glossy. Having everything ready makes the assembly process smooth and fuss-free.
Step 2: Mix the Wet Ingredients
In a large bowl, combine the peanut butter, honey or maple syrup, and vanilla extract. Stir until the mixture is creamy and fully blended. This mixture is the glue that will hold your oats together and give the bars that irresistible chewy texture.
Step 3: Combine Oats and Salt
Add your oats and sea salt into the bowl with the wet ingredients, and mix thoroughly. The oats should be evenly coated but not soggy — you want them to keep their structure for that perfect bite.
Step 4: Press Into Pan and Add Chocolate
Line a square pan with parchment paper and spread the oat mixture evenly, pressing it down firmly with the back of a spoon or your hands. Pour the melted chocolate over the top, smoothing it out to create a shiny, uniform layer.
Step 5: Chill Until Set
Place the pan in the refrigerator for about an hour. This chilling time is crucial so the bars can firm up and the chocolate sets to a satisfying snap when you bite into it.
Step 6: Slice and Enjoy
Once firm, lift the bars out using the parchment paper and cut them into 8 squares or rectangles. These No-Bake Chocolate Oat Bars are ready to enjoy immediately, perfect for a grab-and-go treat!
How to Serve No-Bake Chocolate Oat Bars
Garnishes
Sprinkle a few flaky sea salt crystals on top right after spreading the chocolate for an extra flavor punch. You can also add chopped nuts or shredded coconut if you’re feeling fancy, which boosts both the look and the crunch factor.
Side Dishes
These bars are fabulous on their own but pair beautifully with a cup of hot coffee, chai tea, or a cold glass of milk. For a more substantial snack, serve alongside fresh fruit or yogurt to balance out the indulgence.
Creative Ways to Present
Wrap each bar individually in wax paper or parchment and tie with a little twine for an adorable gift. You can also stack them with layers of parchment in between for a pretty presentation on a dessert platter at your next party.
Make Ahead and Storage
Storing Leftovers
Keep your No-Bake Chocolate Oat Bars fresh by storing them in an airtight container in the refrigerator. They will stay chewy and delicious for up to a week, making them a fantastic prepared snack to grab anytime.
Freezing
If you want to keep them longer, these bars freeze beautifully. Wrap each one individually with plastic wrap and place them in a freezer-safe container or bag. When you’re ready to eat, simply thaw at room temperature for about 15 minutes.
Reheating
Because these bars are best enjoyed cool or at room temperature, reheating is really not necessary. If you prefer a softer texture, you can microwave briefly for 10 to 15 seconds, but watch closely to avoid melting the chocolate layer too much.
FAQs
Can I use crunchy peanut butter instead of creamy?
Yes! Crunchy peanut butter will add a delightful extra texture to your No-Bake Chocolate Oat Bars. Just be sure to mix thoroughly so the oats are evenly coated.
Can I substitute the oats for gluten-free oats?
Absolutely! Using certified gluten-free oats is a great option if you have dietary restrictions. The texture and taste will remain just as wonderful.
Is it possible to make these bars without peanut butter?
Yes, you can substitute with almond butter or sunflower seed butter for a different flavor profile. Just keep in mind it will alter the taste slightly but remain delicious.
How long do these bars keep at room temperature?
For the best quality and texture, it’s recommended to store them in the refrigerator. However, they can safely be kept at room temperature for a day or two if sealed well.
Can I add extras like chocolate chips or dried fruit?
Definitely! Tossing in some mini chocolate chips, chopped nuts, or dried cranberries can take your No-Bake Chocolate Oat Bars to the next level. Just fold them into the oat mixture before pressing into the pan.
Final Thoughts
Trust me, once you try these No-Bake Chocolate Oat Bars, they’ll become your new favorite go-to snack for busy days, dessert cravings, or anytime you want something sweet without the fuss. Their perfect blend of chewy oats, luscious peanut butter, and decadent chocolate makes every bite a little moment of happiness. So go ahead—grab those ingredients and make yourself a batch. You won’t regret it!