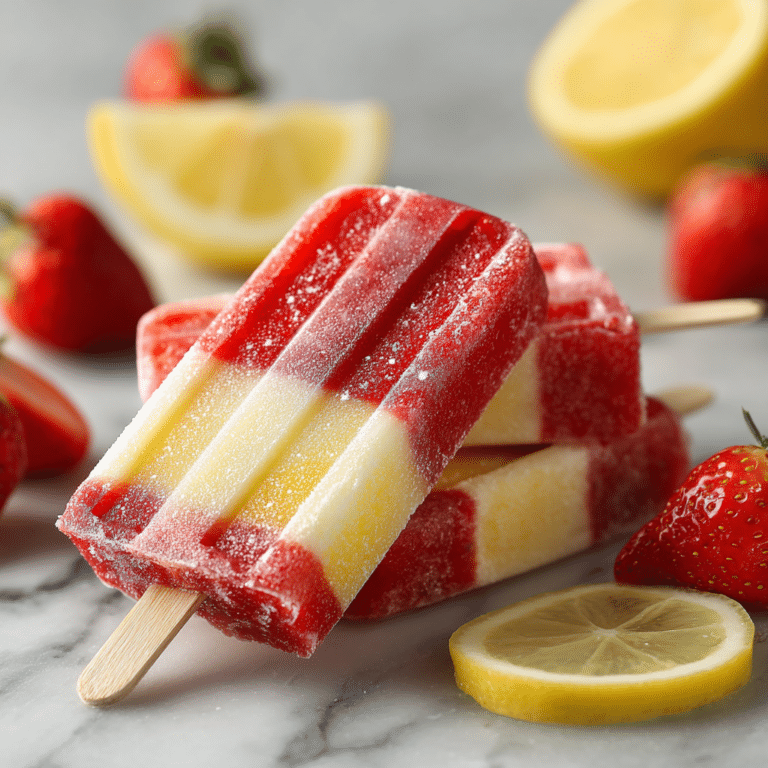
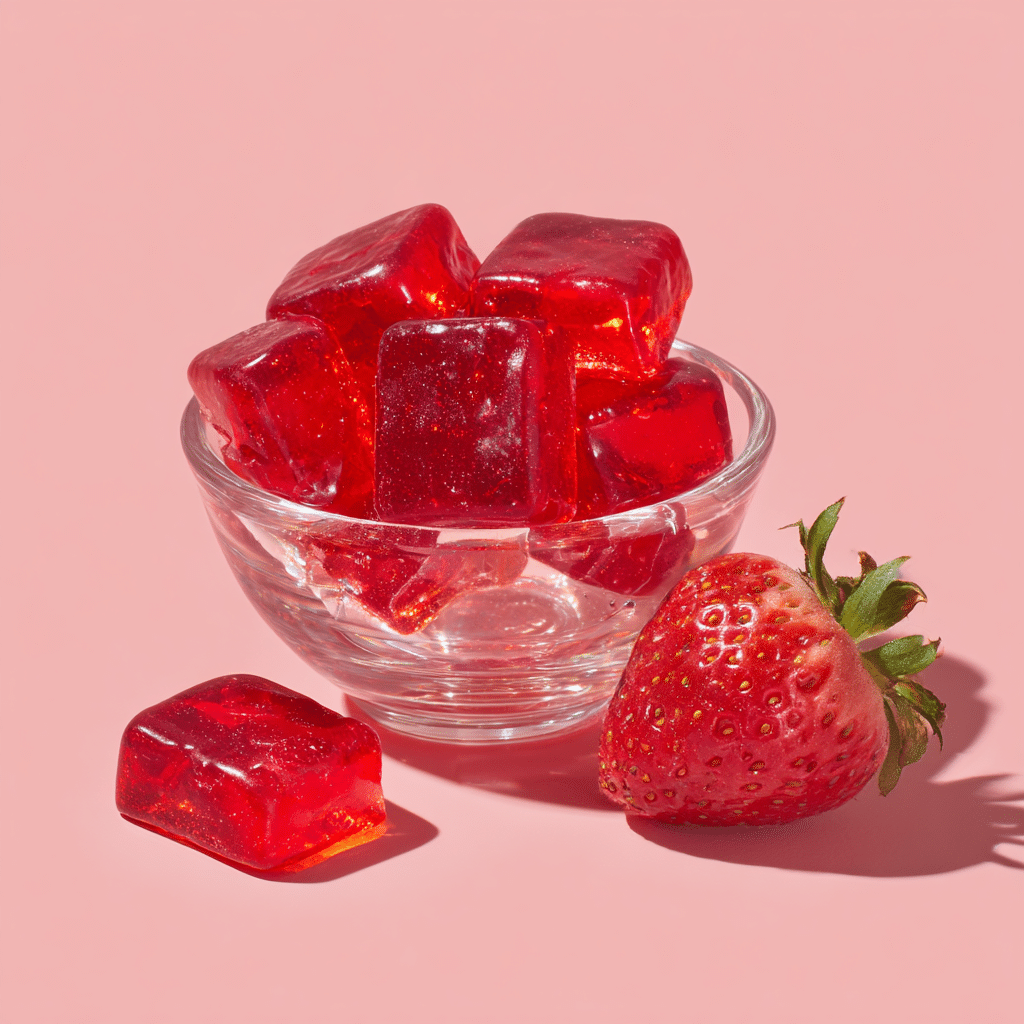
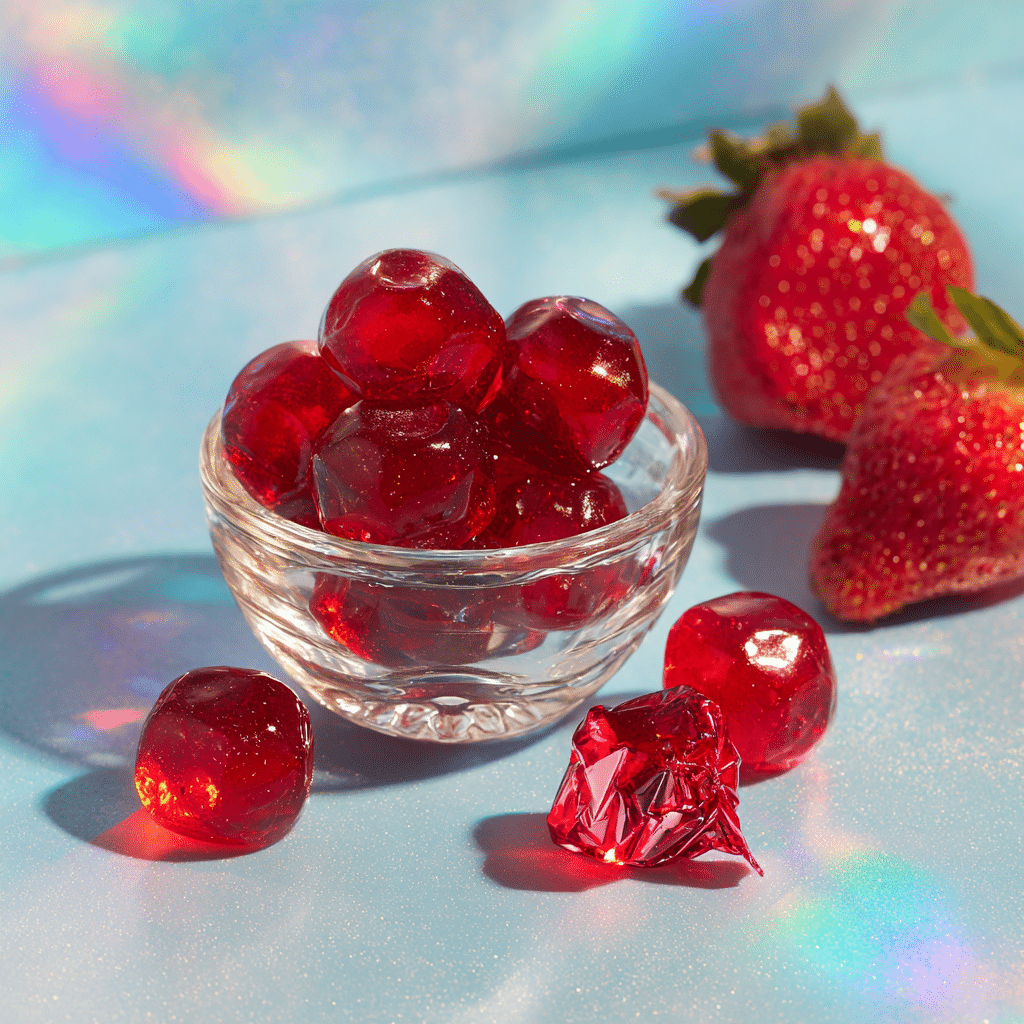
Strawberry Hard Candy Recipe
If you have a sweet tooth and a love for all things fruity, you are going to adore making Strawberry Hard Candy at home. This bright, glossy treat delivers a burst of strawberry flavor with every bite, perfectly balancing sweetness and that coveted candy crunch. The simplicity of the ingredients belies the magic of the process, transforming just sugar, syrup, and a little extract into dazzling red gems that look as delightful as they taste. Whether for a special occasion, gift-giving, or just a personal indulgence, Strawberry Hard Candy is pure joy wrapped in a shiny exterior.
Ingredients You’ll Need
You don’t need a pantry full of exotic items to make these candies. The ingredients are straightforward but crucial—they each bring something essential to the flavor, texture, and appearance of your Strawberry Hard Candy.
- 1 cup sugar: The backbone of your candy, providing the sweetness and structure needed for that perfect hard texture.
- 1/3 cup corn syrup: Acts as a smoothening agent, preventing crystallization and ensuring your candy stays clear and glossy.
- 1/4 cup strawberry extract: This is the star flavor, imparting that unmistakable bright and fruity strawberry taste.
- Few drops red food coloring: Gives your candy its stunning, inviting red color that matches the flavor perfectly.
How to Make Strawberry Hard Candy
Step 1: Prepare Your Workstation
Before turning on the heat, get your molds ready—lightly grease them or use silicone molds to make candy removal easier. Measure your ingredients carefully because candy making is precise and timing matters. Have a candy thermometer standing by, as reaching the right temperature is key to achieving the perfect hardness.
Step 2: Boil Sugar and Syrup
Combine the sugar and corn syrup in a medium saucepan. Stir gently over medium heat until the sugar dissolves, then bring the mixture to a boil without stirring. Keep a close eye on the temperature and let it reach 300°F (150°C), also known as the hard-crack stage. This step requires patience but is critical for that shiny, firm texture of the strawberry hard candy.
Step 3: Add Flavor and Color
Once at temperature, immediately remove the pan from heat and stir in the strawberry extract along with a few drops of red food coloring. Be quick but careful as the hot syrup can bubble up. The result is a fragrant and vivid mixture ready for shaping.
Step 4: Pour into Molds and Cool
Carefully pour your hot candy mixture into your prepared molds. Avoid overfilling and work swiftly because the candy will start to harden fast. Let the molds sit at room temperature until the candies are completely firm and cool to the touch. Once hardened, pop them out gently and admire your glossy, jewel-like Strawberry Hard Candy treats.
How to Serve Strawberry Hard Candy
Garnishes
While these candies are delicious on their own, you can enhance presentation by adding small edible flower petals or sprinkles of crushed freeze-dried strawberries nearby on the serving plate. These touches add a delicate visual complement without overshadowing the candy’s vibrant color and flavor.
Side Dishes
Strawberry Hard Candy pairs wonderfully with light desserts such as vanilla bean ice cream or a subtle lemon sorbet. Its sweetness and texture contrast beautifully with creamy or tart dishes, offering a pleasant break between bites.
Creative Ways to Present
Wrap your Strawberry Hard Candy individually in clear cellophane for a shiny, festive look—perfect for party favors or gifts. Alternatively, arrange several in a glass jar with a decorative ribbon for a charming kitchen countertop display that doubles as a sweet snack invitation.
Make Ahead and Storage
Storing Leftovers
Keep your Strawberry Hard Candy fresh by storing it in an airtight container at room temperature. Avoid humid environments as moisture can cause the candy to become sticky or lose its crunch. Properly stored, these treats can last several weeks without losing their characteristic snap.
Freezing
While you can freeze Strawberry Hard Candy, it’s usually unnecessary due to its long shelf life. If you prefer to freeze, wrap the pieces tightly in wax paper and place them in an airtight freezer-safe bag to prevent condensation upon thawing.
Reheating
Hard candy does not require reheating; however, if your candies soften or stick together, warming them gently in a low oven for a few minutes can restore hardness. Be careful not to overheat, as it may alter the flavor and texture.
FAQs
Can I use fresh strawberries instead of extract?
Fresh strawberries add wonderful flavor but contain moisture that can interfere with the candy’s texture. For best results, stick to strawberry extract designed for candy making to achieve that clear, hard finish.
What if I don’t have corn syrup?
Corn syrup prevents crystallization and keeps the candy smooth. You can substitute with glucose syrup or golden syrup, but avoid using honey or molasses as they may affect flavor and consistency.
Why didn’t my candy harden properly?
If the candy is sticky or too soft, it likely didn’t reach the hard-crack temperature of 300°F (150°C). Using a reliable candy thermometer and boiling to the right stage is crucial for proper hardening.
Can I make this candy in different flavors?
Absolutely! Once you master the Strawberry Hard Candy base, feel free to experiment with other extracts like raspberry, cherry, or even vanilla. Just adjust the coloring accordingly to match your flavor of choice.
How do I prevent the candy from sticking to molds?
Lightly grease molds with a neutral oil or use silicone molds for easier release. Allowing the candy to cool fully before removal also helps prevent sticking.
Final Thoughts
Making your own Strawberry Hard Candy is one of those wonderfully rewarding kitchen projects that transforms simple ingredients into something special and nostalgic. The crackling texture paired with that uplifting strawberry sweetness is sure to bring smiles and maybe even a little childhood wonder to anyone who tries them. So why not roll up your sleeves and give this charming treat a try? Your candy jar—and your taste buds—will thank you.