Pumpkin Scones Recipe
There is something wonderfully nostalgic and cozy about homemade Pumpkin Scones. These delights bring together that tender, buttery crumb with a warm hug of classic fall spices, punctuated by the gentle sweetness of pumpkin. Whether you’re looking to brighten an early morning or savor a comforting afternoon treat, these scones turn your kitchen into a seasonal haven without needing a café run. They are perfectly moist, lightly spiced, and topped with a luscious maple glaze that makes them utterly irresistible.
Ingredients You’ll Need
Gathering simple, quality ingredients is the secret to making bake-at-home Pumpkin Scones that rival your favorite bakery’s version. Each component contributes uniquely—from the tenderizing butter to the fragrant spices and creamy pumpkin that add both flavor and moisture.
- All-purpose flour: The base for structure, ensuring a tender yet sturdy crumb.
- Dark brown sugar: Adds rich sweetness and a slight molasses depth.
- Baking powder and baking soda: Essential for a light, flaky texture with just the right rise.
- Warm spices (cinnamon, ginger, nutmeg, clove): Create that unmistakable fall bouquet of flavor.
- Salted butter: Cold and diced, it laminates the dough creating delicate layers.
- Canned pumpkin: Brings natural moisture and vibrant orange hue without overpowering.
- Buttermilk: Cultured buttermilk is recommended to add slight tang and richness.
- Egg and vanilla extract: Bind the batter while boosting flavor complexity.
- Powdered sugar, maple syrup, milk, and vanilla for glaze: Sweeten and add a glossy, irresistible finish.
- Toasted chopped pecans: For garnish, providing a lovely crunch and nutty accent.
How to Make Pumpkin Scones
Step 1: Combine Dry Ingredients
Begin by preheating your oven to 400°F and lining a baking sheet with parchment paper to prevent sticking. Next, gather all your dry ingredients—flour, brown sugar, baking powder, baking soda, and the cozy spices. Pulsing these together in a food processor helps distribute everything evenly, elevating the overall balance of flavor.
Step 2: Cut in the Butter
Add the cold, diced butter to your dry mixture. Pulse the processor until the texture resembles coarse crumbs, with butter pieces roughly the size of small peas. This technique is what gives your scones those perfect flaky layers that make every bite so delightful.
Step 3: Whisk Together the Wet Ingredients
In a separate bowl, mix your canned pumpkin, buttermilk, egg, and vanilla. This mixture adds moisture and richness, the magic behind that tender crumb that melts in your mouth. Pour it slowly into your dry-butter mixture while pulsing just until the dough starts to come together. It should look shaggy, not perfectly smooth, which means you’re on the right track.
Step 4: Shape and Chill
Turn the dough onto a floured surface and gently press it into a 6-inch disc. Using a sharp knife, slice it into 6 equal triangles. Place these onto your baking sheet and pop them in the freezer for 10 minutes. This chilling step helps the scones maintain their shape and encourages a tender crumb when baked.
Step 5: Bake and Glaze
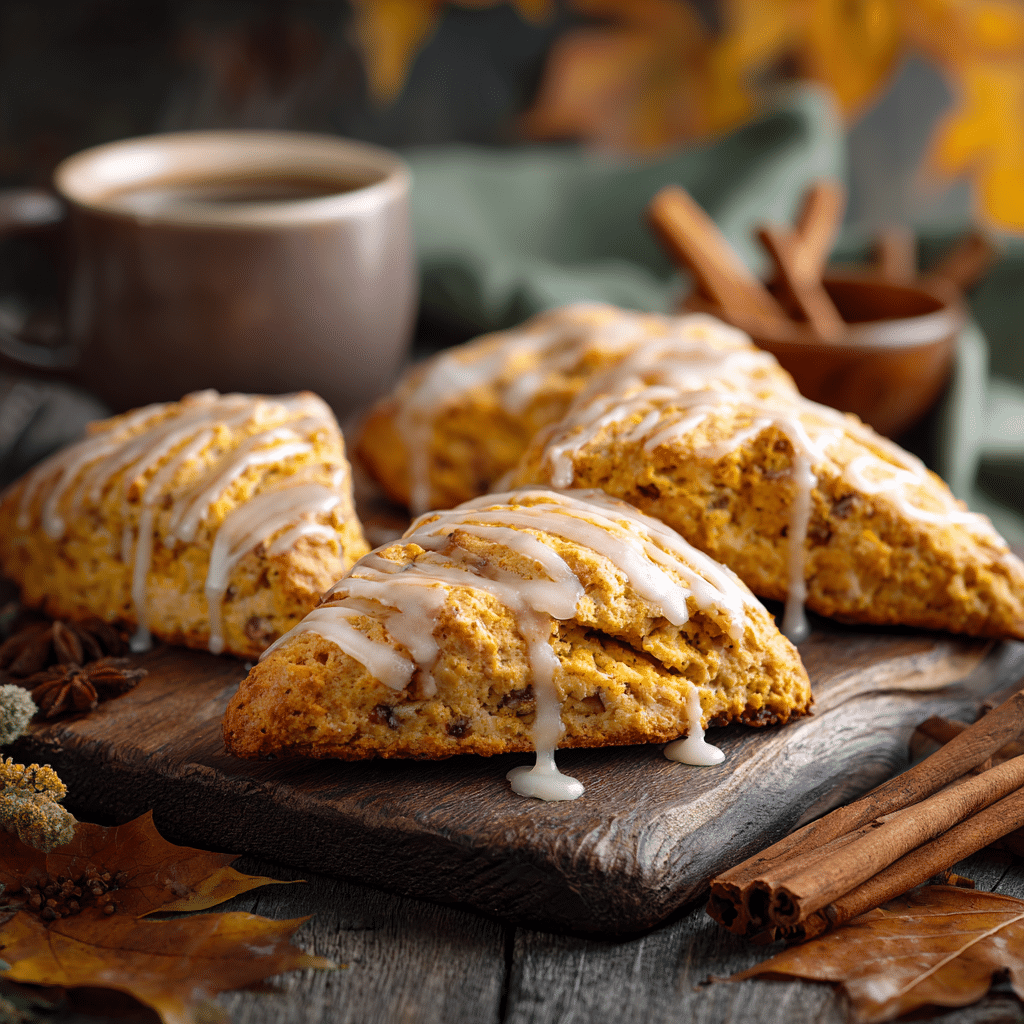
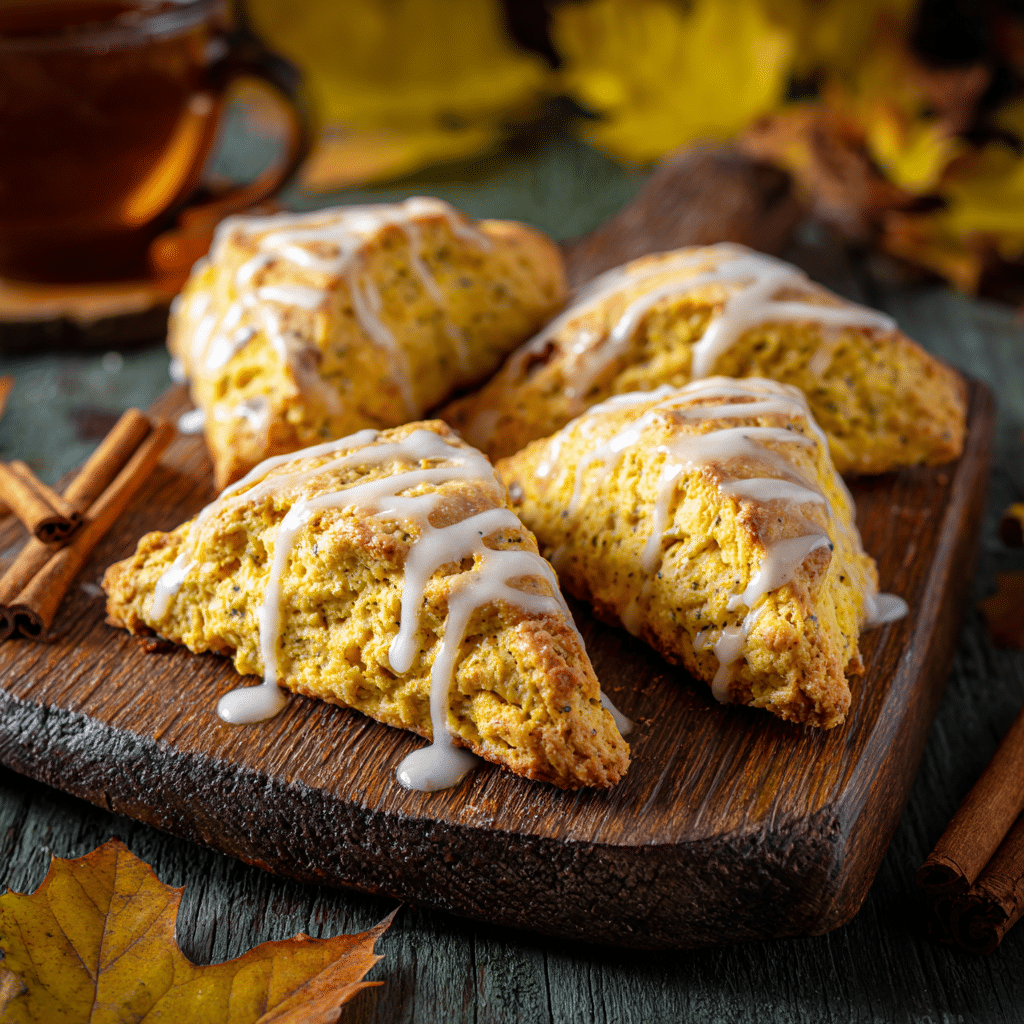
Bake your scones for 18 to 20 minutes until they are puffed up and just starting to turn golden at the edges. Once cooled on a wire rack, whisk together the powdered sugar glaze with maple syrup, milk, and vanilla. Drizzle it generously over each scone and finish with a sprinkle of toasted chopped pecans for that perfect nutty crunch.
How to Serve Pumpkin Scones
Garnishes
While the maple glaze and toasted pecans on top are classic, you can add a dusting of cinnamon sugar or a light brush of melted butter for extra shine and richness. Fresh whipped cream or a smear of cream cheese can elevate these scones for a special brunch touch.
Side Dishes
Pumpkin Scones pair beautifully with warm beverages like chai tea, coffee with a splash of cream, or even hot apple cider. On the savory side, a platter of sharp cheddar or a mild cheese compliments the spicy sweetness nicely. Fresh fruit or a lightly dressed green salad can balance this indulgence perfectly.
Creative Ways to Present
For a festive touch, arrange your Pumpkin Scones on a rustic wooden board surrounded by small bowls of cinnamon butter, nut butters, or honey. For gatherings, stack them in a pyramid lined with autumn leaves or mini pumpkins to celebrate the season and wow your guests.
Make Ahead and Storage
Storing Leftovers
If you have leftovers, store your Pumpkin Scones in an airtight container at room temperature for up to two days. This keeps them moist and flavorful without drying out. If you prefer, refrigeration will extend freshness but can slightly stiffen the texture.
Freezing
These scones freeze beautifully. Wrap each one tightly in plastic wrap and place in a freezer bag or container. They will keep well for up to three months, making them a convenient treat to pull out whenever the craving hits.
Reheating
To enjoy scones just-baked fresh, reheat them gently in a warm oven at 325°F for about 5 to 7 minutes. Avoid microwaving as it can make them tough or soggy. This method revives their tender crumb and melts the glaze slightly for an inviting warmth.
FAQs
Can I make Pumpkin Scones without a food processor?
Absolutely! You can easily mix the dry ingredients by hand and cut in the butter using a pastry blender or your fingertips. Just be sure to keep the butter cold for that flakiness. Then combine wet and dry ingredients as usual.
What if I don’t have buttermilk?
If you don’t have buttermilk on hand, using cream is a great substitute that still adds richness. Avoid homemade DIY buttermilk substitutes here, as the cultured buttermilk provides a subtle tang important for that classic scone flavor.
Can I add mix-ins like chocolate chips or nuts?
Definitely! Pumpkin Scones are a great base for additions like white chocolate chips, dried cranberries, or chopped pecans inside the dough. Just toss your mix-ins with the flour before combining with liquids to ensure even distribution.
How do I know when the scones are done baking?
Look for scones that have puffed up nicely with golden edges. They should feel firm to the touch but not hard. Overbaking can dry them out, so keep a close eye near the end of the baking time.
Is it best to eat Pumpkin Scones warm or at room temperature?
They are delightful warm from the oven, fresh and tender with melting glaze. However, Pumpkin Scones also maintain great flavor at room temperature, making them perfect for leisurely breakfasts or coffee breaks anytime.
Final Thoughts
There is a special kind of joy in making and sharing these Pumpkin Scones, radiant with warmth and comfort. I wholeheartedly encourage you to try baking them—it’s surprisingly simple and so rewarding. Every bite will remind you why homemade treats hold a treasured place in our hearts. Enjoy these scones with your favorite cup and watch your kitchen fill with irresistible autumn aromas!