Oreo Cheesecake Cups Recipe
If you have a sweet tooth and love that perfect balance of creamy and crunchy, then Oreo Cheesecake Cups are about to become your new obsession. These delightful little treats capture everything you adore about classic Oreo cheesecake but in a fun, handheld cup form. They’re no-bake, meaning you get all the rich, velvety goodness without turning on the oven, making them perfect for last-minute gatherings or any time you want a viral dessert that impresses without stress. The combination of crushed Oreo cookies layered with smooth, light cheesecake filling creates a flavor and texture experience that’s simply irresistible.
Ingredients You’ll Need
Getting started with Oreo Cheesecake Cups is incredibly straightforward because the ingredients are simple yet perfectly complementary. Each one plays a key role in delivering the rich taste, smooth texture, and irresistible crunch these cups are known for.
- Cream cheese: The velvety base of your cheesecake layer, providing that classic tart creaminess.
- Oreo cookies: Essential for both the crunchy crust and adding bursts of chocolatey goodness throughout.
- Butter: Binds the crushed Oreo crust together while adding a rich, buttery flavor.
- Whipping cream: Whipped to soft peaks to lighten the cheesecake filling and give it a luscious, airy texture.
How to Make Oreo Cheesecake Cups
Step 1: Prepare the Oreo Crust
Start by crushing your Oreo cookies into fine crumbs—using a food processor or placing them in a sealed bag and smashing with a rolling pin works perfectly. Melt the butter and mix it into the crushed Oreos until the mixture holds together when pressed. Press this mixture firmly into the bottom of your serving cups or jars to create a sturdy base that sets the stage for the cheesecake filling.
Step 2: Make the Cheesecake Filling
Beat the cream cheese until smooth and creamy, then gently fold in whipped cream that’s been beaten to soft peaks. This step is where the cheesecake turns luxuriously light, transforming from heavy cream cheese into a fluffy, dreamy filling that balances perfectly with the crunchy crust.
Step 3: Assemble the Cups
Layer the cheesecake filling over the Oreo crust in each cup. For an extra special touch, sprinkle some crushed Oreos on top or even tuck whole Oreo pieces in for a fun surprise as you dig in. Once filled, refrigerate your cups for at least a couple of hours until they’re firm and chilled.
Step 4: Chill and Set
Patience is key! Letting your Oreo Cheesecake Cups chill is what allows the flavors to meld beautifully and the cheesecake texture to set just right. The no-bake nature means all you need is to cool them in the fridge, then you’re ready to enjoy a dessert that feels like it took hours to make.
How to Serve Oreo Cheesecake Cups
Garnishes
Adding a personal touch with garnishes makes Oreo Cheesecake Cups even more fun to serve. Fresh berries, a drizzle of chocolate sauce, or even a swirl of whipped cream can elevate these cups from simple to spectacular and add a pop of color and flavor.
Side Dishes
While Oreo Cheesecake Cups are a showstopper on their own, pairing them with a light fruit salad or a refreshing mint tea can perfectly balance the richness. These sides cleanse the palate and complement the intense chocolate and cheesecake flavors.
Creative Ways to Present
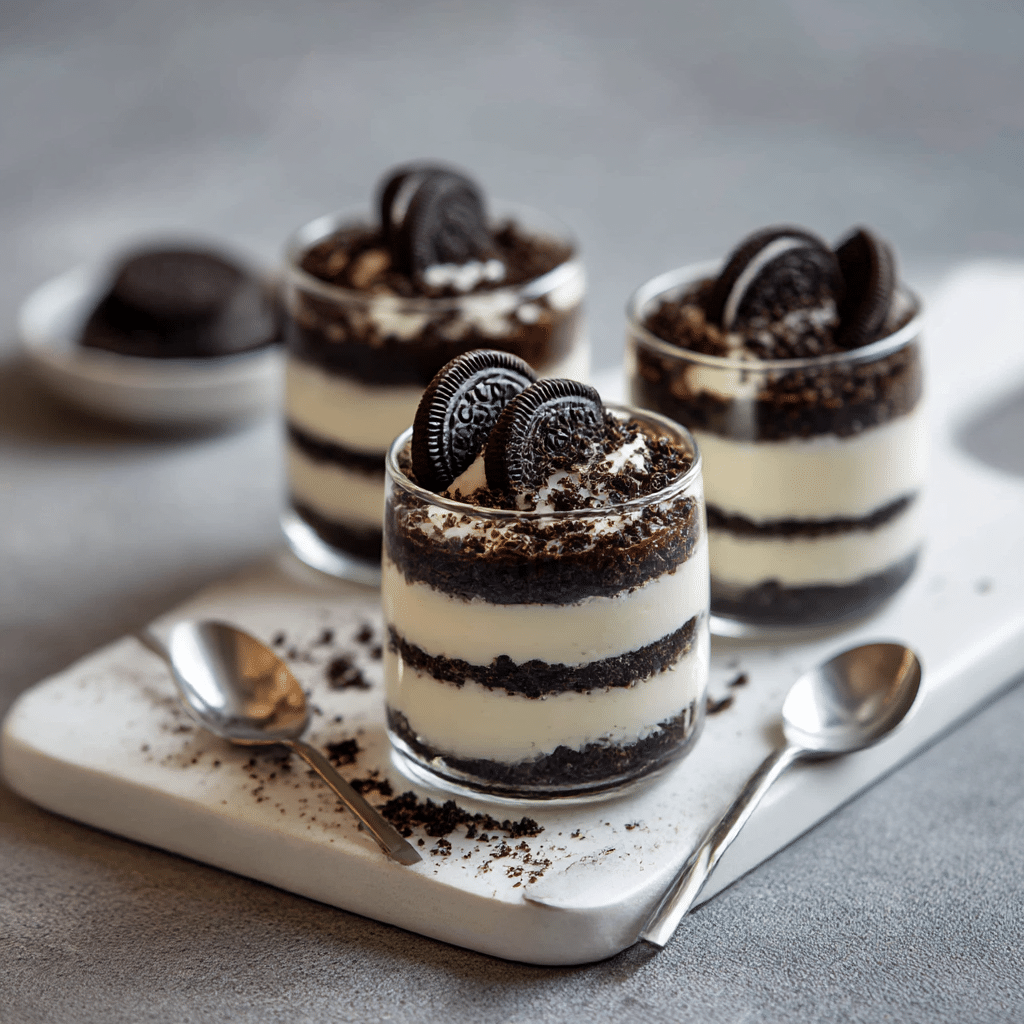
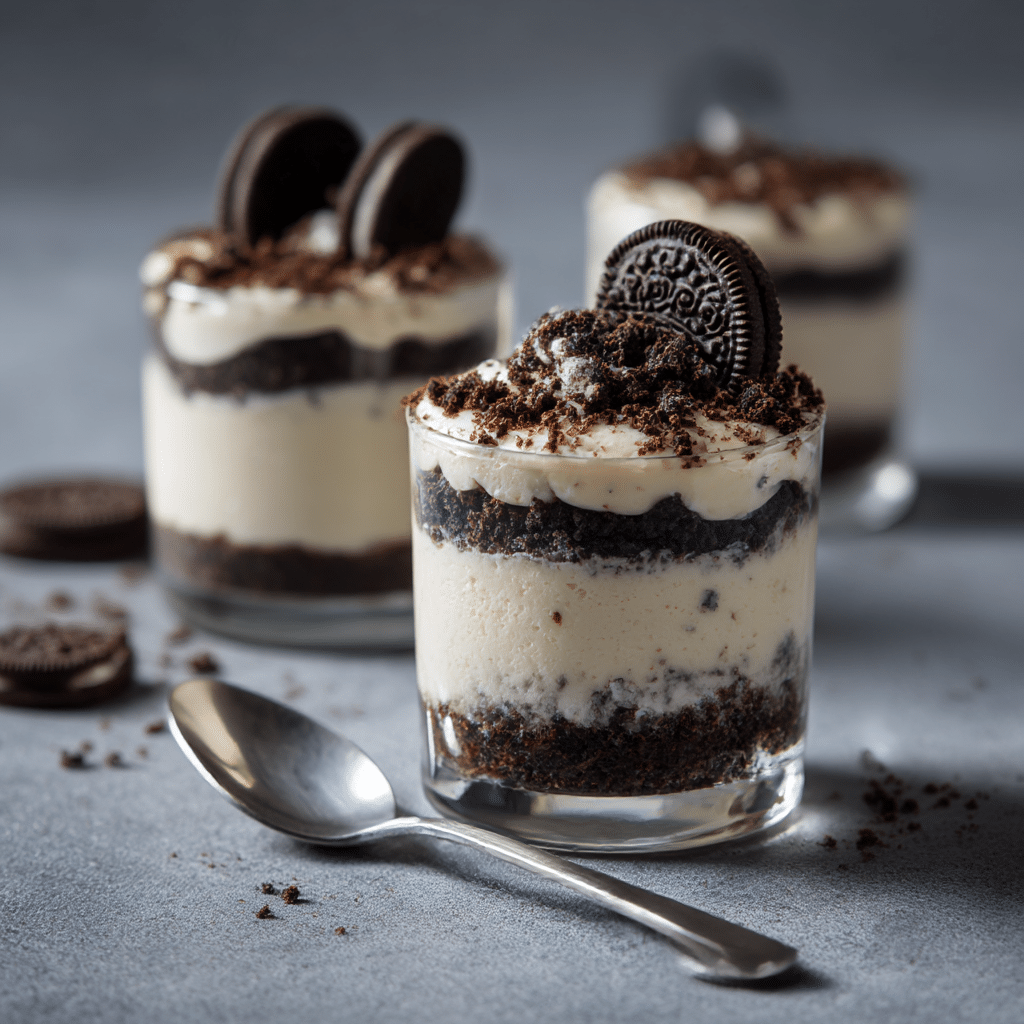
Try serving Oreo Cheesecake Cups in mini mason jars, colorful silicone cupcake liners, or even clear shot glasses for a chic, party-ready display. Layering the filling and crust in transparent containers lets the beautiful contrast of black and white Oreo pieces peek through, making the dessert as delightful to see as it is to eat.
Make Ahead and Storage
Storing Leftovers
Oreo Cheesecake Cups keep wonderfully in the refrigerator, tightly covered to prevent drying out. They’ll stay fresh and delicious for up to 3 days, making them great for prepping ahead for your favorite celebrations or simply enjoying over a few days.
Freezing
If you want to enjoy these cups later, they freeze well. Cover each cup tightly with plastic wrap and place them in an airtight container. When you’re ready to eat, thaw them overnight in the fridge so the texture stays creamy and perfect.
Reheating
Since Oreo Cheesecake Cups are best served cold, reheating isn’t necessary. Instead, simply let frozen cups thaw completely in the refrigerator to maintain that signature creamy texture without melting the crust or separating the filling.
FAQs
Can I use a different cookie instead of Oreos?
Absolutely! While Oreos provide that classic chocolate flavor and color contrast, you can experiment with other chocolate sandwich cookies or even graham crackers for a different twist.
Do I have to use whipped cream in the filling?
Whipped cream is key for a light, airy texture, but if you want a denser cheesecake, you can skip it or substitute with sour cream for a tangier flavor.
How long do Oreo Cheesecake Cups take to set?
They should be chilled for at least 2 hours, though overnight is ideal for the best texture and flavor combination.
Can I make these cups without a food processor?
Definitely! Just put the Oreo cookies in a sealed plastic bag and crush them using a rolling pin or heavy pan until finely ground.
Are Oreo Cheesecake Cups suitable for parties?
They are perfect for parties! Their individual serving size makes them easy to handle, and their eye-catching layers will surely be a hit with guests.
Final Thoughts
Oreo Cheesecake Cups are the kind of dessert that feels special yet comes together effortlessly, combining familiar flavors in a new, fun way. Whether you’re cheering up a weeknight or aiming to wow at your next get-together, these cups are a sweet treat worth making again and again. I can’t wait for you to try this recipe and share it with your friends because once you taste these, Oreo Cheesecake Cups are going to be a happy tradition!