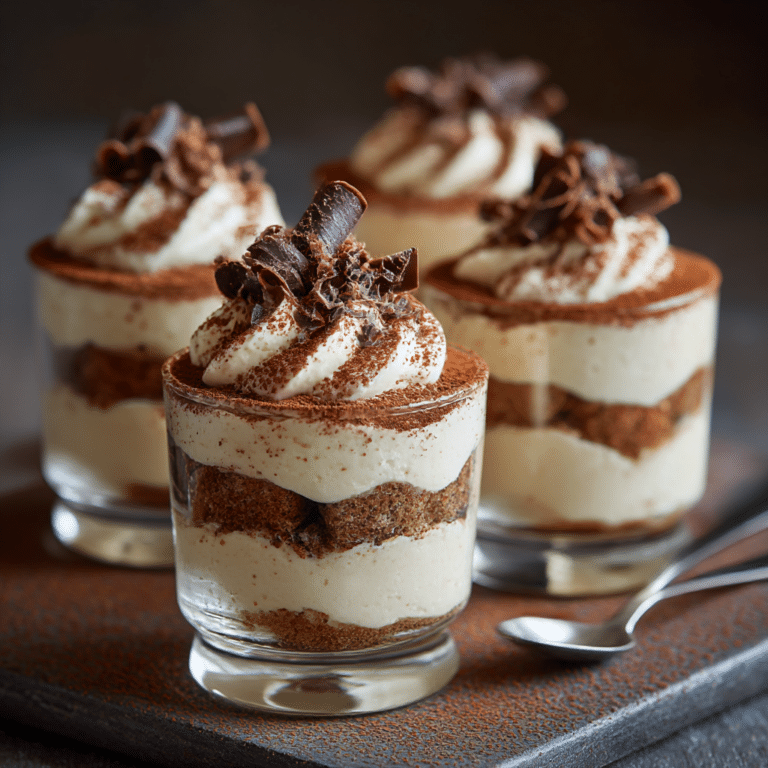
No-Bake Lotus Biscoff Cheesecake Cups Recipe
If you are craving an indulgent treat that feels like a hug in dessert form, these No-Bake Lotus Biscoff Cheesecake Cups are exactly what you need. Imagine the rich, caramelized notes of Lotus Biscoff cookies mingling perfectly with a velvety, creamy cheesecake layer, all served in convenient little cups that make every bite effortlessly delightful. Whether you’re after a quick dessert fix or something to impress guests without breaking a sweat, this recipe brings an irresistible combination of flavor and ease to your kitchen.
Ingredients You’ll Need
The magic behind these No-Bake Lotus Biscoff Cheesecake Cups lies in a handful of ingredients that are simple yet impactful. Each item plays a crucial role in building the luscious texture, that signature Biscoff flavor, and the perfect balance between creamy and crunchy.
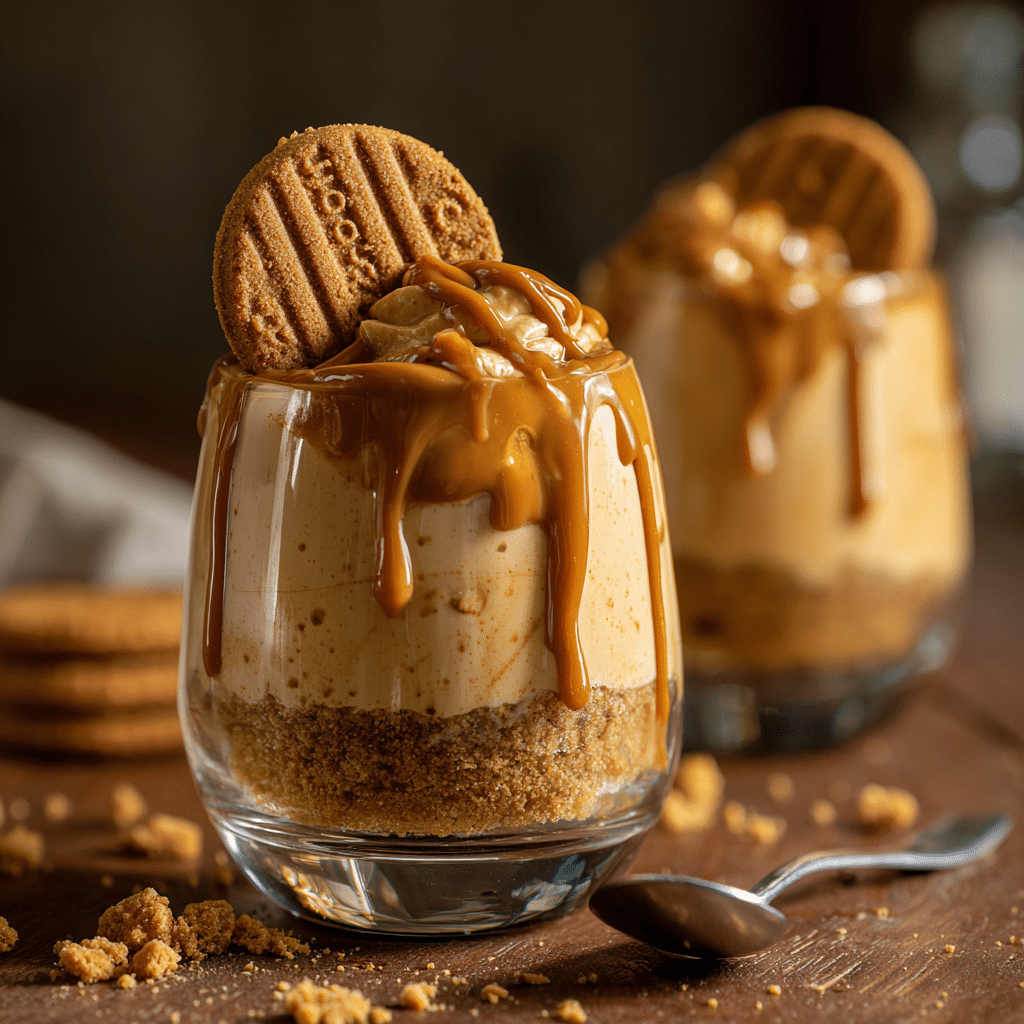
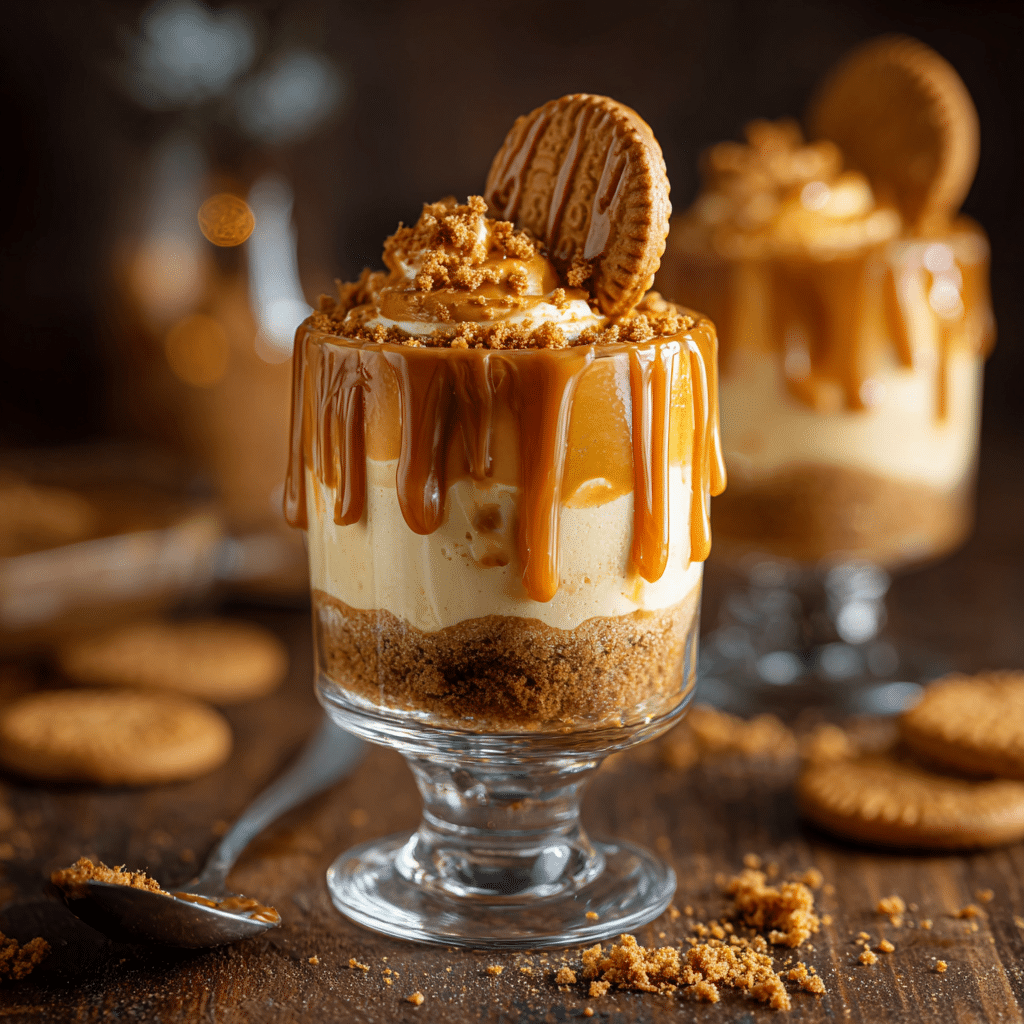
- Crushed Biscoff Cookies: Provides that unforgettable spiced cookie base with a hint of caramel sweetness.
- Melted Butter: Binds the cookie crumbs together firmly, creating a sturdy and buttery crust.
- Cream Cheese: The heart of your cheesecake layer, offering tanginess and richness.
- Whipping Cream: Adds lightness and airiness to the filling when whipped and folded in.
- Lotus Biscoff Spread: Intensifies the cookie flavor with its smooth, caramelized essence.
- Powdered Sugar: Sweetens the cheesecake gently without graininess.
How to Make No-Bake Lotus Biscoff Cheesecake Cups
Step 1: Prepare the Crust
Start by combining the crushed Biscoff cookies with melted butter in a bowl. This mixture is your flavorful base that holds everything together. Press the buttery crumbs firmly into the bottom of your serving cups to form an even crust layer. This step sets the foundation for that satisfying crunch that contrasts perfectly with the creamy topping.
Step 2: Make the Cream Cheese Mixture
Next, in a mixing bowl, beat the cream cheese, powdered sugar, and Lotus Biscoff spread until you achieve a smooth, silky mixture. This combination infuses your cheesecake with that unmistakable spiced caramel flavor while maintaining a lush texture that feels silky on the palate.
Step 3: Whip the Cream
In a separate bowl, whip the whipping cream until soft peaks form. This step is crucial because it adds volume and lightness, transforming the dense cream cheese blend into a fluffy, cloud-like filling. Be gentle as you fold the whipped cream into the cream cheese mixture to keep all that lovely airiness intact.
Step 4: Assemble the Cups and Chill
Carefully spoon the luscious cheesecake mixture over the prepared crust in your cups. Spread it evenly, making sure every bite will have the perfect ratio of crust to cream. Cover the cups and refrigerate for at least two hours. This chilling time allows the dessert to set up beautifully and lets the flavors meld into an irresistible harmony.
How to Serve No-Bake Lotus Biscoff Cheesecake Cups
Garnishes
To elevate your No-Bake Lotus Biscoff Cheesecake Cups, consider topping them with a sprinkle of crushed Biscoff cookies, a drizzle of Lotus spread, or even a few toasted nuts. These final touches add texture and an extra visual appeal that makes serving these cups feel all the more special.
Side Dishes
Pair these cheesecake cups with fresh berries or a simple fruit salad. The bright, tangy notes of fruit offer a refreshing contrast that balances the richness of the dessert perfectly. A cup of coffee or tea also complements this treat wonderfully, enhancing the cozy, comforting vibe.
Creative Ways to Present
Try layering the cheesecake mixture and cookie crumbs to create a striped effect within the cups for a stunning visual. Alternatively, serve them in mini mason jars or even edible chocolate cups to impress guests and add a fun twist to presentation. Garnishing with edible gold flakes or a dusting of cinnamon adds that wow factor when you want to make your dessert truly memorable.
Make Ahead and Storage
Storing Leftovers
If you have any leftovers from your No-Bake Lotus Biscoff Cheesecake Cups, store them covered in the refrigerator to maintain their creamy texture and fresh flavor. They will stay delicious for up to three days, making for easy grab-and-go treats.
Freezing
These cheesecake cups freeze well if you want to prepare them in advance. Cover them tightly with plastic wrap and then foil to prevent freezer burn. When frozen properly, they can last up to one month. Thaw them overnight in the fridge before serving for the best texture and taste.
Reheating
Since these are no-bake cheesecake cups, they’re best served chilled and aren’t intended for reheating. Warm temperatures can affect the texture, causing the cream cheese mixture to lose its lightness and become too soft.
FAQs
Can I substitute regular cookies for Biscoff cookies?
While you can swap Biscoff cookies for other spiced or ginger snap cookies, the unique caramel and cinnamon flavor of Biscoff is what defines this dessert’s charm, so substitutions might alter the signature taste.
Is it possible to make these cups vegan?
Absolutely! Use vegan cream cheese, plant-based whipped creams like coconut cream, and vegan butter alternatives to create a delicious dairy-free version of No-Bake Lotus Biscoff Cheesecake Cups.
How long does it take to set properly?
Chilling the cups for at least two hours is essential to allow the cheesecake layer to firm up and the flavors to blend. For best results, you can also leave them overnight.
Can I make these in a larger dish instead of cups?
Yes! This recipe works beautifully in a larger serving dish or springform pan. Just be sure to adjust chilling times accordingly and slice the cheesecake when ready to serve.
What’s the best way to crush Biscoff cookies?
The easiest way is to place them in a plastic bag and gently crush with a rolling pin, or pulse briefly in a food processor to get fine crumbs without turning into powder.
Final Thoughts
There is something so wonderfully comforting and indulgent about these No-Bake Lotus Biscoff Cheesecake Cups, and I can’t recommend them enough for both everyday treats and special occasions. Their blend of creamy, crunchy, and deeply spiced flavors makes every spoonful feel like a little celebration. Give this recipe a try—you’ll be delighted at how simple it is and how quickly it becomes a favorite you’ll want to share again and again.