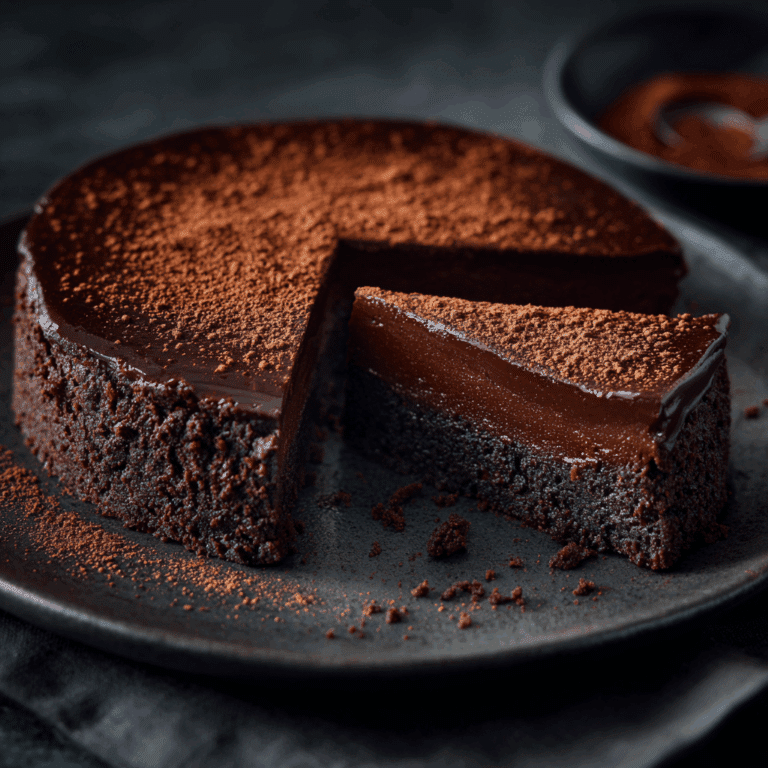
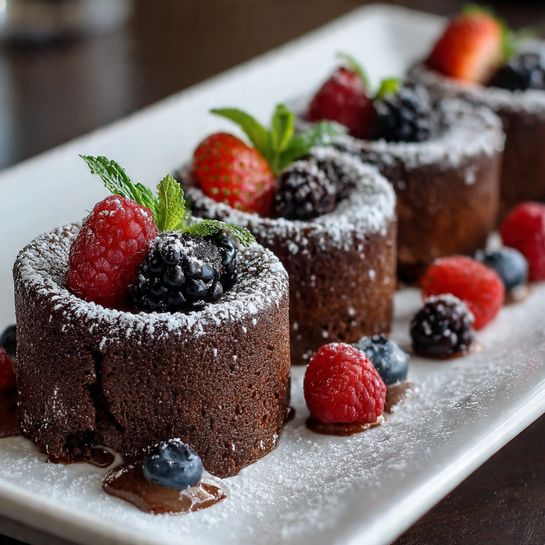
Mini Chocolate Lava Cakes Recipe
If you’ve ever dreamed of a dessert that feels like a warm hug, then these Mini Chocolate Lava Cakes are just what you need. Imagine biting into a tender chocolate cake that gives way to a luscious, molten center of rich, gooey chocolate that spills out like liquid gold. It’s a truly indulgent treat perfect for any occasion, from an intimate dinner to a sudden craving for something sweet that’s quick to whip up. These mini versions pack all the decadence of classic lava cakes but in a petite, perfectly portioned cake, making each bite an experience you’ll want to savor again and again.
Ingredients You’ll Need
Simple ingredients come together to create magic in these Mini Chocolate Lava Cakes. Each item is essential, playing a specific role in building the perfect balance of flavor, texture, and that irresistible molten center.
- Chocolate (100 g): Use good quality chocolate for a deep, rich taste and nice melt.
- Butter (60 g): Provides moistness and helps achieve that smooth, velvety texture.
- Eggs (2): They add structure and richness to the cake.
- Sugar (1/3 cup): Sweetens the cake while helping with tender crumb formation.
- Flour (1/4 cup): Just enough flour to hold the cake together without weighing down the gooey center.
How to Make Mini Chocolate Lava Cakes
Step 1: Melt the Chocolate and Butter
Begin by gently melting the chocolate and butter together until smooth and glossy. This creates the luscious base for your lava cakes, so take your time to avoid burning. You can do this over a double boiler or carefully in short bursts in the microwave, stirring frequently to combine.
Step 2: Whisk Eggs and Sugar
In a separate bowl, vigorously whisk the eggs with the sugar until the mixture is pale and fluffy. This aerates the batter, ensuring your cakes have a tender crumb and rise beautifully during baking.
Step 3: Combine Ingredients
Slowly fold the melted chocolate and butter into the egg and sugar mixture. Once blended, gently fold in the flour, taking care not to overmix. Overworking the batter can lead to a denser cake, and not what you want when you’re aiming for that molten center.
Step 4: Prepare and Fill Ramekins
Grease your mini ramekins or muffin tin thoroughly with butter to prevent sticking. Divide the batter evenly among them, filling each about three-quarters full to allow room for rising without overflowing.
Step 5: Bake to Perfection
Bake the mini cakes in a preheated 200°C oven for about 10 minutes. The edges should be set while the center remains just undercooked and molten. Timing here is everything; keep an eye on them for that perfect gooey core.
How to Serve Mini Chocolate Lava Cakes

Garnishes
Enhance your Mini Chocolate Lava Cakes with delicate touches like a light dusting of powdered sugar or a few fresh berries for a pop of color and brightness. A dollop of whipped cream or a scoop of vanilla ice cream also adds a lovely contrast to the warm, rich chocolate.
Side Dishes
While these cakes shine brilliantly on their own, serving them alongside fresh fruit or a drizzle of raspberry sauce can elevate the experience. The tartness of berries balances the intense sweetness of the chocolate, making each bite feel delightfully complex.
Creative Ways to Present
For a special occasion, try serving Mini Chocolate Lava Cakes in decorative mini ramekins or even in edible chocolate cups. Layering your plate with edible flowers or crushed nuts adds sophistication and a fun textural surprise.
Make Ahead and Storage
Storing Leftovers
Mini Chocolate Lava Cakes are best enjoyed fresh while the center is melty and warm. If you have leftovers, store them tightly covered in the refrigerator and try to eat within a day or two, although they won’t have quite the same gooey charm when cold.
Freezing
You can freeze the unfrosted cakes before baking by placing the batter-filled ramekins in the freezer. Once frozen solid, wrap them well with plastic wrap and foil. When ready, bake straight from frozen—add a few extra minutes to the baking time to achieve that molten center.
Reheating
To revive your Mini Chocolate Lava Cakes, gently warm them in the oven at a low temperature for a few minutes. Avoid microwaving, which can cause uneven heating and dry out the cake edges while leaving the center hard.
FAQs
Can I use dark chocolate or milk chocolate for Mini Chocolate Lava Cakes?
Absolutely! Dark chocolate creates a richer, more intense flavor, while milk chocolate makes the cakes sweeter and creamier. Choose based on your sweetness preference, but high-quality chocolate always makes a difference.
How do I know when the lava cakes are perfectly baked?
The edges should look firm and set, but the center will still be soft and slightly jiggly. The top might crack just a little, showing that perfect molten core. Overbaking will cook out the gooey center, so timing matters!
Can I make Mini Chocolate Lava Cakes gluten-free?
Yes! You can substitute the all-purpose flour with a gluten-free flour blend that measures cup-for-cup. Just be mindful of the flour’s properties to maintain the right texture.
Do I have to use ramekins, or can I use other molds?
Ramekins are ideal because of their size and heat distribution, but you can use mini muffin tins or silicone molds—just make sure to grease them well. The key is to have individual portions that bake evenly.
Why is the center not molten or gooey?
If your center isn’t molten, it likely baked too long or the oven temperature was too high. Try reducing the bake time slightly or check your oven’s actual temperature with an oven thermometer for accuracy.
Final Thoughts
Making Mini Chocolate Lava Cakes is like capturing a slice of pure joy on a plate. They are simple to make yet incredibly impressive and satisfying to eat. Whether you’re celebrating a special event or just treating yourself after a long day, these warm chocolate delights bring comfort and indulgence in every bite. Don’t hesitate to dive in and share this delicious treasure with friends and family—you’ll find it hard not to come back for seconds!