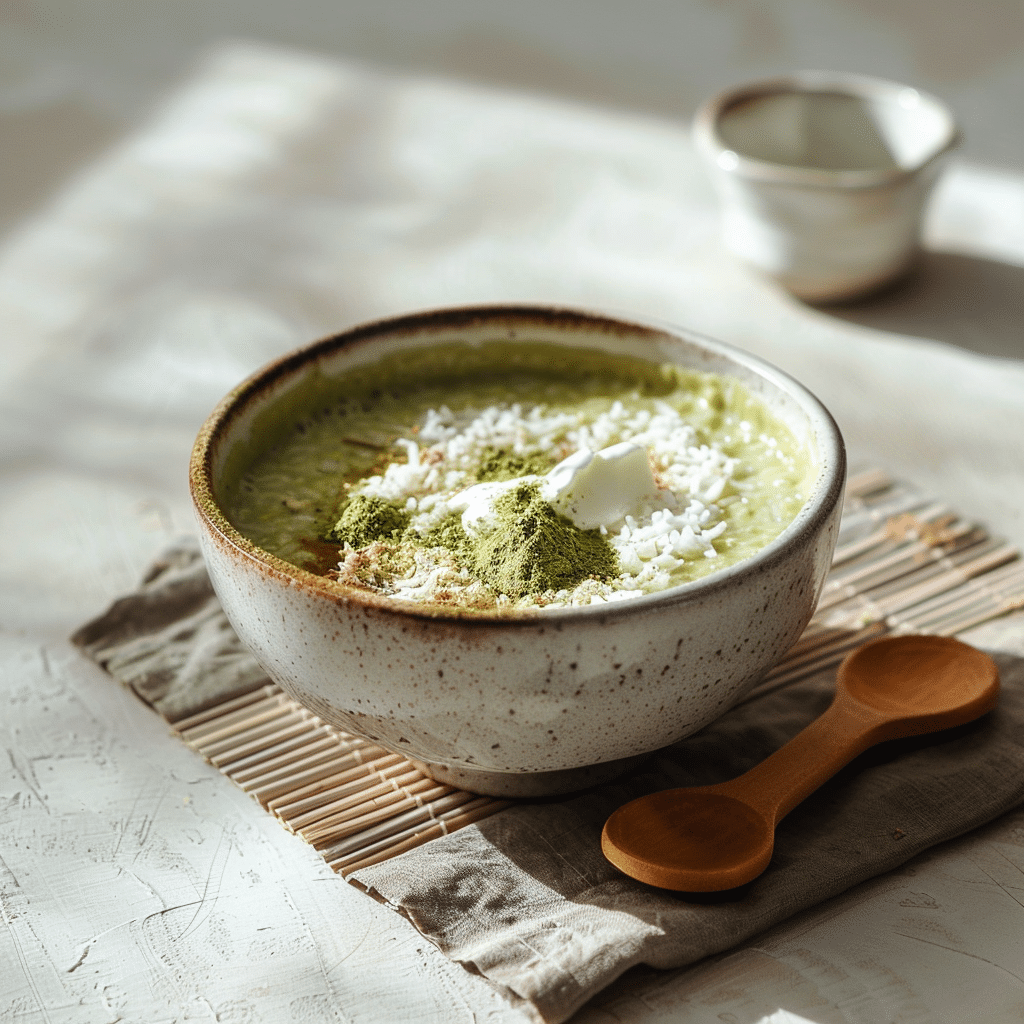
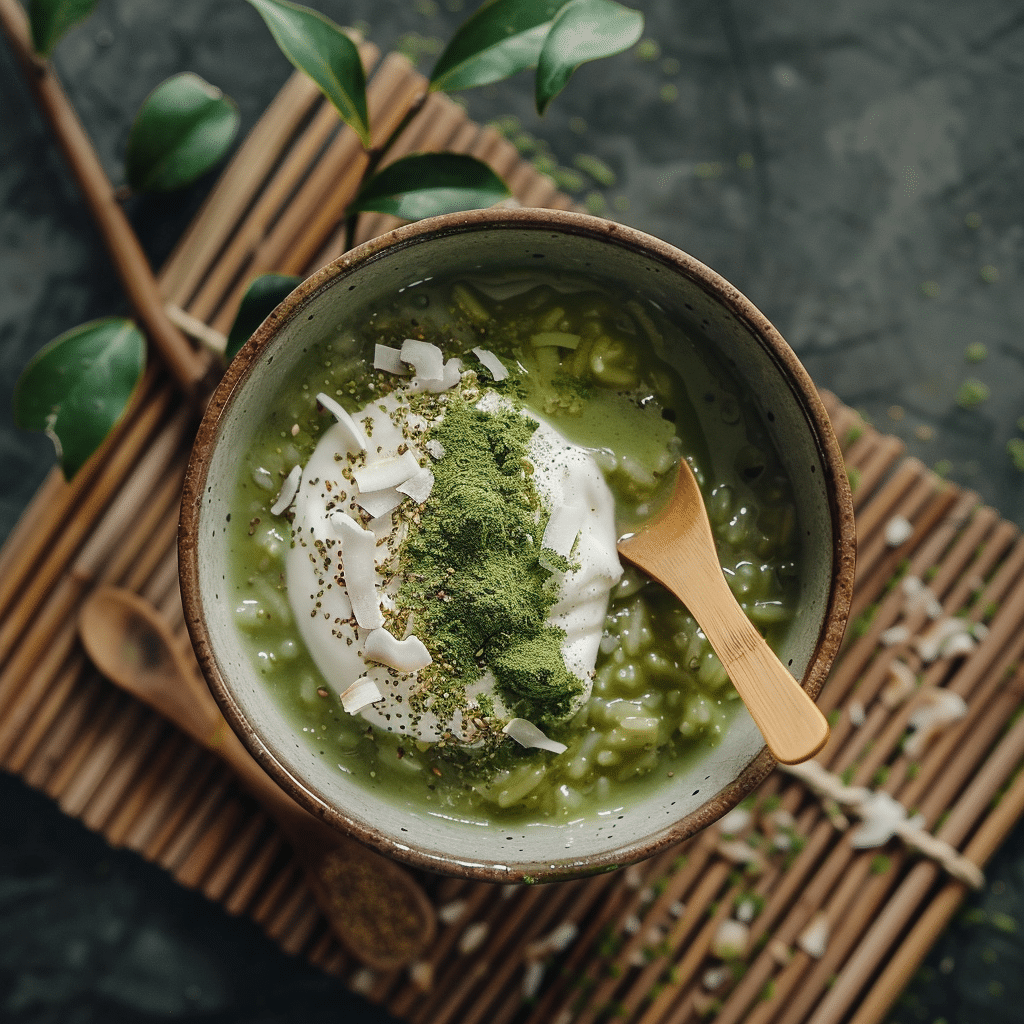
Matcha Coconut Rice Pudding Recipe
If you’re craving a dessert that feels both indulgent and refreshingly different, look no further than this Matcha Coconut Rice Pudding. It’s a creamy, dreamy concoction where delicate Japanese green tea powder meets the rich silkiness of coconut milk, delivering an earthy yet subtly sweet flavor with a smooth texture that’s downright comforting. This unique take on rice pudding not only delights your taste buds but also adds a beautiful pop of green color to your dessert table, making it a showstopper for any occasion.
Ingredients You’ll Need
The magic of this Matcha Coconut Rice Pudding comes down to a handful of simple, wholesome ingredients, each playing its own vital role. From the aromatic, vivid green matcha powder to the luscious coconut milk that creates a creamy base, these components together craft a dessert that’s both satisfying and visually stunning.
- Glutinous rice: provides the perfect sticky and creamy texture essential to rice pudding.
- Matcha powder: adds an earthy, slightly bitter note with that iconic vibrant green color.
- Coconut milk: infuses the pudding with a luscious creaminess and subtle tropical sweetness.
- Sugar: balances the bitterness of matcha and sweetness of coconut for a harmonious flavor.
- Salt: enhances and rounds out all the flavors beautifully.
- Vanilla extract (optional): a hint of warmth that deepens the flavor profile without overpowering the matcha.
How to Make Matcha Coconut Rice Pudding
Step 1: Rinse and Soak the Rice
Start by rinsing your glutinous rice under cold water until the water runs clear—this step washes away excess starch to prevent the pudding from becoming gluey. Soak the rice for at least 30 minutes to soften the grains, which helps achieve that signature creamy texture after cooking.
Step 2: Cook the Rice With Coconut Milk
Drain the soaked rice, then combine it with coconut milk, sugar, salt, and a little water in a heavy-bottomed saucepan. Simmer gently on low heat, stirring regularly to ensure nothing sticks to the bottom. Cooking slowly allows the rice to absorb all the luscious flavors while becoming tender and creamy.
Step 3: Incorporate the Matcha Powder
Once the rice is tender and most of the liquid is absorbed, it’s time to add the star ingredient—matcha powder. Sift the matcha into the pudding to avoid clumps, then stir thoroughly to evenly distribute its beautiful green color and distinct flavor throughout the creamy mixture.
Step 4: Final Simmer and Flavor Adjustment
Let the pudding simmer on very low heat for a few more minutes so the matcha fully infuses into the rice pudding. Taste and adjust sweetness with a bit more sugar if needed. If you want extra depth, a splash of vanilla extract here complements the earthy notes wonderfully.
Step 5: Cool and Serve
Remove the pudding from heat and allow it to cool slightly before serving. It can be enjoyed warm, at room temperature, or chilled—each temperature offering a slightly different but equally delightful experience.
How to Serve Matcha Coconut Rice Pudding
Garnishes
Elevate your serving presentation by topping the Matcha Coconut Rice Pudding with toasted coconut flakes for crunch, a sprinkle of extra matcha powder for an extra green pop, or even a few fresh berries to introduce a burst of color and tanginess. A drizzle of honey or maple syrup also works beautifully if you prefer additional sweetness.
Side Dishes
This pudding pairs wonderfully with light and fresh sides to balance its rich creaminess. Think crisp fruit salads, citrus-infused sorbets, or even a dab of tangy yogurt that complements the earthiness of the matcha without overwhelming the palate.
Creative Ways to Present
Serve individual portions in pretty glass jars or vintage teacups to make your guests feel extra special. Layer the pudding with chia seeds or crushed nuts for an interesting texture contrast. Alternatively, turn it into a frozen treat by pouring it into popsicle molds for a matcha-coconut popsicle that’s perfect for warmer days.
Make Ahead and Storage
Storing Leftovers
Leftover Matcha Coconut Rice Pudding can be stored comfortably in an airtight container in the refrigerator for up to 3 days. This helps the flavors to meld even further, and the pudding thickens up nicely, making it easy to portion out for a quick snack or dessert.
Freezing
You can freeze this pudding, though the texture may slightly change upon thawing. Portion it into freezer-safe containers and freeze for up to one month. When ready to enjoy, thaw it overnight in the fridge for best results.
Reheating
Warm the pudding gently on the stovetop or microwave, stirring occasionally to restore its creamy texture. Add a splash of coconut milk if it has thickened too much while cooling or during storage — this brings it back to that silky consistency we love.
FAQs
Can I use regular rice instead of glutinous rice?
While regular rice can be used, the texture won’t be quite as creamy and sticky. Glutinous rice is essential for that classic pudding consistency that holds everything together beautifully.
Is matcha powder appropriate for people sensitive to caffeine?
Matcha does contain caffeine, though usually less than a cup of coffee. If you are sensitive, consider using smaller amounts or opting for a caffeine-free green tea powder alternative.
Can I substitute coconut milk with another milk?
Yes, you can substitute with almond, oat, or dairy milk, but keep in mind the distinct coconut flavor and creaminess will be diminished, changing the character of the dish significantly.
How sweet should Matcha Coconut Rice Pudding be?
It should have a gentle sweetness that balances the earthy, slightly bitter notes of the matcha without overpowering it. Always adjust sugar to your taste, starting with less and adding more if desired.
Is this recipe vegan?
Absolutely! This version uses coconut milk and plant-based sweeteners, making it a perfect vegan dessert option. Just be sure your sugar is vegan-friendly if you follow strict dietary guidelines.
Final Thoughts
This Matcha Coconut Rice Pudding is a delicious invitation to explore unique flavors in a classic dessert format. It’s simple enough for a weeknight treat yet elegant enough to serve at your next gathering. Give this recipe a try — I promise it will become one of your favorite, go-to comfort desserts that you’ll want to make again and again.