I normally use a 9×13 inch baking dish for these, so lightly grease your baking dish with cooking spray or butter Recipe
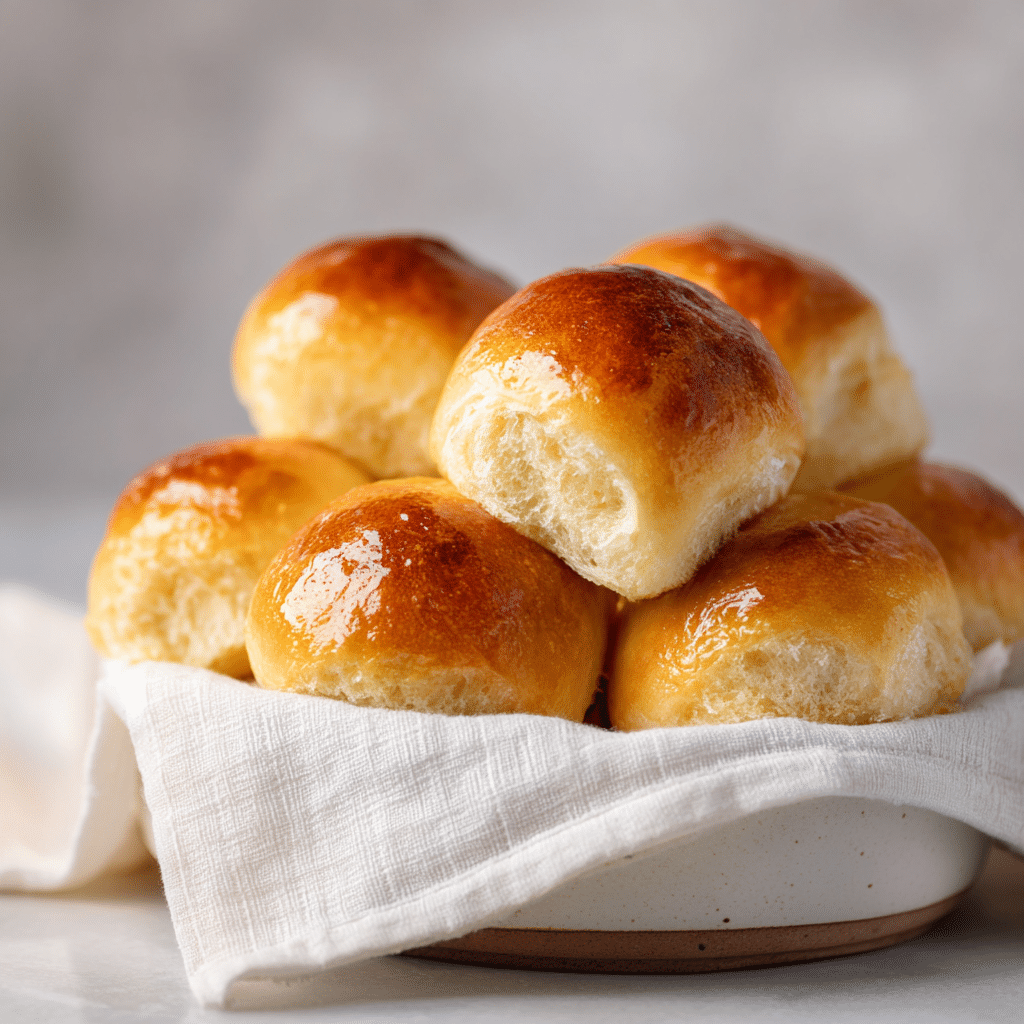
There’s nothing quite like the smell of fresh-baked classic dinner rolls filling your kitchen, warm, soft, and buttery to the core. These rolls are the ultimate comfort food, perfect for mopping up gravy or accompanying your favorite meal. I normally use a 9×13 inch baking dish for these, so lightly grease your baking dish with cooking spray or butter to ensure the rolls bake up with a golden crust and soft interior every time. Trust me, this simple step makes a world of difference and helps you get those perfect fluffy rolls you’ll want to eat straight from the pan.
Ingredients You’ll Need
The beauty of this recipe is how straightforward and essential the ingredients are. Each one plays a vital part: the yeast brings life to the dough, the sugar adds a hint of sweetness, and the butter makes the rolls irresistibly tender. These ingredients come together to create a texture that’s just fluffy enough and a flavor that feels both homey and classic.
- 2½ teaspoon active dry yeast: This helps your rolls rise beautifully and gives them a lovely airy texture.
- 1 tablespoon sugar: Feeds the yeast and adds subtle sweetness to balance the flavors.
- 1 cup warm milk (100 to 110°F): Activates the yeast gently and contributes to a soft crumb.
- 8 tablespoons unsalted butter, melted: Adds richness and moisture for those melt-in-your-mouth rolls.
- ⅓ cup sugar: Sweetens the dough for that classic dinner roll taste without being overpowering.
- 3 egg yolks: Enrich the dough, giving the rolls a tender crumb and beautiful color.
- 1 teaspoon salt: Balances flavor and enhances the yeast’s performance.
- 4 cups all-purpose flour: The structure of your rolls; it’s important to measure properly for the right texture.
- 1 egg white, lightly beaten: Creates a shiny, golden crust when brushed on before baking.
- 2 tablespoons poppy seeds (optional): Adds a subtle crunch and visual appeal.
- 2 tablespoons sesame seeds (optional): Gives a nutty flavor and decorative finish.
How to Make I normally use a 9×13 inch baking dish for these, so lightly grease your baking dish with cooking spray or butter
Step 1: Activate the yeast
Start by combining your yeast, 1 tablespoon of sugar, and warm milk in the mixer bowl. Whisk them gently so everything dissolves and let the mixture sit for 10 to 15 minutes. If your yeast is active, you’ll see a nice frothy foam on top—that’s a sign that magic is happening and your rolls will rise beautifully.
Step 2: Make the dough
Next, add your melted butter, sugar, egg yolks, salt, and flour to the yeast mixture. Using the dough hook attachment, mix on low speed until incorporated, then bump it up to medium-high and knead for about 5 minutes. The dough should feel slightly sticky but still soft—perfect for fluffy rolls.
Step 3: First rise
Place your dough in a lightly greased bowl, cover it with plastic wrap, and let it rest in a warm spot until it doubles in size, which usually takes between 45 minutes and an hour. This slow rise develops flavor and gives your rolls that tender texture we all love.
Step 4: Prepare the baking dish
I normally use a 9×13 inch baking dish for these, so lightly grease your baking dish with cooking spray or butter—this simple step prevents sticking and encourages even browning, setting the stage for perfect rolls.
Step 5: Form the rolls
Generously dust your work surface with flour. Turn the dough out and gently press it down to deflate. Shape into a ball, divide into 16 equal pieces, and then shape each piece into a smooth ball by folding the sides underneath and rolling it slightly on the surface. Place each roll smooth side up in your prepared baking dish.
Step 6: Second rise
Cover the baking dish with plastic wrap or a clean towel and let the rolls rise again until doubled in size, about 30 minutes. This second rise is crucial for light and airy rolls.
Step 7: Prepare oven and brush rolls
Preheat your oven to 375°F. Before baking, brush each roll with the lightly beaten egg white—this will give you that beautiful, glossy golden finish after baking. Sprinkle with poppy seeds or sesame seeds if you’re feeling fancy.
Step 8: Bake
Pop your rolls into the oven and bake for about 30 minutes, or until the tops are a deep golden brown. The aroma alone will have your mouth watering. Once baked, let them cool slightly before serving to enjoy the ultimate softness.
How to Serve I normally use a 9×13 inch baking dish for these, so lightly grease your baking dish with cooking spray or butter
Garnishes
These classic dinner rolls shine on their own, but for an extra touch, brush them with melted butter right after they come out of the oven. A sprinkle of flaky sea salt or fresh herbs like rosemary or thyme adds a pop of flavor and makes them even more inviting. Seeds add texture and visual flair too, making every bite exciting.
Side Dishes
Classic dinner rolls are a dream paired with hearty soups, stews, or roasted meats. Think creamy mashed potatoes, savory gravy, or a colorful roasted vegetable medley. They’re also incredible with a smear of jam or honey for a sweet twist during brunch.
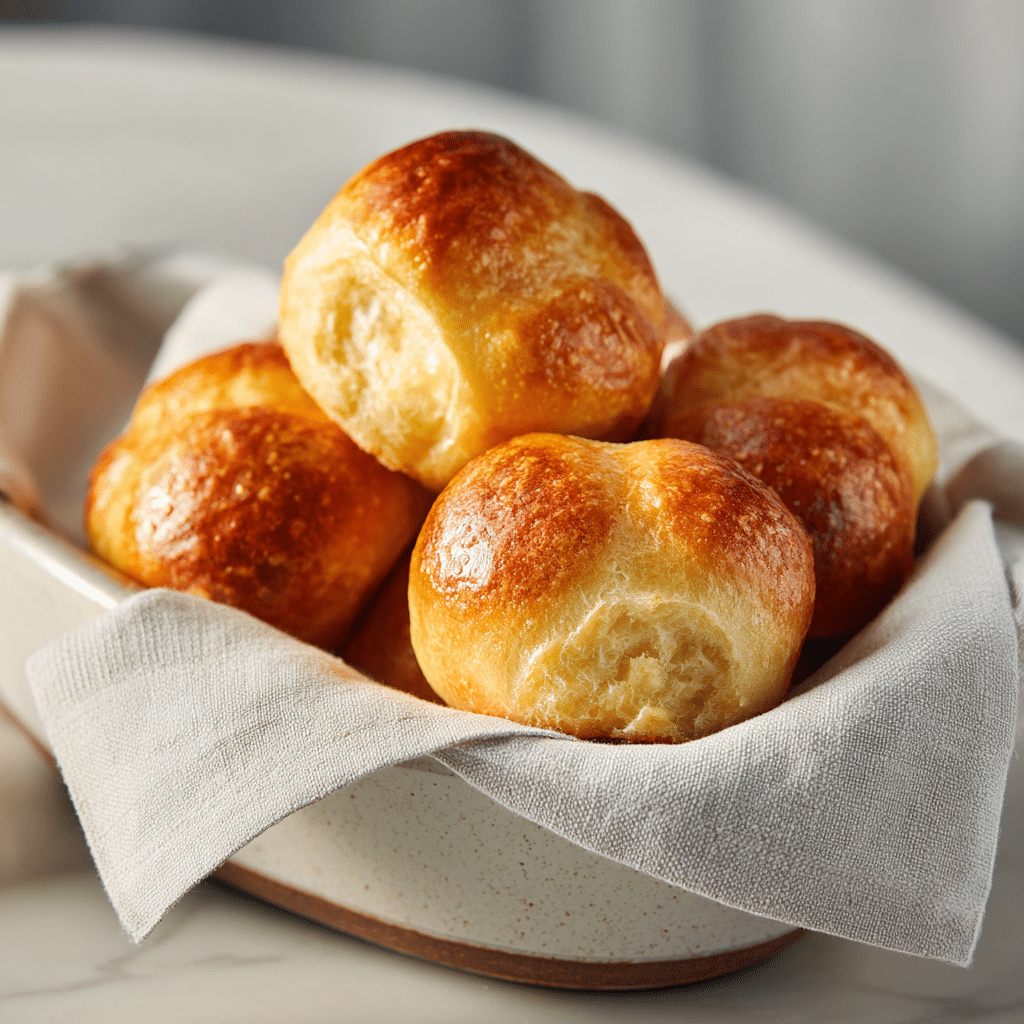
Creative Ways to Present
For gatherings, arrange the rolls in a basket lined with a soft kitchen towel to keep them warm, or serve them in your greased baking dish straight from the oven for a rustic feel. You can even slice them in half and build mini sliders with your favorite fillings for a fun party appetizer.
Make Ahead and Storage
Storing Leftovers
Leftover rolls store wonderfully in an airtight container at room temperature for up to 2 days. Keeping them covered prevents them from drying out, maintaining that soft, inviting texture.
Freezing
These rolls freeze beautifully too! Once completely cooled, wrap them tightly in plastic wrap and then foil or place in a freezer bag. They’ll keep in the freezer for up to 3 months. When ready to eat, thaw overnight in the fridge for best results.
Reheating
To enjoy your rolls warm after storage or freezing, wrap them in foil and heat in a 350°F oven for 10-15 minutes. This brings back the fresh-baked softness and warmth that makes these rolls irresistible.
FAQs
Can I use instant yeast instead of active dry yeast?
Absolutely! If you choose instant yeast, there is no need to proof it in warm milk beforehand. Just add it directly with the rest of your dry ingredients, and proceed as usual. This makes your prep even quicker while still giving you wonderful results.
What if my dough feels too sticky?
A slightly sticky dough is perfect here, as it keeps the rolls tender. However, if it’s too sticky to handle, sprinkle a little bit more flour onto your work surface and your hands when shaping. Just avoid adding too much flour, or your rolls could turn out dense.
How can I speed up the rising time?
If you’re short on time, you can create a warm, draft-free environment by placing your dough in the oven with the light on or heating the oven to 200°F, then turning it off before putting in the dough. This gentle warmth helps the yeast work faster and can cut your rising time roughly in half.
Why is it important to brush the rolls with egg white?
Brushing your rolls with egg white before baking gives them a beautiful shiny, golden crust that’s visually appealing and adds a slight crispness without drying out the soft interior.
Do I have to use seeds on top?
Not at all! Seeds are entirely optional and just add a bit of texture and flavor. If you prefer plain rolls, you can skip this step, and they will still be deliciously satisfying.
Final Thoughts
Making these classic dinner rolls is truly a labor of love that pays off with every soft, buttery bite. I normally use a 9×13 inch baking dish for these, so lightly grease your baking dish with cooking spray or butter to get the best results every time. Whether you’re baking for a family dinner or a festive occasion, these rolls will quickly become a treasured staple. So go ahead, roll up your sleeves, and enjoy the simple joy of fresh homemade bread!