Creamy Peanut Butter Fudge (Low Sugar Version) Recipe
If you are craving a sweet treat that feels indulgent but won’t weigh you down, you have to try this Creamy Peanut Butter Fudge (Low Sugar Version). This delightful recipe captures all the rich, melt-in-your-mouth goodness of classic peanut butter fudge but cleverly cuts back on the sugar without sacrificing flavor. Made with simple, wholesome ingredients like natural peanut butter and coconut cream, it’s smooth, nutty, and perfectly balanced with just a touch of maple syrup. Whether you want a guilt-free snack or a delicious dessert to impress guests, this fudge is sure to become your new favorite.
Ingredients You’ll Need
The magic of this Creamy Peanut Butter Fudge (Low Sugar Version) lies in its simple yet essential ingredients. Each one plays a special role in creating that dreamy texture and rich peanut flavor while keeping things light and satisfying.
- Natural peanut butter (1 cup): Use unsweetened and creamy for the best smoothness and authentic peanut flavor.
- Coconut oil (¼ cup): It melts down to add silkiness and helps the fudge set beautifully in the fridge.
- Maple syrup (2 tbsp): Adds just a hint of natural sweetness that perfectly complements the peanuts without overpowering them.
- Vanilla extract (½ tsp): Enhances the overall flavor with a warm, fragrant note.
- Sea salt (pinch): Balances the sweetness and intensifies the nutty flavors even more.
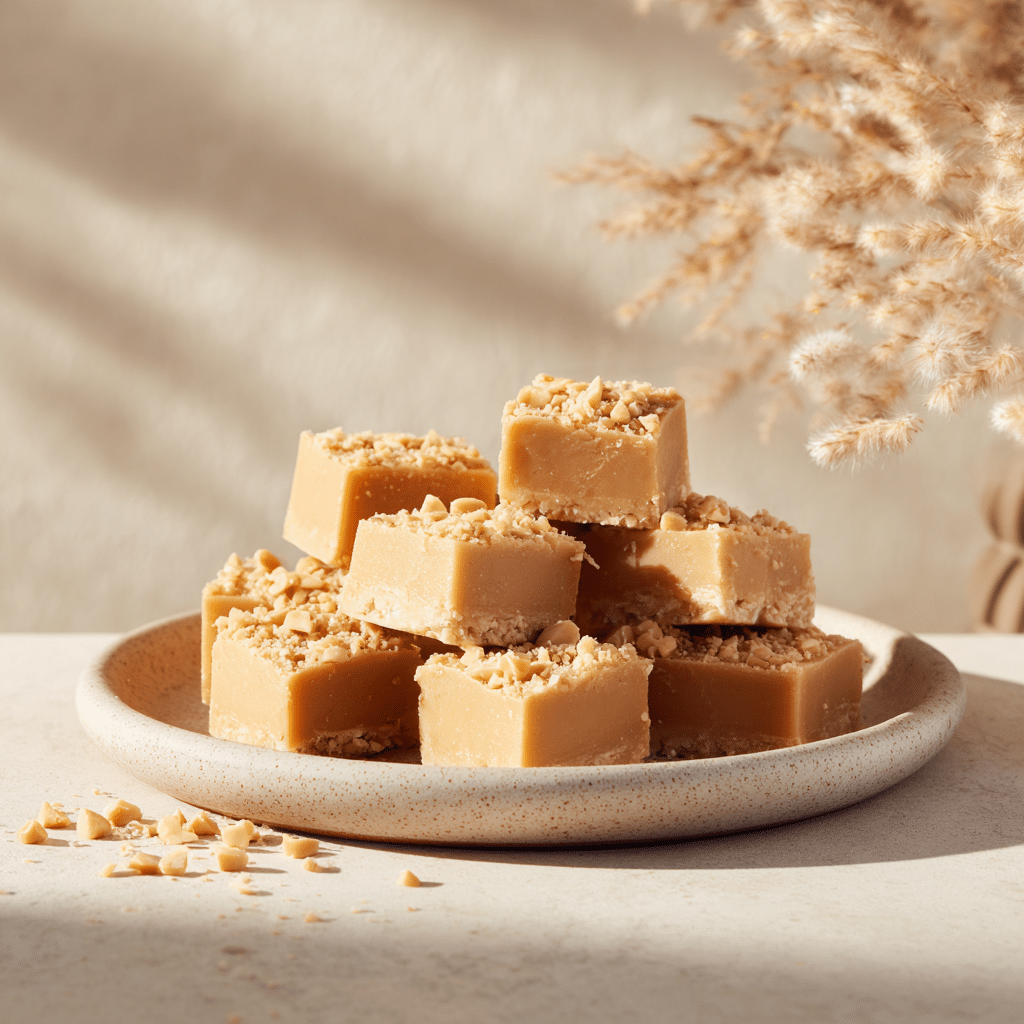
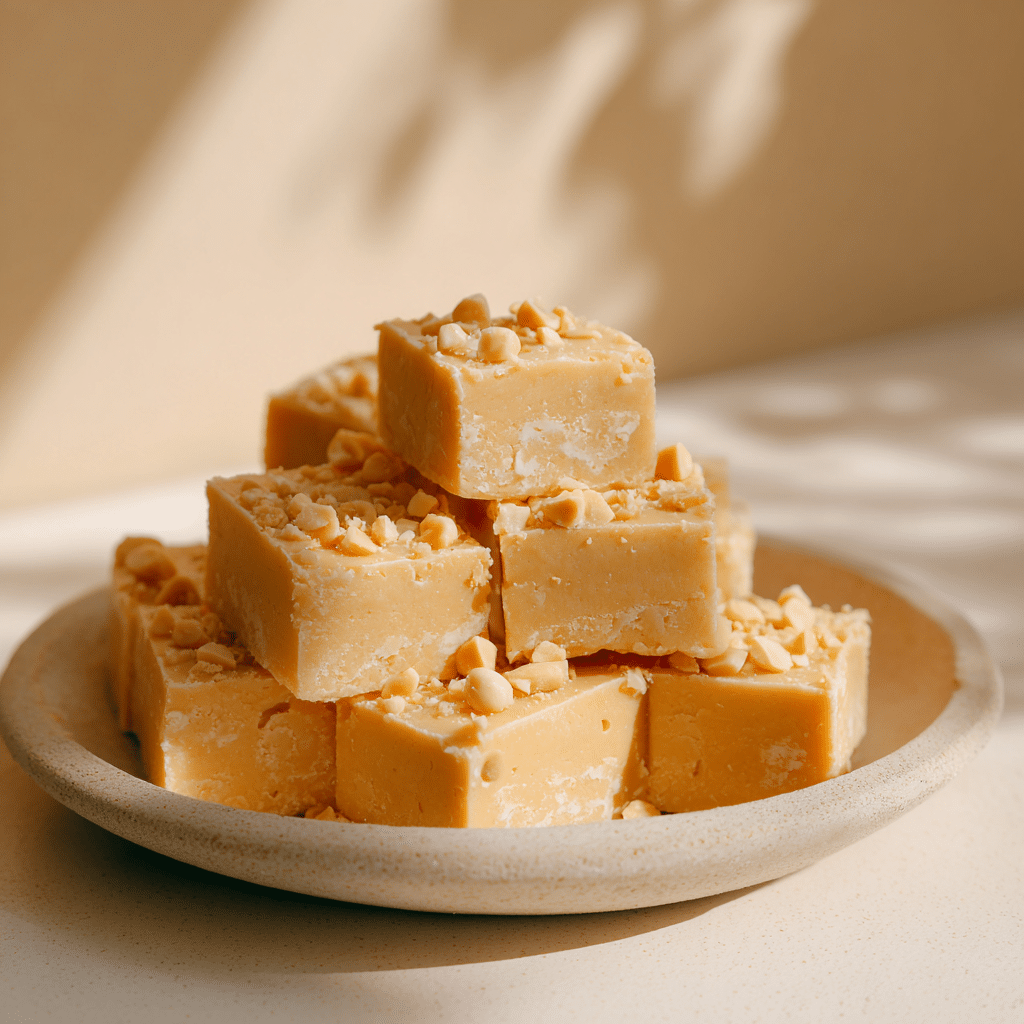
- Crushed roasted peanuts (optional): For a crunchy topping that adds texture and an extra peanut punch.
How to Make Creamy Peanut Butter Fudge (Low Sugar Version)
Step 1: Melt the coconut oil gently
Begin by placing the coconut oil in a small saucepan and warming it over low heat. This ensures it liquefies without burning, setting the stage for a smooth fudge base.
Step 2: Incorporate the peanut butter
Once the coconut oil is melted, stir in your natural peanut butter. Keep mixing until the blend turns perfectly smooth and creamy—no lumps here, just rich, velvety goodness.
Step 3: Sweeten and flavor
Add the maple syrup, vanilla extract, and a pinch of sea salt to the mix. Stir thoroughly until the mixture becomes glossy, signaling that all elements are harmoniously combined.
Step 4: Prepare and pour
Line a small square baking pan with parchment paper. This simple step prevents sticking and makes removing the fudge a breeze. Pour in the warm peanut butter mixture, spreading it evenly with a spatula for a flat surface.
Step 5: Top and chill
If you’re using crushed roasted peanuts, sprinkle them generously over the top now. Transfer the pan to your refrigerator and let it chill for at least two hours or until the fudge is firm enough to cut into squares without crumbling.
How to Serve Creamy Peanut Butter Fudge (Low Sugar Version)
Garnishes
Enhance your fudge with a variety of garnishes to amp up the flavor and texture. Chopped toasted peanuts add crunch, a light drizzle of melted dark chocolate complements the peanut flavor beautifully, or a sprinkle of flaky sea salt can create a perfect sweet-salty balance.
Side Dishes
This fudge pairs wonderfully with a cup of steaming coffee or a creamy herbal tea, making it a perfect afternoon pick-me-up. For those looking to keep things healthy, serve alongside fresh berries to brighten the palate and add a juicy contrast.
Creative Ways to Present
Thinking beyond the usual squares? Try cutting the fudge into bite-sized cubes and placing them on pretty toothpicks for party treats. Or, layer chunks between sheets of wax paper and pack them in a jar tied with a ribbon for charming homemade gifts.
Make Ahead and Storage
Storing Leftovers
This Creamy Peanut Butter Fudge (Low Sugar Version) keeps beautifully in an airtight container in the fridge for up to a week. The cooler temperature helps maintain its creamy yet firm texture, so each bite remains perfectly satisfying.
Freezing
If you want to keep your fudge longer, it freezes wonderfully. Just wrap individual pieces tightly in plastic wrap and place them in a freezer-safe container. When you’re ready to enjoy, thaw in the fridge for the best texture.
Reheating
Since this fudge is best enjoyed cold or at room temperature, reheating isn’t usually necessary. If you prefer it a little softer, leave it out for 10-15 minutes before serving to bring out that luscious creaminess.
FAQs
Can I use crunchy peanut butter instead of creamy?
You can, but it will change the texture of your fudge. The creamy version ensures a smooth finish, while crunchy will add bits of peanuts throughout for a chewier bite.
Is maple syrup necessary, or can I substitute another sweetener?
Maple syrup adds a lovely natural sweetness and depth, but you can swap it for agave syrup or honey if preferred. Just keep the quantity the same to keep that perfect balance.
What if I don’t have coconut oil?
Coconut oil helps this fudge firm up nicely, but you can use unsalted butter as a substitute. The flavor might be slightly different, but the texture will remain creamy and delicious.
Can I make this fudge dairy-free?
Absolutely! This recipe is already dairy-free thanks to coconut oil and natural peanut butter, making it a fantastic choice for those avoiding dairy but still craving creamy indulgence.
How do I prevent the fudge from being too hard?
If your fudge turns out firmer than you like, store it in the fridge rather than the freezer, or let it sit at room temperature for a few minutes before eating. Using natural peanut butter with some oil content also helps keep it soft.
Final Thoughts
There’s something so satisfying about enjoying a dessert that feels lavish but doesn’t tip the scales on sugar. This Creamy Peanut Butter Fudge (Low Sugar Version) offers just that—it’s smooth, flavorful, and easy to make with wholesome ingredients you can feel good about. Next time you need a sweet treat or want to impress friends with a healthier dessert option, give this fudge a try. It’s the kind of recipe you’ll want to keep coming back to again and again.