Christmas Cake Pops: 5 Sweet Ways to Spread Cheer Recipe
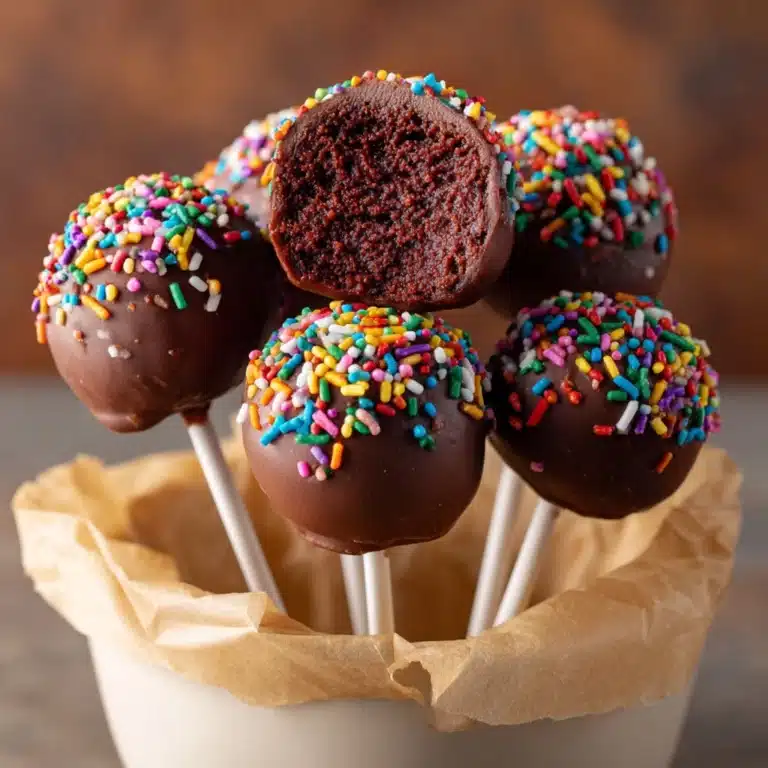
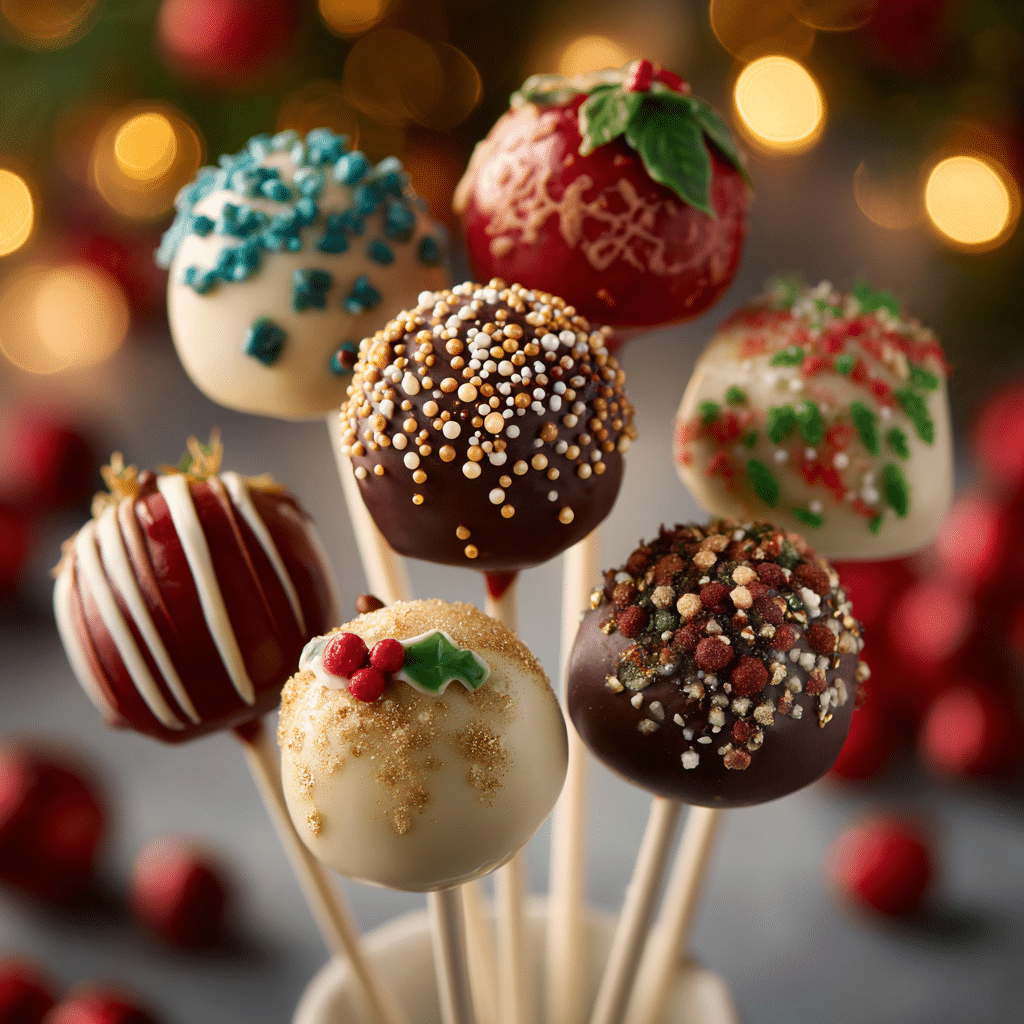
There is something undeniably magical about Christmas Cake Pops: 5 Sweet Ways to Spread Cheer that makes them the perfect holiday treat. These delightful little bites combine moist chocolate cake with rich frosting, all wrapped up in a smooth coating of melted white chocolate. The festive sprinkles add an extra pop of color and joy, making them not only delicious but also irresistible to the eyes. Whether you are baking for a big holiday party or gifting these to loved ones, these cake pops capture the true spirit of Christmas in every sweet bite.
Ingredients You’ll Need
Gathering simple and versatile ingredients is the first step toward creating these charming Christmas Cake Pops: 5 Sweet Ways to Spread Cheer. Each item plays a crucial role, whether it’s the cake mix providing a moist base, the frosting binding it all together, or the white chocolate chips that give the perfect coating.
- Chocolate cake mix: The foundation that guarantees a rich and tender crumb for your cake pops.
- Frosting (1 cup): Acts as the glue to hold your cake crumbs tightly together for easy shaping.
- White chocolate chips: Perfect for melting into a smooth, glossy coating to dip your cake pops.
- Sprinkles: Add festive flair and a fun crunch to your holiday treats.
- Wooden sticks: Essential for holding your cake pops and making them easy to serve.
How to Make Christmas Cake Pops: 5 Sweet Ways to Spread Cheer
Step 1: Bake the cake
Start this joyful adventure by preparing your chocolate cake mix exactly as the package directs. Baking the cake properly is key since the texture will affect how well your cake pops hold together. Once baked, be patient and allow your cake to cool completely to avoid melting the frosting later.
Step 2: Crumble and combine with frosting
Once cool, crumble the chocolate cake into fine crumbs inside a large mixing bowl. Now, add the frosting gradually, mixing until the consistency is perfect—not too wet and sticky, but enough to hold firm when shaped. This step really enhances the flavor and ensures your cake pops stay intact.
Step 3: Form the cake balls and chill
Using your hands or a small scoop, form the mixture into bite-sized balls and place them neatly on a baking sheet. Pop the tray in the fridge for at least 30 minutes. Chilling is essential because it firms up the cake balls, making dipping them easier and less messy.
Step 4: Prepare the coating and insert sticks
Melt the white chocolate chips carefully in a microwave-safe bowl. Dip the tip of each wooden stick into the melted chocolate before inserting it into a cake ball—this acts like glue, keeping the stick in place securely.
Step 5: Dip and decorate
One by one, dip each cake ball into the melted white chocolate, rotating to cover fully. While the coating is still wet, sprinkle your festive sprinkles generously. Allow the pops to set by standing them upright in a foam block or a cake pop stand for perfectly smooth finishes.
How to Serve Christmas Cake Pops: 5 Sweet Ways to Spread Cheer

Garnishes
Elevate your Christmas Cake Pops: 5 Sweet Ways to Spread Cheer by choosing garnishes that complement the festive theme. Classic choices like crushed candy canes, colored sugar crystals, or edible glitter can add sparkle and texture that will wow guests.
Side Dishes
Pair these cake pops with cozy drinks such as hot cocoa or spiced mulled wine for a comforting holiday spread. Consider serving alongside a cheese board with mild cheeses and fruit preserves, creating a balance between sweet and savory flavors for your guests.
Creative Ways to Present
Presentation counts when spreading cheer! Arrange the cake pops in mason jars filled with festive tissue paper or place them in decorative foam blocks adorned with ribbons. Wrapping individual pops in clear cellophane tied with a bow makes for adorable edible gifts as well.
Make Ahead and Storage
Storing Leftovers
Keep your cake pops fresh by storing them in an airtight container in a cool, dry place. If your home is warm, refrigeration is best to prevent the chocolate coating from melting, but bring them to room temperature before serving for the best flavor.
Freezing
Christmas Cake Pops: 5 Sweet Ways to Spread Cheer freeze beautifully! Place them on a baking sheet to freeze individually before transferring them into a freezer-safe container. This way, you can enjoy homemade holiday treats long after the season.
Reheating
When you’re ready to indulge, simply thaw the cake pops at room temperature. Avoid microwaving as this might melt the coating. Patience yields the perfect texture and enjoyment in every bite.
FAQs
Can I use a different kind of cake mix?
Absolutely! Feel free to experiment with any cake flavor you love. Vanilla, red velvet, or even spice cake will work wonderfully with this recipe and change up the festive vibe.
What if I don’t have wooden sticks?
You can use sturdy lollipop sticks or even candy canes for a holiday twist. Just make sure whatever you use is strong enough to support the weight of the cake pops.
How long do these cake pops last?
When stored properly in an airtight container, cake pops can stay fresh for about 3 to 5 days. For best taste and texture, consume them within this timeframe.
Can I make these dairy-free?
Yes! Use a dairy-free frosting and choose dairy-free white chocolate or candy melts. This way, everyone can enjoy these Christmas Cake Pops: 5 Sweet Ways to Spread Cheer without worry.
How do I prevent the cake pops from falling off the sticks?
Dipping the stick tip in melted chocolate before inserting it into the cake ball is a game-changer. It acts like a glue, creating a strong bond. Also, chilling the cake balls well before dipping helps them hold their shape nicely.
Final Thoughts
I can’t recommend these Christmas Cake Pops: 5 Sweet Ways to Spread Cheer enough for making your holiday celebrations extra joyful. They’re fun to create, delicious to eat, and shareable in all the best ways. Give them a try and watch smiles light up around the room with every little bite of sweetness!