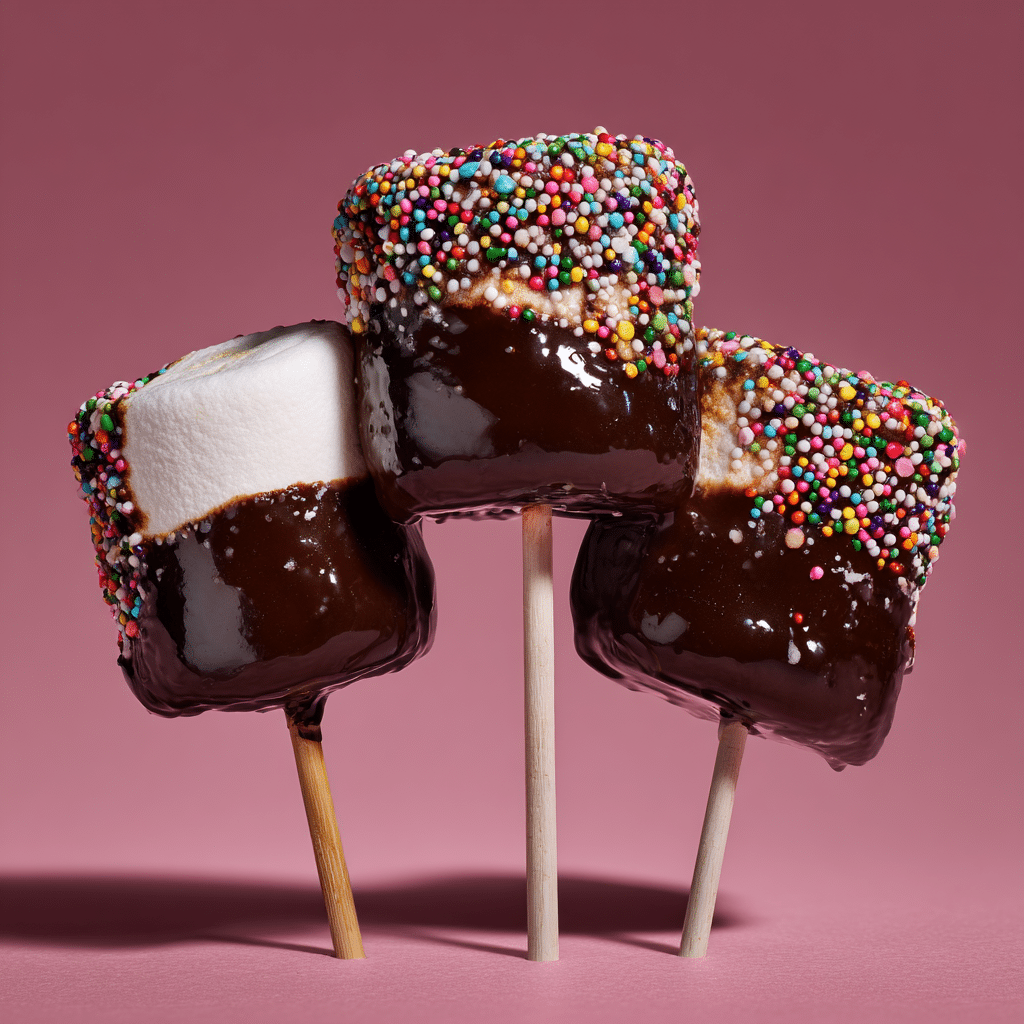
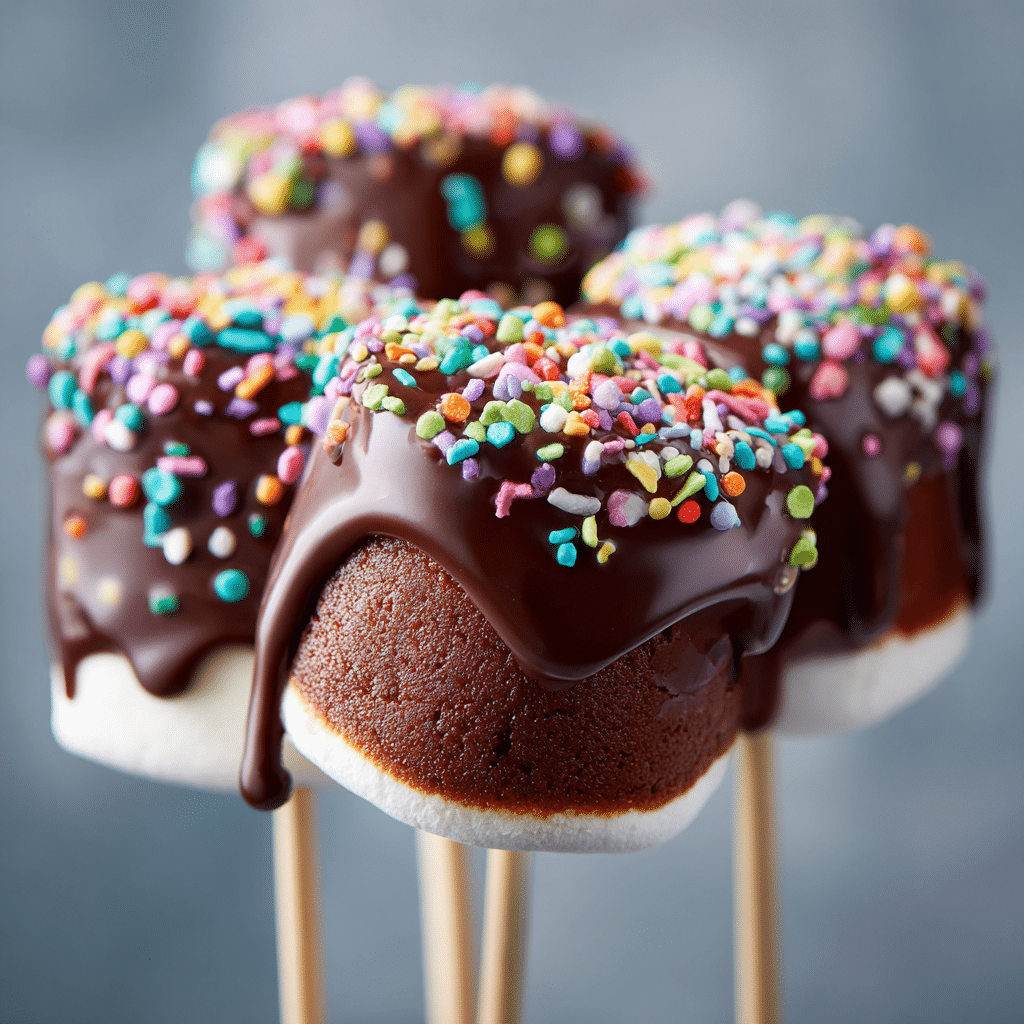
Chocolate Dipped Marshmallow Sticks Recipe
There is something magically simple and utterly delightful about Chocolate Dipped Marshmallow Sticks. These treats combine the pillowy softness of marshmallows with the rich, smooth embrace of melted chocolate, finished with a playful sprinkle of colorful toppings. Whether you’re making them for a kids’ party, a cozy family night, or just a spontaneous sweet craving, these sticks turn ordinary marshmallows into an irresistible dessert that’s as fun to make as it is to eat.
Ingredients You’ll Need
The beauty of Chocolate Dipped Marshmallow Sticks lies in their simplicity. Each ingredient plays a crucial role in creating that perfect balance of texture and taste, coloring the experience with both visual appeal and delicious flavor.
- Large marshmallows: These are the fluffy stars of the show, offering a soft, airy base that melts in your mouth.
- Chocolate chips or melting chocolate: Choose good-quality chocolate for a silky dip that hardens with a gentle snap.
- Colored sprinkles or crushed nuts: These add eye-catching color and an exciting crunch that contrast beautifully with the smooth chocolate and soft marshmallows.
- Wooden skewers or sticks: Essential for dipping and easy handling, they turn this treat into a fun-to-eat handheld delight.
How to Make Chocolate Dipped Marshmallow Sticks
Step 1: Prepare Your Marshmallows
Start by inserting wooden sticks gently into each marshmallow, making sure they’re secure but not squished. This will give you the perfect handle to dip your marshmallows smoothly into the chocolate later. It’s a simple step that sets you up for success and helps keep things clean and easy to eat.
Step 2: Melt the Chocolate
Next, melt your chocolate chips or melting chocolate in a microwave-safe bowl or over a double boiler. Stir frequently to ensure the chocolate melts evenly and becomes luxuriously smooth. Don’t rush this step—the silky texture is what will coat your marshmallows to chocolatey perfection.
Step 3: Dip the Marshmallows
Now comes the fun part! Dip each marshmallow into the melted chocolate, swirling to coat it completely. Let the excess chocolate drip off, but don’t wait too long before moving to the next step to keep things neat and tidy.
Step 4: Add Your Toppings
Before the chocolate sets, sprinkle on your chosen toppings—colorful sprinkles, crushed nuts, or even mini candies work beautifully. This step brings an extra layer of texture and an irresistible pop of color that transforms plain marshmallows into festive treats.
Step 5: Let Them Cool and Set
Place the dipped marshmallows on wax paper or a lined tray, allowing the chocolate to cool and harden naturally. This usually takes about 15 to 20 minutes at room temperature, or you can speed things up by popping them in the fridge for a few minutes. Once firm, your Chocolate Dipped Marshmallow Sticks are ready to enjoy!
How to Serve Chocolate Dipped Marshmallow Sticks
Garnishes
When it comes to garnishing, think beyond the basics to elevate your sticks. Try edible glitter, crushed peppermint, or even a drizzle of white chocolate for a contrasting touch. Garnishes aren’t just pretty—they add delightful flavors and textures that keep every bite exciting.
Side Dishes
Pair your sticks with simple sides like fresh berries, a glass of cold milk, or a scoop of vanilla ice cream. These complementary tastes balance the sweetness and keep your dessert experience fresh and satisfying.
Creative Ways to Present
Presentation can be just as fun as the making. Arrange the Chocolate Dipped Marshmallow Sticks standing upright in a decorated jar filled with colored sugar or mini marshmallows. Or create a dessert platter with varying chocolate coatings and toppings to showcase your creativity. These ideas make your treats a stunning centerpiece for any occasion.
Make Ahead and Storage
Storing Leftovers
If you end up with extras, store your Chocolate Dipped Marshmallow Sticks in an airtight container at room temperature. Avoid humid spots to keep the chocolate from melting or getting sticky, and consume within 2-3 days for the best texture and flavor.
Freezing
You can freeze these treats if you want to keep them longer. Place the sticks on a baking sheet to freeze individually first, then transfer to a freezer-safe bag. Thaw at room temperature when ready to enjoy, though the texture of the marshmallow might soften slightly after freezing.
Reheating
Reheating isn’t typically necessary, but if you’d like to soften the chocolate just a bit, gently warm the sticks in a low-temperature oven for a few minutes or in a microwave on a very low setting. Keep a close eye to avoid melting the toppings.
FAQs
Can I use different types of chocolate for Chocolate Dipped Marshmallow Sticks?
Absolutely! Milk, dark, or white chocolate all work wonderfully. Each brings its own flavor profile, so feel free to experiment depending on your preference or the occasion.
Are Chocolate Dipped Marshmallow Sticks kid-friendly to make?
Yes! Kids love helping insert the sticks, dipping marshmallows, and choosing toppings. It’s a fantastic hands-on activity that also teaches basic kitchen skills and creativity.
What toppings work best on Chocolate Dipped Marshmallow Sticks?
Beyond traditional sprinkles, try crushed cookies, chopped nuts, shredded coconut, or even tiny candy pieces. The options are endless and fun to mix and match.
How long does it take for the chocolate to set?
At room temperature, about 15-20 minutes is usually enough. Chilling in the refrigerator can speed this up to around 5-10 minutes.
Can I make these gluten-free?
Definitely! Marshmallows and plain chocolate are naturally gluten-free, just be sure to select gluten-free toppings and check your chocolate packaging for any cross-contamination notices.
Final Thoughts
Chocolate Dipped Marshmallow Sticks are a wonderfully simple treat that brings joy to every occasion. Their inviting combination of textures, playful colors, and ease of preparation make them a standout favorite to share with loved ones. Give this recipe a go and watch smiles grow as everyone delights in their homemade sweetness!