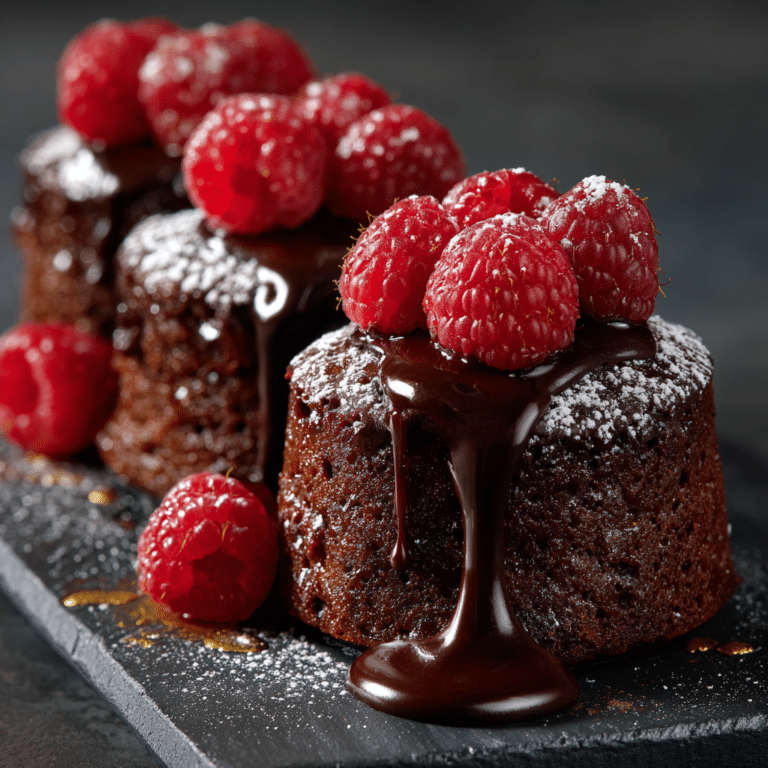
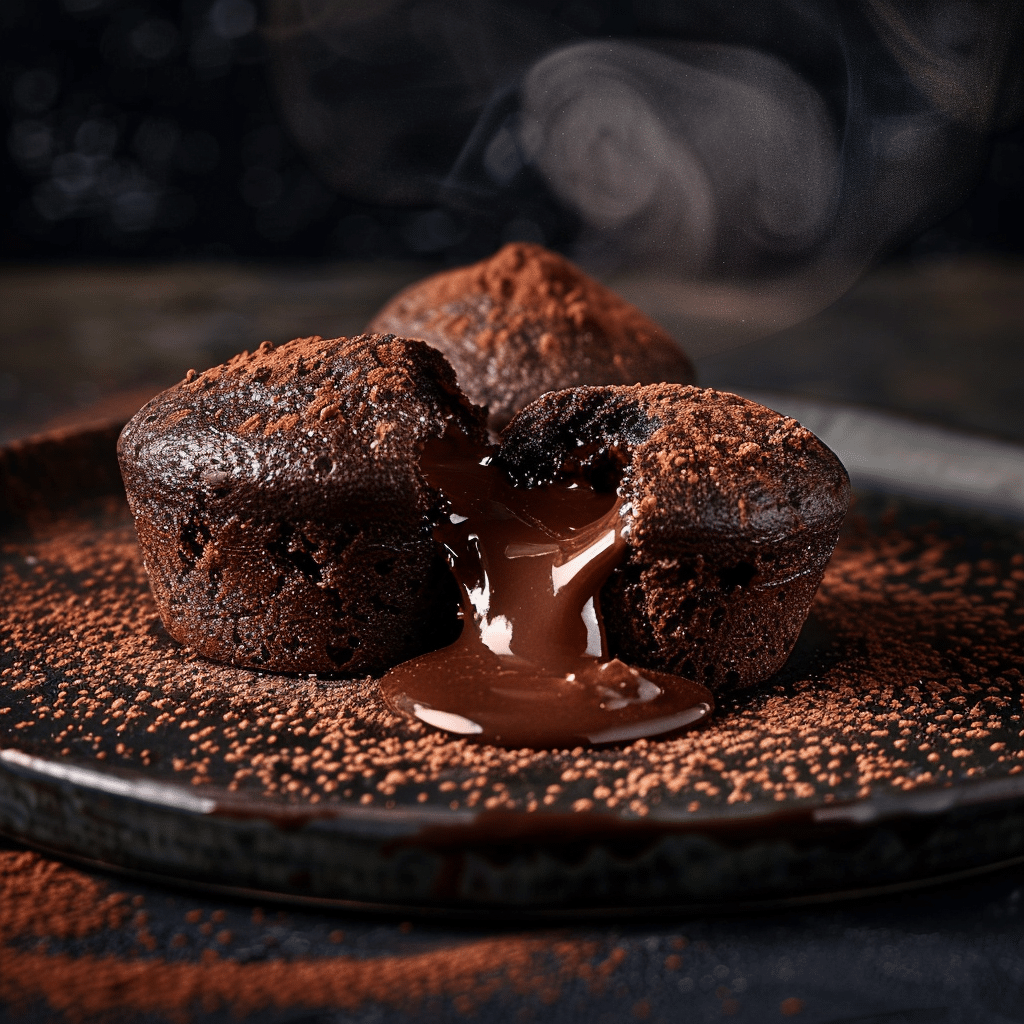
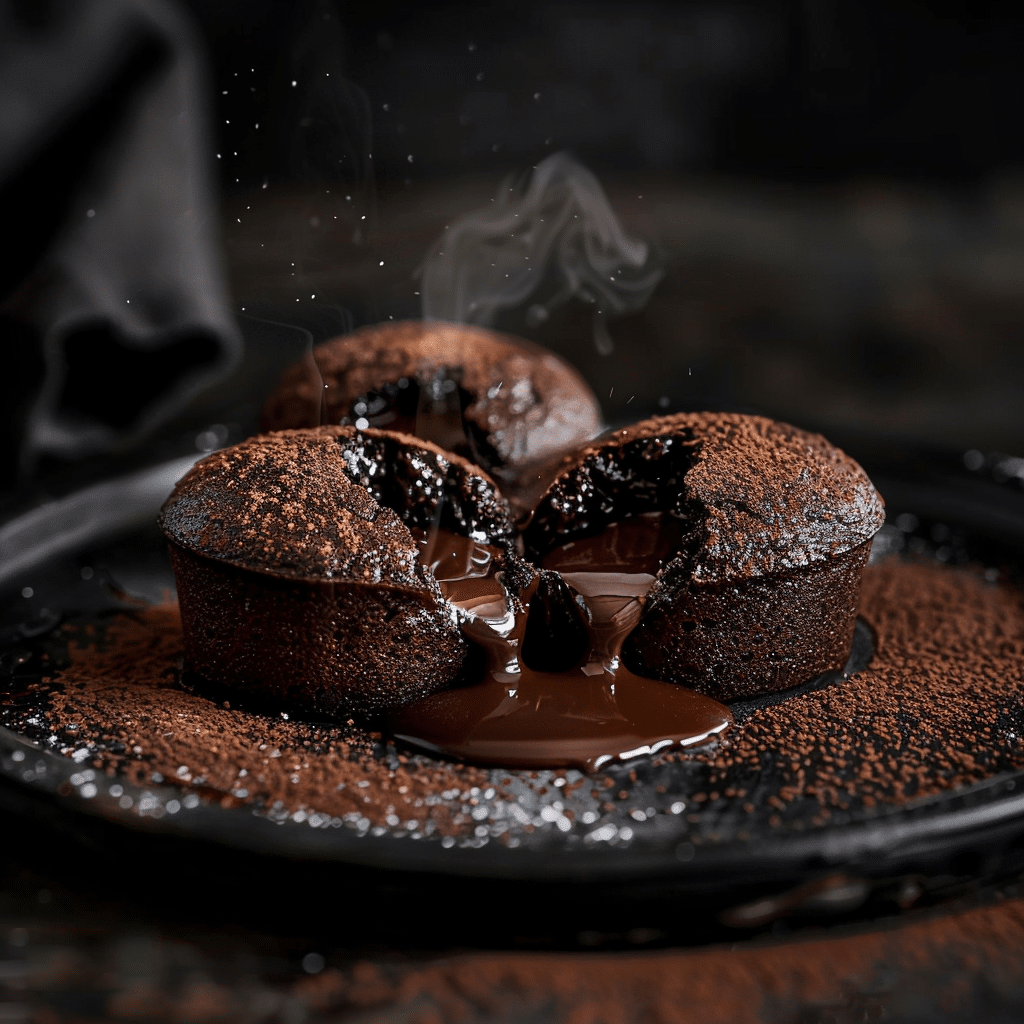
Dreamy Chocolate Lava Muffins 🍫
If you are a chocolate lover looking for a treat that brings together the perfect combination of fluffy cake and molten chocolate center, these Dreamy Chocolate Lava Muffins 🍫 are exactly what you need. Imagine sinking your teeth into a soft, tender muffin that reveals a luscious, warm chocolate surprise inside — it’s pure magic in every bite. These muffins are rich yet simple, making them an irresistible snack or dessert that feels both indulgent and comforting.
Ingredients You’ll Need
The magic behind these Dreamy Chocolate Lava Muffins 🍫 starts with a handful of simple, quality ingredients. Each one plays a crucial role, whether it’s giving the muffins their moist crumb, delicate rise, or that decadent chocolate center that melts perfectly.
- All-purpose flour: Provides structure and lightness to the muffins, ensuring they are tender but hold together well.
- Cocoa powder: Adds deep, rich chocolate flavor and a lovely dark color to the batter.
- Sugar: Sweetens the muffins just enough without overpowering the chocolate and helps to create a soft texture.
- Baking powder: Gives the muffins a gentle lift, making them fluffy and airy.
- Salt: Balances the sweetness and enhances the chocolate flavor, a small addition with a big impact.
- Butter: Adds richness and moisture, keeping the muffins delectably soft.
- Eggs: Bind the ingredients together while contributing to the muffins’ tender crumb.
- Milk: Moistens the batter, making it smooth and easy to pour.
- Chocolate cubes or squares: The heart of these muffins — they melt inside during baking creating that dreamy, gooey lava center.
How to Make Dreamy Chocolate Lava Muffins 🍫
Step 1: Prepare Your Batter
Start by combining your dry ingredients — flour, cocoa powder, sugar, baking powder, and salt — in a large bowl. In a separate bowl, whisk together melted butter, eggs, and milk until well blended. Gradually add the dry mixture to the wet, stirring gently just until everything is combined. This careful mixing ensures your muffins stay light and tender, avoiding any toughness.
Step 2: Fill the Muffin Cups Halfway
Divide the batter evenly among your muffin cups, filling each one only halfway. This is a crucial step because it leaves enough space for the molten chocolate center and the batter to rise beautifully around it, delivering that wow factor when you bite in.
Step 3: Add the Chocolate Cube
Place one chocolate cube in the center of each muffin cup on top of the batter. This little chocolate treasure will melt during baking, turning the center into a molten, dreamy surprise that perfectly complements the soft muffin exterior.
Step 4: Cover and Bake Briefly
Top the chocolate cubes with a spoonful of the remaining batter to cover them completely. Bake your muffins at a moderate temperature until they puff up and the tops are set but still soft. Timing is key here — bake just long enough to maintain that flowing chocolate lava inside while the tops bake to tender perfection.
How to Serve Dreamy Chocolate Lava Muffins 🍫
Garnishes
These muffins are stunning on their own, but a light dusting of powdered sugar, a few fresh berries, or a dollop of whipped cream can add an elegant touch. Sprinkle some crushed nuts or drizzle a thin layer of caramel sauce for texture and contrast.
Side Dishes
Pairing Dreamy Chocolate Lava Muffins 🍫 with a scoop of vanilla ice cream or a fresh fruit salad can balance the rich chocolate with cool creaminess or refreshing brightness, making your dessert experience complete and satisfying.
Creative Ways to Present
For a fun twist, serve your muffins warm in individual ramekins with the molten chocolate side visible. Alternatively, slice the muffins in half and add a scoop of ice cream or some fruit compote between the halves for an indulgent chocolate lava muffin sandwich.
Make Ahead and Storage
Storing Leftovers
Keep your Dreamy Chocolate Lava Muffins 🍫 fresh by storing them in an airtight container at room temperature for up to two days. This prevents them from drying out while maintaining that moist, chocolatey goodness.
Freezing
If you want to enjoy these muffins at your convenience, freeze them before baking. Wrap each muffin cup individually with plastic wrap and place them in a freezer bag. When you’re ready to bake, add a couple of extra minutes to the baking time for a fresh, molten treat anytime.
Reheating
To reheat baked muffins, pop them in a warm oven for about 5 minutes or microwave briefly. This will revive the soft texture and warm the chocolate center, giving you that fresh-from-the-oven feel all over again.
FAQs
Can I use regular chocolate chips instead of chocolate cubes?
While chocolate chips work, cubes melt more evenly and create a thicker lava center. If using chips, add a few in the middle for a similar effect, but cubes are ideal for the best molten experience.
What type of chocolate is best for the lava center?
Choose good-quality semi-sweet or dark chocolate with at least 60% cocoa. It balances sweetness and richness perfectly and melts beautifully during baking.
Can I make these muffins dairy-free?
Absolutely! Substitute butter with coconut oil or a vegan butter alternative and use your favorite plant milk like almond or oat milk. The key is to maintain the moisture and richness the dairy adds.
How long should I bake the muffins to keep the lava center gooey?
Bake them just until the muffin tops are set but still soft, generally 12 to 15 minutes depending on your oven. Overbaking will harden the chocolate, so keep a close eye near the end.
Can I add nuts or other mix-ins to the batter?
Definitely! Chopped walnuts, hazelnuts, or even a handful of dried cherries can add delightful texture and complementary flavors. Just fold them in gently with the dry ingredients.
Final Thoughts
Once you try making and savoring these Dreamy Chocolate Lava Muffins 🍫, you’ll understand why they become an instant favorite. Their rich, molten centers paired with pillowy soft muffin exteriors will make your kitchen smell like pure heaven. These muffins are perfect for sharing or indulging in a quiet moment of chocolate bliss — so grab your ingredients and dive in!