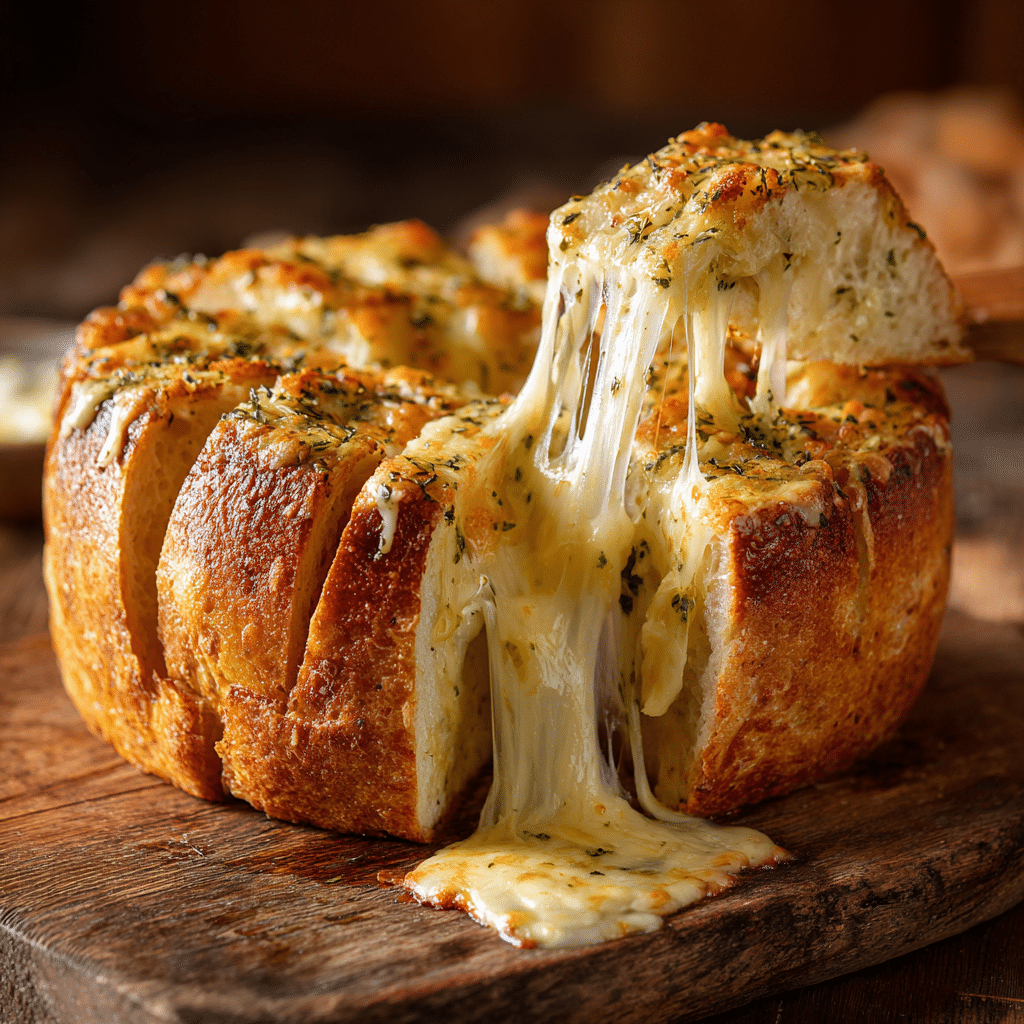
Cheesy Garlic Pull-Apart Bread Recipe
If you’ve ever dreamed of a snack that combines ooey-gooey cheese, fragrant garlic, and crusty bread all in one irresistible bite, then you’re in for a real treat with this Cheesy Garlic Pull-Apart Bread. It’s exactly the kind of dish that brings people together—whether for a casual game night, a cozy weekend treat, or the star appetizer at a dinner party. Each pull-away piece reveals melty mozzarella, infused with buttery garlic goodness, wrapped in soft, warm bread that practically begs to be savored. Trust me, once you try this Cheesy Garlic Pull-Apart Bread, it’s going to become your go-to for sharing moments filled with flavor and fun.
Ingredients You’ll Need
Getting this delicious Cheesy Garlic Pull-Apart Bread right starts with just a handful of simple ingredients that come together for maximum comfort food impact. Each element plays an essential role—soft bread provides the perfect base, mozzarella melts into cheesy pockets, and the garlic butter brings that irresistible aroma and rich flavor that makes every bite unforgettable.
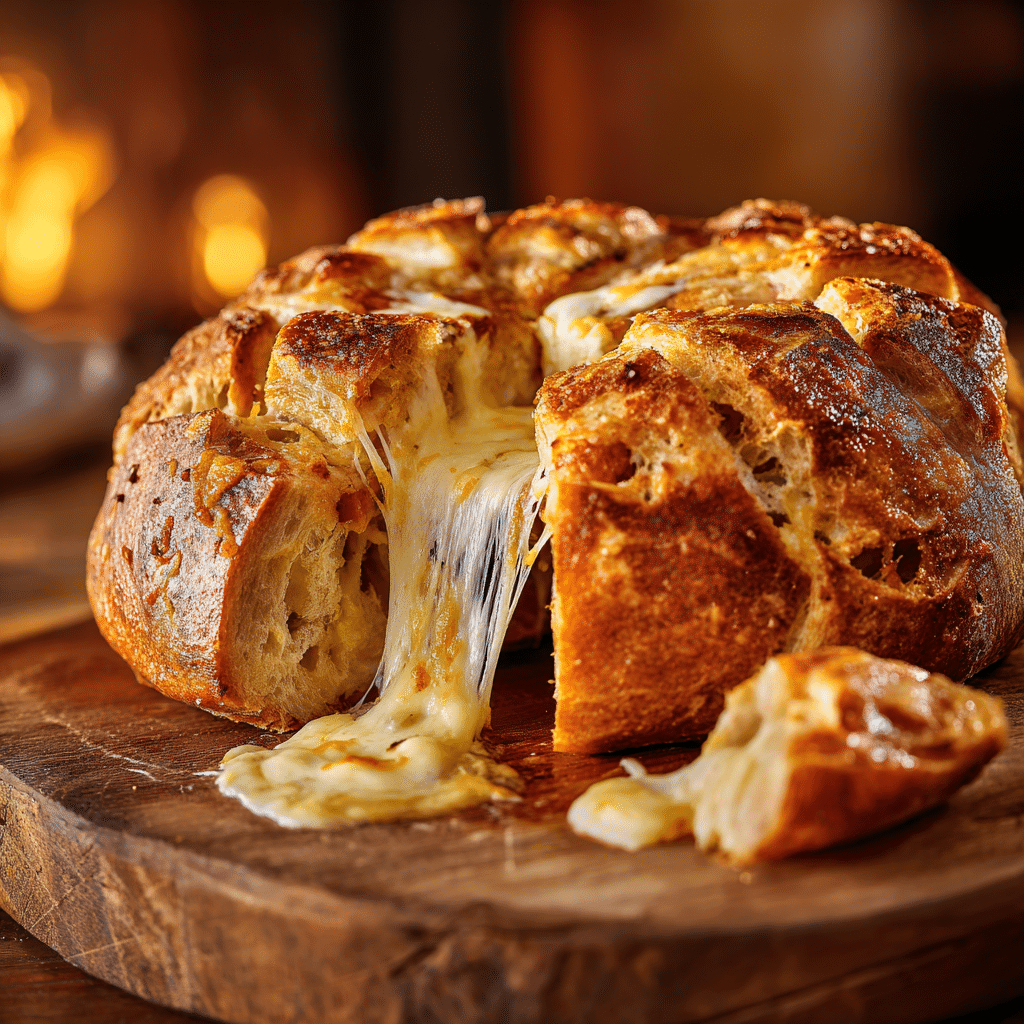
- 1 loaf bread: Choose a round or oval loaf with a sturdy crust that can hold all the cheese and butter without falling apart.
- 1 cup mozzarella: Fresh mozzarella works best for melting beautifully inside the bread cubes.
- 2 tbsp butter, melted: This creates the luscious garlic butter glaze that keeps the bread moist and flavorful.
- 1 tsp garlic powder: A fantastic, easy way to infuse the butter with rich, savory garlic notes.
- Parsley: Fresh parsley adds a lovely pop of color and a hint of herbaceous brightness.
How to Make Cheesy Garlic Pull-Apart Bread
Step 1: Prepare the Bread
Start by grabbing your loaf of bread and carefully cutting it into cubes. The key is to slice through the top crust and deep enough into the loaf, but not all the way through at the bottom—this keeps the bread intact while creating perfect little pockets to stuff with cheese.
Step 2: Stuff with Mozzarella
Now comes the best part. Gently stuff each cube with generous pieces of mozzarella. You want the cheese nestled inside every nook so that it melts beautifully and oozes in every bite when baked.
Step 3: Brush with Garlic Butter
Mix the melted butter with garlic powder, then brush it luxuriously over the entire loaf, making sure to get the buttery goodness deep inside the cracks and on top of the bread. This step is essential to ensure that perfect garlicky aroma and that golden finish.
Step 4: Bake to Perfection
Pop your stuffed loaf in a preheated oven at 180°C and bake it for about 25 minutes. During this time, the cheese melts thoroughly, the bread softens, and the garlic butter crisps up the crust just enough. When the aroma fills your kitchen, you’ll know it’s done.
How to Serve Cheesy Garlic Pull-Apart Bread
Garnishes
Sprinkle freshly chopped parsley over the top right before serving to bring a fresh, herby contrast to the richness. A light dusting of parmesan cheese can also add a lovely tangy kick to your Cheesy Garlic Pull-Apart Bread.
Side Dishes
This bread pairs beautifully with a crisp green salad or a bowl of warm tomato soup to balance the savory richness. It’s also a wonderful companion to pasta dishes and roasted veggies, making meal time a true celebration of comfort and flavor.
Creative Ways to Present
For a fun twist, try serving the Cheesy Garlic Pull-Apart Bread on a wooden board surrounded by small bowls of dipping sauces like marinara, ranch, or even a spicy aioli. It turns an already delightful dish into an interactive and shareable feast everyone will love.
Make Ahead and Storage
Storing Leftovers
If you have any leftovers, place the bread in an airtight container or wrap it tightly in foil. Store it at room temperature for up to two days to keep it fresh and delicious.
Freezing
You can freeze the bread before baking by wrapping it well in plastic wrap and aluminum foil. Freeze for up to one month, then thaw overnight in the fridge before baking as usual, so you can enjoy this Cheesy Garlic Pull-Apart Bread anytime the craving strikes.
Reheating
The best way to reheat is in a preheated oven at 180°C for 10-15 minutes. This helps refresh the crispy crust and melt the cheese back to that gooey perfection. Avoid the microwave, or you risk losing that magical texture.
FAQs
Can I use other types of cheese besides mozzarella?
Absolutely! While mozzarella melts beautifully and has a mild flavor, feel free to mix in cheddar, provolone, or even gouda to customize your Cheesy Garlic Pull-Apart Bread to your taste.
Do I need to use fresh bread or can I use pre-sliced?
For the best results, use a whole loaf with a firm crust to hold the cheese and butter inside. Pre-sliced bread won’t give you the same pull-apart effect and melty cheese pockets.
Is garlic powder necessary or can I use fresh garlic?
You can absolutely use fresh minced garlic mixed into the melted butter for a more intense garlic flavor. Just be careful not to use too much to avoid overpowering the other flavors.
Can I make this recipe vegan or dairy-free?
Definitely! Use vegan butter and your favorite dairy-free cheese alternatives to create a delicious vegan version that still captures all the wonderful flavors and textures.
How do I prevent the bread from becoming soggy?
Make sure not to over-brush the bread with butter and avoid cutting all the way through the bottom crust. Baking at the right temperature also helps keep the crust crispy while the inside stays soft and cheesy.
Final Thoughts
There’s nothing quite as satisfying as sharing a warm, gooey Cheesy Garlic Pull-Apart Bread with family and friends—it’s pure comfort in a loaf. The combination of buttery garlic, stretchy cheese, and soft bread makes it an instant favorite for any occasion. So go ahead, give this recipe a try and watch it vanish from your table in no time. I promise, this is one treat you’ll want to make again and again.