Oreo Chocolate Mousse Recipe
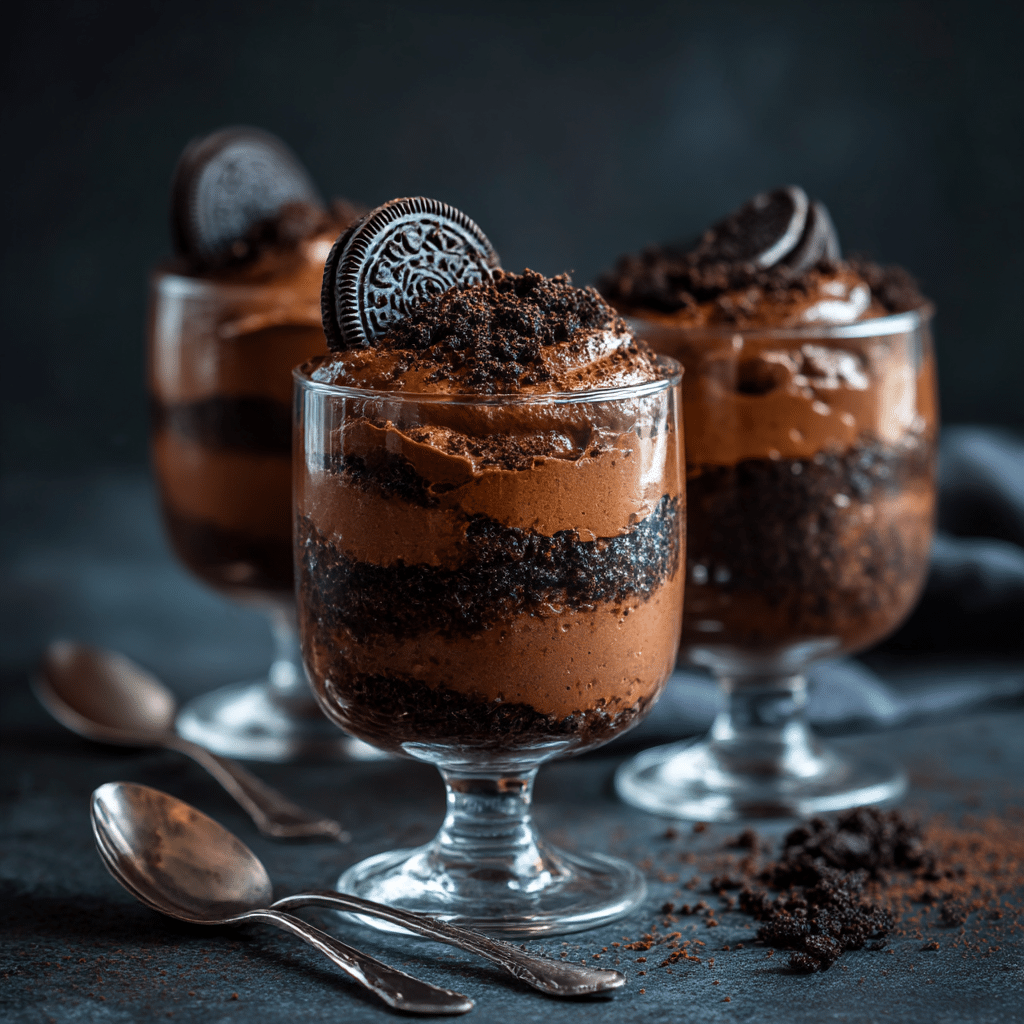
Imagine a dessert that combines the silky richness of chocolate mousse with the irresistible crunch and flavor of Oreo cookies. That is exactly what Oreo Chocolate Mousse brings to your table—an indulgent, creamy delight layered with crushed Oreos to add texture and nostalgic charm. This no-bake treat is perfect for impressing guests or simply satisfying your sweet tooth at home, offering an elegant yet simple way to enjoy two classic flavors in one luscious bite.
Ingredients You’ll Need
To create this stunning Oreo Chocolate Mousse, you’ll need just a handful of straightforward ingredients. Each plays an important role in balancing creamy, crunchy, and rich flavors while keeping the preparation delightfully easy.
- Oreo cookies, crushed: Provide that iconic chocolatey crunch and a fun texture contrast that makes the mousse stand out.
- Butter: Acts as the binding fat to hold the Oreo base together, giving it a slightly indulgent, melt-in-your-mouth feel.
- Dark chocolate: Adds deep cocoa richness and a slight bitterness that intensifies the mousse’s flavor without overwhelming sweetness.
- Whipping cream: Whipped to airy perfection, it’s the secret to the mousse’s light and creamy texture that melts on your tongue.
How to Make Oreo Chocolate Mousse
Step 1: Prepare the Oreo Base
Start by crushing your Oreo cookies into fine crumbs—using a food processor or a sealed bag and rolling pin works great. Melt the butter and mix it into the crushed Oreos until well combined. Then, press this mixture firmly into the bottoms of your serving cups or glasses to form a sturdy, flavorful base that will complement the fluffy mousse layer perfectly.
Step 2: Melt the Dark Chocolate
Next, gently melt the dark chocolate using a double boiler or microwave in short bursts, stirring frequently to avoid burning. The key is to keep the chocolate silky smooth and shiny, ensuring it integrates seamlessly into the whipped cream for a luxuriously rich mousse experience.
Step 3: Whip the Cream
Whip the heavy cream until soft peaks form—this means when you lift the whisk, the cream holds its shape without collapsing immediately. Achieving this light, airy texture is essential since the cream provides the mousse’s characteristic fluffiness that balances the dense chocolate and crunchy cookie base.
Step 4: Combine Chocolate and Cream
Carefully fold the melted dark chocolate into the whipped cream with gentle, sweeping motions. This folding technique ensures you keep the mousse light and airy while fully incorporating the rich chocolate, resulting in a smooth, decadent mixture that’s anything but heavy.
Step 5: Assemble and Chill
Spoon or pipe the chocolate mousse evenly over the Oreo cookie bases in your cups. Once assembled, refrigerate the dessert for at least two hours to allow the mousse to set and the flavors to meld together beautifully. The chilling step also helps the texture firm up for that perfect spoonful.
How to Serve Oreo Chocolate Mousse

Garnishes
For a final touch of elegance and extra flavor, top your Oreo Chocolate Mousse with a few whole Oreo cookies, a dusting of cocoa powder, or a dollop of freshly whipped cream. A sprinkle of chocolate shavings or even a few fresh raspberries adds a lovely contrast that makes each serving look as good as it tastes.
Side Dishes
This dessert pairs wonderfully with a light, fresh fruit salad or a simple espresso shot to cut through the richness. If you want to add a bit of texture, crunchy biscotti or candied nuts on the side also create a delightful contrast that complements the mousse’s creamy smoothness.
Creative Ways to Present
Feel like getting fancy? Serve the Oreo Chocolate Mousse in elegant martini glasses or clear jars layered with extra crushed Oreos for a striking visual effect. Alternatively, use small dessert spoons to create bite-sized parfaits, perfect for parties where guests can sample a little of this indulgent dessert with ease.
Make Ahead and Storage
Storing Leftovers
Leftover Oreo Chocolate Mousse keeps beautifully refrigerated in an airtight container for up to three days. Just make sure to cover the surface with plastic wrap to prevent any fridge odors from seeping in and to maintain the mousse’s creamy texture.
Freezing
You can freeze the mousse, but it’s best to do so without the buttery Oreo base to avoid sogginess upon thawing. Keep the mousse in a freezer-safe container for up to one month. Thaw it slowly in the refrigerator overnight before serving for the best taste and texture.
Reheating
Since this dessert is best served chilled, reheating isn’t recommended. Instead, allow any frozen mousse to thaw gently in the fridge. If the texture feels slightly off, a quick gentle whisk before serving can help restore its smooth consistency.
FAQs
Can I use milk chocolate instead of dark chocolate?
Absolutely! Milk chocolate will make your Oreo Chocolate Mousse sweeter and creamier, but keep in mind it may be less intense in cocoa flavor compared to dark chocolate. Adjust sweetness accordingly if you prefer a less rich taste.
How do I crush the Oreos without a food processor?
Simply place the Oreos in a sealed plastic bag and gently roll over them with a rolling pin or a heavy pan. This manual method works great for achieving the perfect crumb texture for your base.
Can I make this recipe vegan?
With a few substitutions, yes! Use dairy-free whipping cream, vegan butter, dark chocolate that’s dairy-free, and a vegan-friendly Oreo alternative if needed. The texture and flavor will still be delightful.
Is it necessary to chill the mousse for two hours?
Yes, chilling is key for the mousse to set properly and develop its signature texture. If you’re short on time, an hour may suffice, but longer chilling gives the best results.
Can I double the recipe for a larger crowd?
Definitely! This recipe scales up beautifully. Just keep the ratio of ingredients consistent and use a larger container or more serving cups to accommodate the extra mousse.
Final Thoughts
Oreo Chocolate Mousse is one of those magical desserts that feels like a special occasion every time you dig in. Its combination of creamy chocolate and crunchy Oreos creates a harmony of textures and flavors that never fails to bring smiles. Whether you’re making it for a family dessert night or an elegant gathering, this recipe is sure to become one of your favorite go-to sweets. Give it a try—you’ll wonder how you ever lived without it!