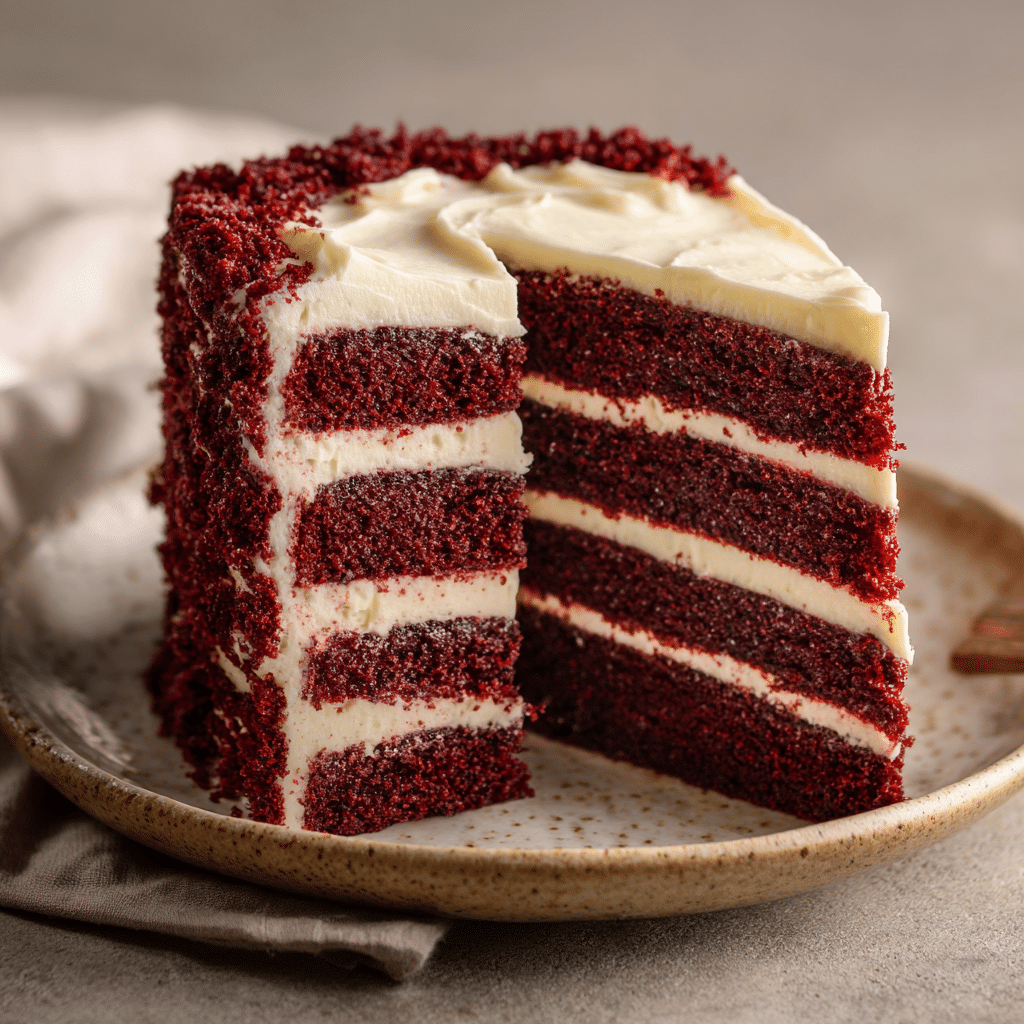
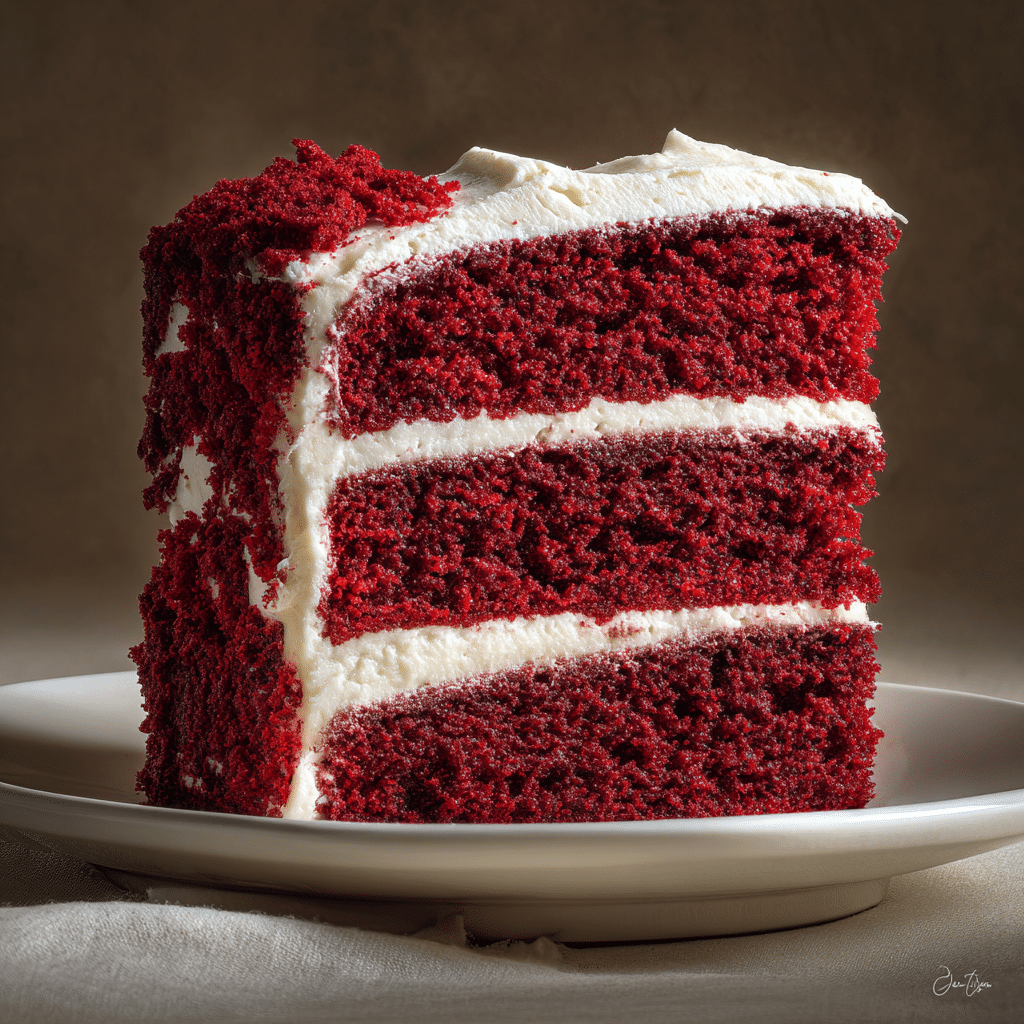
Red velvet cake: 7 Secrets to Unforgettable Indulgence Recipe
If you have a sweet spot for classic desserts with a vibrant twist, then this Red velvet cake: 7 Secrets to Unforgettable Indulgence is exactly what your kitchen needs. Imagine a beautifully moist, tender cake layered with luscious cream cheese frosting that practically melts in your mouth. It’s not just any red velvet cake — this recipe unlocks seven well-guarded secrets that elevate each bite to a luxurious experience filled with rich cocoa undertones, the perfect balance of tanginess from the buttermilk, and a striking ruby-red hue that never fails to impress. Whether you’re baking for a special occasion or simply craving a treat that feels like a warm embrace, this delightful cake will quickly become your go-to indulgence.
Ingredients You’ll Need
Each ingredient in this Red velvet cake: 7 Secrets to Unforgettable Indulgence plays a crucial role in crafting its distinct flavor, texture, and color. From the humblest flour to the punchy red dye, every component combines harmoniously to create that signature velvety smoothness and irresistible richness.
- All-purpose flour: The foundation for the cake’s soft yet structured crumb.
- Sugar: Sweetness that balances the cocoa and tang.
- Baking soda: Helps the cake rise perfectly light and fluffy.
- Salt: Enhances all flavors and keeps the sweetness in check.
- Cocoa powder: Adds depth and the subtle chocolate hint that defines red velvet.
- Vegetable oil: Keeps the cake moist and tender.
- Buttermilk: Provides the tang and tenderizes the crumb.
- Eggs: Bind everything together while lending richness.
- Red food coloring: The secret behind that unforgettable red color.
- Vanilla extract: Adds warmth and rounds out the flavors.
- White vinegar: Reacts with baking soda to help the cake rise and enhances the tanginess.
How to Make Red velvet cake: 7 Secrets to Unforgettable Indulgence
Step 1: Preheat and Prepare Your Pans
Start by heating your oven to 350°F (175°C). Grease and flour two 9-inch round cake pans — this ensures your cake layers come out smooth and flawless every time. Trust me, a well-prepared pan is one of the simple secrets to an unforgettable finish.
Step 2: Mix the Dry Ingredients
In a large bowl, combine the all-purpose flour, sugar, baking soda, salt, and cocoa powder. Sifting these dry ingredients together not only helps to avoid lumps but also evenly distributes the cocoa powder and baking soda, setting the stage for that perfect crumb and flavor balance.
Step 3: Combine the Wet Ingredients
In a separate bowl, whisk together the vegetable oil, room-temperature buttermilk, eggs, red food coloring, vanilla extract, and white vinegar. This mixture is where the magic begins — the oil keeps the cake moist, while the vinegar reacts with baking soda to create that signature lightness and tang.
Step 4: Bring It All Together
Gradually add the dry ingredients to the wet ingredients, mixing until smooth and uniform. Avoid overmixing here; gently folding in the flour will keep the cake tender and avoid toughness.
Step 5: Bake to Perfection
Divide the batter evenly between your prepared pans and pop them into the oven. Bake for about 25 to 30 minutes until a toothpick inserted in the center comes out clean. This is the moment where patience really pays off — a perfectly baked red velvet has delicate crumbs that hold together beautifully.
Step 6: Cool Completely
Let the cakes cool in their pans for 10 minutes before removing to wire racks to cool fully. This step helps the cake set up properly so it won’t crumble when you frost it later, preserving that silky, moist texture.
Step 7: Frost with Cream Cheese Frosting
Once cooled, generously slather each layer with your best cream cheese frosting. This luscious topping enhances every bite, providing a tangy creaminess that complements the red velvet’s richness perfectly.
How to Serve Red velvet cake: 7 Secrets to Unforgettable Indulgence
Garnishes
Elevate your presentation by adding fresh raspberries or strawberries on top for a pop of bright color and subtle acidity. A sprinkle of edible glitter or finely chopped nuts also adds a fun texture and visual appeal that make this classic cake feel special.
Side Dishes
Serve your red velvet cake alongside a simple cup of freshly brewed coffee or a creamy vanilla bean latte. The bitterness and creaminess of these beverages complement the sweet tang of the cake, creating a perfectly balanced dessert experience.
Creative Ways to Present
Try slicing the cake into petite squares for an elegant dessert platter or layer the cake crumbs inside cupcakes for a whimsical twist. For parties, consider a red velvet trifle or cake pops featuring the same unforgettable flavors and colors.
Make Ahead and Storage
Storing Leftovers
Leftover cake should be stored in an airtight container in the refrigerator. This keeps your cake moist and the cream cheese frosting fresh while preserving those unforgettable flavors for up to 4 days.
Freezing
If you want to enjoy this indulgence later, you can freeze the unfrosted cake layers wrapped tightly in plastic wrap and foil for up to 2 months. Thaw completely before frosting to maintain that perfect texture and taste.
Reheating
For a freshly baked feel, gently warm individual slices in the microwave for 10-15 seconds. This softens the cake slightly while leaving the frosting cool and creamy, a delightful contrast in every bite.
FAQs
Can I substitute the vegetable oil with butter?
Butter will add a different richness and texture, but vegetable oil keeps the cake extra moist and tender, which is essential for that classic red velvet feel.
Is red food coloring necessary?
While it’s not absolutely required, the red food coloring is key to achieving the iconic vibrant red color that makes red velvet cake so unforgettable.
Can I make this recipe gluten-free?
You can substitute the all-purpose flour for a gluten-free baking blend, but texture might vary slightly. Using cake flour or a gluten-free alternative can help retain tenderness.
How do I get the cream cheese frosting just right?
Use full-fat cream cheese and butter at room temperature, and beat them until silky smooth before adding powdered sugar gradually for the best, creamy texture.
What’s the purpose of vinegar in the recipe?
Vinegar reacts with baking soda to help the cake rise and tenderize, and it enhances the tang that balances the sweetness, making the cake especially memorable.
Final Thoughts
Trying out this Red velvet cake: 7 Secrets to Unforgettable Indulgence will open your eyes to what makes this classic dessert truly stand out. Every step, from the ingredient choices to the finishing touches, is designed to make your experience in the kitchen joyful and the result irresistibly delicious. So don your apron, gather these simple yet magic-packed ingredients, and indulge yourself and your loved ones in a cake that promises unforgettable delight in every bite.