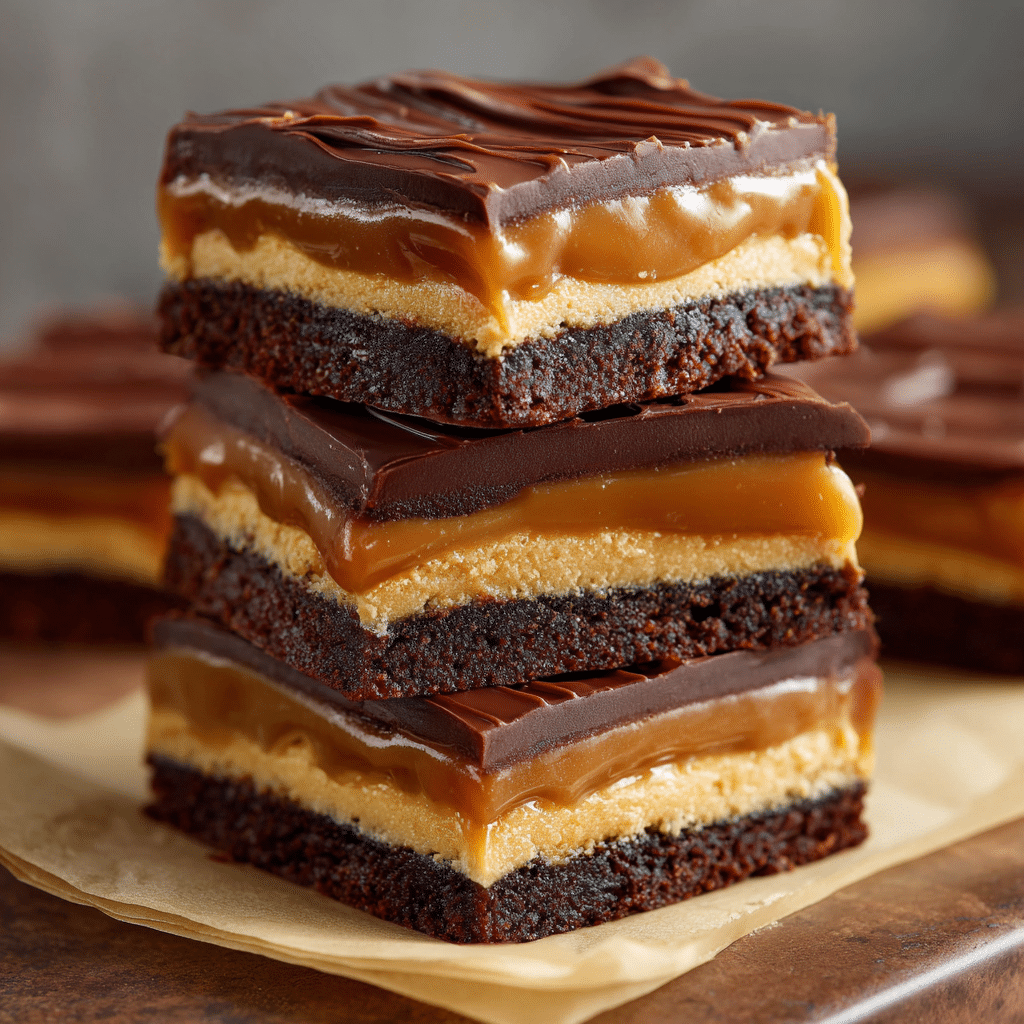
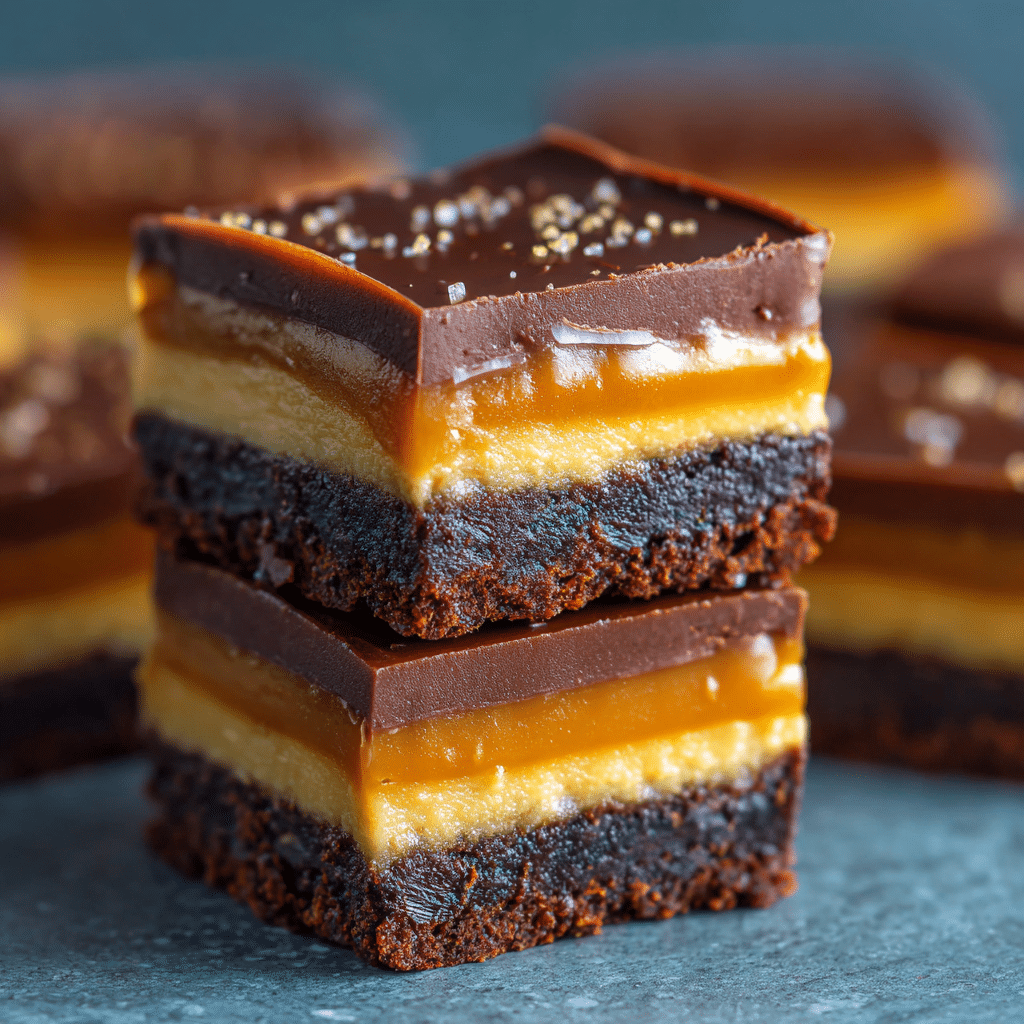
Chocolate Caramel Bars Recipe
If you have a sweet tooth and love a perfect balance of rich chocolate and buttery caramel, these Chocolate Caramel Bars are going to become your new favorite treat. This no-bake dessert features a crunchy graham cracker crust layered with a luscious homemade caramel filling and topped with a glossy, dreamy chocolate ganache. Easy to make yet decadently delicious, these bars bring the kind of comfort and joy that only a truly spectacular dessert can. Whether you’re baking for a crowd or just craving something special at home, Chocolate Caramel Bars deliver that classic combination with stunning results every time.
Ingredients You’ll Need
Putting these Chocolate Caramel Bars together is surprisingly simple thanks to a handful of pantry staples that each play a crucial role in making this dessert irresistible. From the buttery crust to the creamy caramel and silky chocolate topping, every ingredient adds its own magic.
- Graham cracker crumbs: The base of your crust, providing a classic crispy and slightly sweet texture.
- Unsalted butter: Used in the crust, filling, and helps give the rich, smooth consistency to your caramel and chocolate layers.
- Granulated sugar: Adds subtle sweetness to the crust without overpowering the caramel.
- Light brown sugar: Key to that deep, buttery flavor in the caramel filling.
- Light corn syrup: Keeps the caramel smooth and prevents it from crystallizing.
- Salt: Enhances all the flavors and balances sweetness across every layer.
- Sweetened condensed milk: The secret to creamy caramel that’s insanely indulgent yet easy to make.
- Vanilla extract: Adds a warm, aromatic note to the caramel filling.
- Semi-sweet chocolate chips: Melted for that perfect chocolate topping that’s rich but not too sweet.
- Heavy cream: Combines with chocolate to create a smooth, ganache-like finish.
How to Make Chocolate Caramel Bars
Step 1: Make the Crust
The foundation of any great bar is a sturdy crust, and here that’s our graham cracker base. Mix your graham cracker crumbs, melted butter, granulated sugar, and salt until everything is perfectly moistened, then press it firmly and evenly into your baking pan. Use the bottom of a measuring cup to really compress the crumb mixture; it helps the crust hold together when you slice the bars later. Pop the crust in the fridge to chill for an hour. This step sets the stage for that satisfying crunch that contrasts beautifully against the creamy filling.
Step 2: Prepare the Caramel Filling
In a saucepan, combine butter, brown sugar, corn syrup, salt, and sweetened condensed milk. Heat this mixture over medium, stirring constantly until it reaches a boil, then maintain the boil for 5 minutes while still stirring. This process thickens and caramelizes the filling, giving it that rich, buttery flavor that melts in your mouth. Pull it off the heat and stir in vanilla for an extra layer of warmth and complexity. Pour the caramel over your chilled crust and let it rest at room temperature for about 15 minutes so it starts to set gently.
Step 3: Create the Chocolate Topping
Your final layer is a luscious chocolate topping made with semi-sweet chocolate chips, heavy cream, and a touch of corn syrup. Microwave this mixture in short bursts, stirring between intervals until it’s silky smooth and perfectly glossy. This topping is like the cherry on top that seals in all the flavors. Spread the chocolate evenly over the caramel layer with an offset spatula and let the bars sit at room temperature for 30 minutes. Then refrigerate them for at least 4 hours, or better yet, overnight. This chilling time ensures the layers firm up wonderfully so you get clean, beautiful slices every time.
How to Serve Chocolate Caramel Bars
Garnishes
To elevate your Chocolate Caramel Bars for guests or special occasions, consider adding a sprinkle of flaky sea salt on top right after spreading the chocolate. The salty crunch complements the sweet caramel perfectly. For a festive touch, you can scatter chopped toasted pecans or almonds for texture, or even drizzle a bit of melted white chocolate in elegant zigzags.
Side Dishes
These bars shine beautifully paired with a scoop of vanilla ice cream or a dollop of freshly whipped cream to balance their richness. For a cozy drink, serve alongside a cup of robust coffee or a glass of cold milk—both bring out the dessert’s intense flavors wonderfully.
Creative Ways to Present
Chocolate Caramel Bars are versatile when it comes to presentation. Cut them into bite-sized squares for a party platter or stack a few layers with parchment paper between for a pretty box of homemade treats. You can also serve them warm slightly reheated topped with a sprinkle of chopped nuts and a drizzle of caramel sauce for a comforting dessert.
Make Ahead and Storage
Storing Leftovers
If you have any bars left after the initial slice (which honestly might be a challenge), store them in an airtight container in the fridge. They’ll stay fresh and delicious for up to 5 days, making them perfect for midweek indulgences or last-minute guests.
Freezing
To keep these bars longer, wrap them tightly in plastic wrap and aluminum foil then place them in a freezer-safe container. They freeze beautifully for up to 2 months. When you’re ready to enjoy, thaw them in the refrigerator overnight to maintain their texture and flavor.
Reheating
While Chocolate Caramel Bars are best served chilled, if you prefer a softer, warm bite, gently microwave individual portions for 10 to 15 seconds. This softens the chocolate and caramel layers just enough to ooze a bit without melting away completely.
FAQs
Can I use a different type of chocolate for the topping?
Absolutely! While semi-sweet chocolate chips are recommended for their balanced flavor, feel free to swap in dark chocolate for a richer taste or milk chocolate if you like it sweeter. Just adjust the sweetness in your caramel accordingly if you make that swap.
Do I have to refrigerate the bars before serving?
Yes, chilling the bars for at least 4 hours is important to let the layers set properly, especially the caramel and chocolate topping. Overnight refrigeration is ideal if you want neat slices and the best texture.
Can I make these bars vegan or dairy-free?
This recipe relies heavily on butter, condensed milk, and cream, so making a vegan or dairy-free version would require several substitutions like plant-based butter, coconut condensed milk alternatives, and dairy-free cream. The taste and texture will be different, but it’s possible with some experimentation.
What’s the best pan size to use?
The recipe calls for a 15- by 10- by 1-inch baking pan which is perfect for creating those thin, evenly layered bars. Using a different size might affect the thickness and cooking time a little, so try to stick to this size for best results.
Why do you need to boil the caramel filling?
Boiling the caramel filling for 5 minutes while stirring triggers the chemical changes that thicken it and give it that classic caramel flavor and chewy, yet creamy texture. Skipping this step may cause it to be runny or grainy.
Final Thoughts
Chocolate Caramel Bars are hands down one of those desserts that bring everyone to the table and keep them coming back for more. The combination of crunchy crust, buttery caramel, and smooth chocolate topping is pure magic in every bite. I can’t encourage you enough to give this recipe a try—once you experience how simple it is and how incredibly satisfying the results are, these bars might just become your go-to dessert for every occasion!