Homemade Marshmallows Recipe
If you have a sweet tooth or simply love that melt-in-your-mouth softness of marshmallows, making your own treats at home is a game changer. These Homemade Marshmallows are delightfully fluffy and airy, bringing a fresh and pure sweetness far beyond anything store-bought. Whether you’re stirring them into hot chocolate or just savoring them as a snack, this recipe offers a wonderful way to enjoy a classic treat made with simple ingredients and lots of love in your own kitchen.
Ingredients You’ll Need
With just a handful of ingredients, this recipe keeps things wonderfully straightforward. Each element plays a crucial role: sugar sweetens and provides structure, water helps dissolve and combine the ingredients, gelatin creates that signature soft bounce, and vanilla adds a warm, inviting flavor to your homemade cloud-like treats.
- 200 g sugar: The sweet backbone that caramelizes slightly when cooked, ensuring perfect texture and sweetness.
- 80 ml water: Helps dissolve the sugar and activate the gelatin for a smooth consistency.
- 2 tbsp gelatin: This is the magic ingredient that gives the marshmallows their distinctive fluffy, yet firm texture.
- 1 tsp vanilla: A touch of warmth and aromatic flavor that elevates these Homemade Marshmallows beyond basic sweetness.
How to Make Homemade Marshmallows
Step 1: Bloom the Gelatin
Start by softening your gelatin. Sprinkle the gelatin over a small amount of water, allowing it to absorb the liquid and swell up. This blooming process is essential to ensure the gelatin dissolves evenly later, giving your marshmallows a smooth and consistent texture.
Step 2: Boil Sugar and Water
Next, combine the sugar and water in a saucepan and bring it to a rolling boil. Keep a close eye on it to reach the perfect temperature and concentration, as this step determines how well the marshmallows will set. Once your syrup is ready, carefully pour it over the bloomed gelatin so that it fully dissolves without lumps.
Step 3: Beat Until Thick
Using a mixer, beat the hot syrup and gelatin mixture vigorously. This is where the magic happens — air is incorporated, transforming the sticky liquid into a thick, fluffy marshmallow mixture. Keep going until it’s creamy white and holds its shape, a sign that you’re almost ready to set them.
Step 4: Spread and Dust
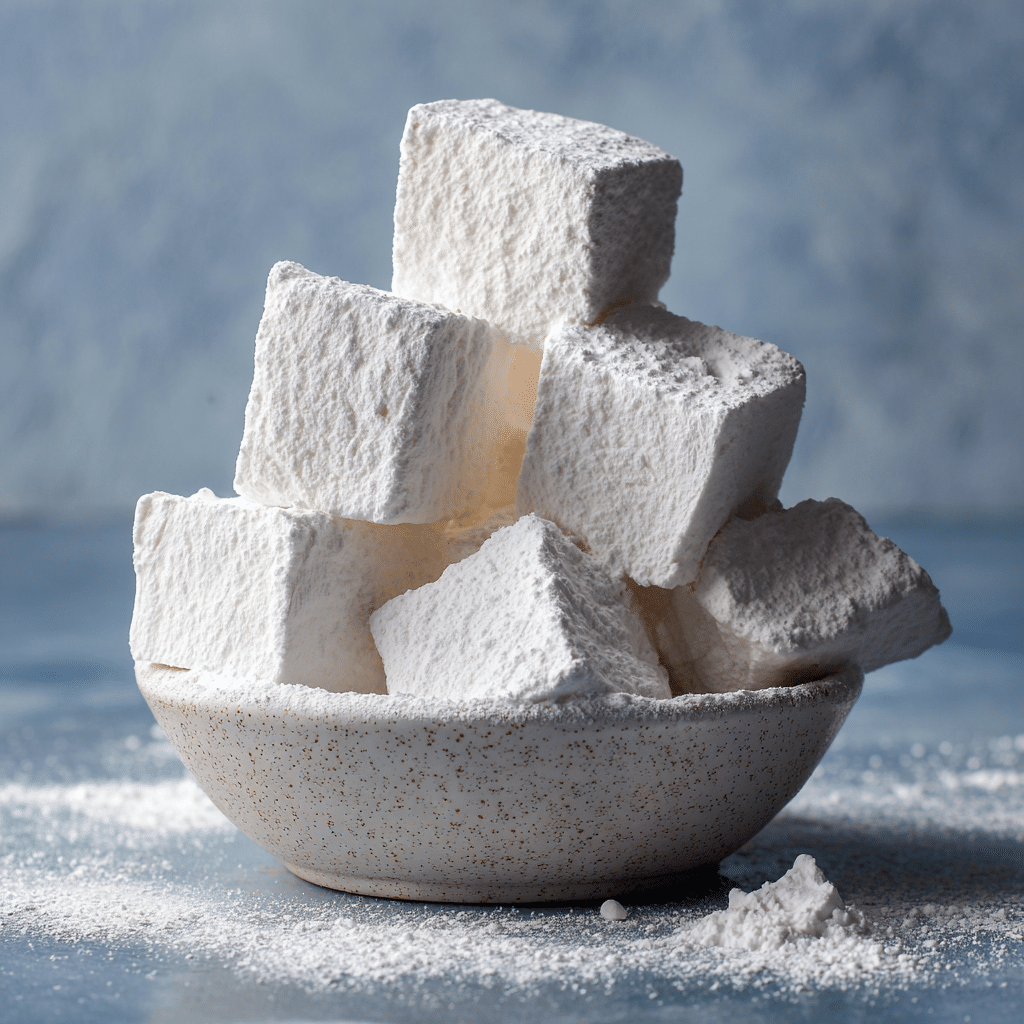
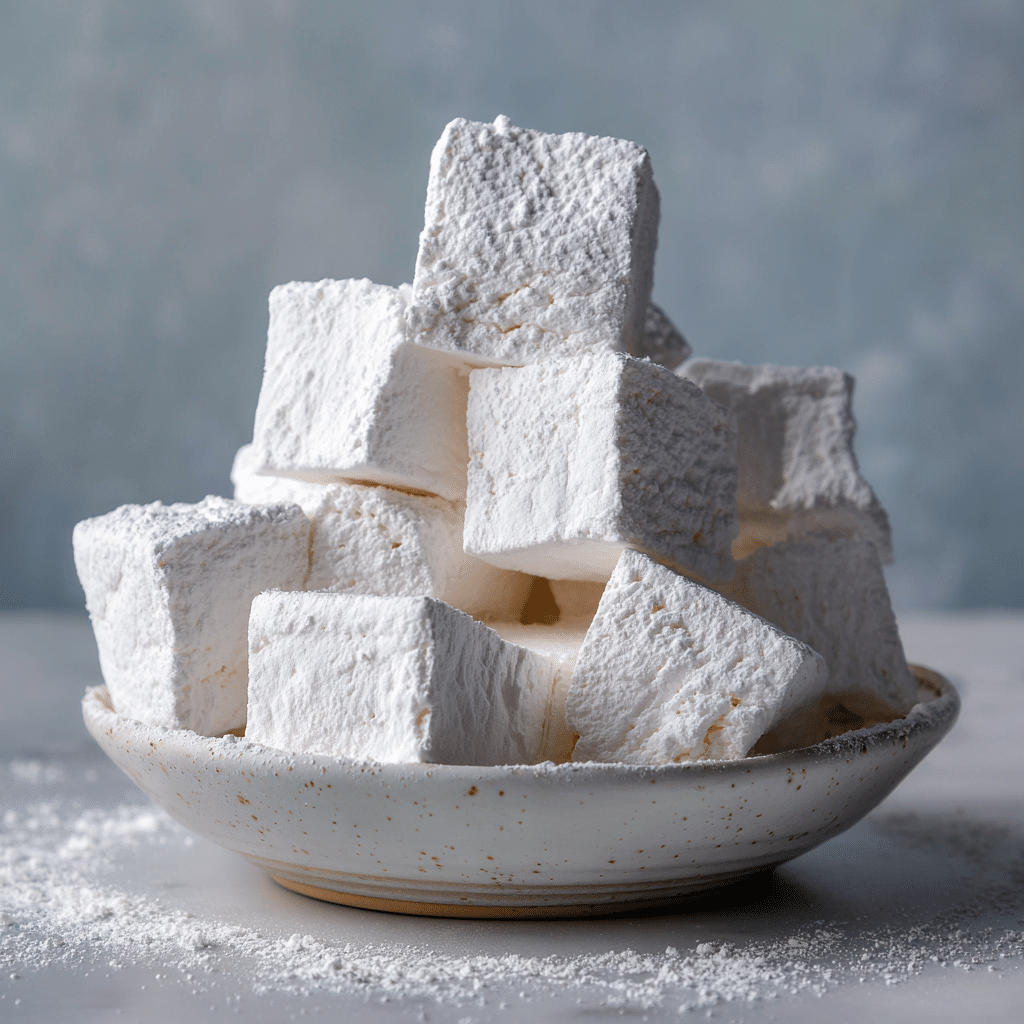
Pour your marshmallow mixture into a prepared pan, smoothing it out evenly. To keep them from sticking and create that classic marshmallow coating, dust the top generously with powdered sugar. This final touch not only aids in cutting but gives a little extra sweetness and a delightful texture on the outside.
Step 5: Cut and Enjoy
Once the marshmallows have set for a few hours, use a sharp knife to cut them into your preferred shapes. This is the moment when you get to show off your handiwork and finally taste that perfect, pillowy softness that only Homemade Marshmallows can provide.
How to Serve Homemade Marshmallows
Garnishes
Adding garnishes can turn simple marshmallows into eye-catching treats. Consider rolling them in cocoa powder, cinnamon, or even shredded coconut. Sprinkling crushed nuts or colorful sprinkles right after dusting with powdered sugar adds an exciting twist and makes them fun to serve at parties or special occasions.
Side Dishes
Homemade Marshmallows are fantastic companions to desserts like brownies, cookies, or fruit platters. Pairing them with a rich hot chocolate or a creamy latte creates an indulgent break-time combo that will have everyone reaching for seconds.
Creative Ways to Present
Think beyond the traditional square and get playful! Stack marshmallows on skewers for a sweet kabob, sandwich them between cookies for a homemade s’more, or dip them in melted chocolate for a glossy, decadent coating. Presentation is part of the fun, and these customizable treats are perfect for gifting too.
Make Ahead and Storage
Storing Leftovers
If you find yourself with extra Homemade Marshmallows, store them in an airtight container at room temperature. This keeps them soft and fresh for about 5 to 7 days, so you can enjoy their fluffy goodness well after making them.
Freezing
Want to keep your marshmallows longer? These marshmallows freeze beautifully. Just wrap them tightly in plastic wrap and place in a freezer-safe container. When you’re ready to enjoy, thaw at room temperature for a couple of hours. They’ll be just as delightful as on day one.
Reheating
If they get a little stiff or dry, you can soften Homemade Marshmallows by popping them into the microwave for a few seconds. This briefly restores their pillowy softness, making them perfect for use in hot beverages or roasting over a fire.
FAQs
Can I make Homemade Marshmallows without gelatin?
Gelatin is what gives marshmallows their signature texture, so omitting it changes the recipe entirely. Some vegans substitute agar-agar, but results will differ in firmness and fluffiness.
Why are my marshmallows sticky?
If your marshmallows are sticky, it usually means there wasn’t enough powdered sugar or cornstarch coating, or they need more drying time after setting. Be sure to dust them well to prevent sticking.
How long do Homemade Marshmallows last?
Stored properly in an airtight container at room temperature, marshmallows will keep fresh for about 5 to 7 days, maintaining their soft texture and delicious flavor.
Can I flavor Homemade Marshmallows differently?
Absolutely! Vanilla is classic, but you can experiment with peppermint, almond extract, citrus zest, or even cocoa powder to create your own unique marshmallow experience.
Do I need special equipment to make Homemade Marshmallows?
A stand mixer or hand mixer is highly recommended to achieve the right fluffy consistency, but with some elbow grease, you can also whisk by hand — it just takes longer.
Final Thoughts
Making Homemade Marshmallows is a wonderfully rewarding experience that fills your kitchen with sweet aromas and yields irresistibly soft treats. With each step, from blooming gelatin to the final cut, you get to savor the joy of crafting something truly special. Give this recipe a try, and I promise these fluffy delights will quickly become a favorite to share and enjoy any time you crave a little sweet magic.